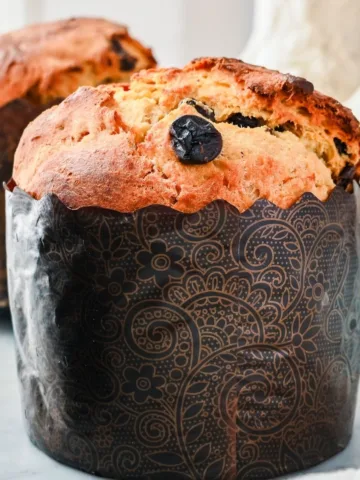
This easy chocolate hazelnut swirl sourdough bread recipe is a delicious and visually appealing variation of traditional sourdough bread, infused with the rich flavors of chocolate and hazelnuts. The swirls of chocolate and hazelnut create pockets of gooey richness and a slightly denser, more luxurious texture in some areas.

Table of Contents
This post contains affiliate links, which means I make a small commission at no extra cost to you. See my full disclosure here.

This delicious bread makes a perfect breakfast or snack on its own or can be paired with a cup of coffee or tea. It can also be used to make decadent toast, sandwiches, or even a luxurious bread pudding. Overall, chocolate hazelnut swirl sourdough is a scrumptious fusion of classic sourdough bread with the sweet, nutty flavors of chocolate and hazelnuts, offering a rich and satisfying treat for any time of day.
My oldest son, Sean, has a serious love affair with Nutella. So much so, that everyone knows it! On his 11th birthday, my silly grandma gifted him a loaf of bread along with a jar of Nutella spread! Sean, being the gracious person he is, took it with so much gratitude and enjoyed his gift the following week. Now, I can honestly say that I'm not sure any other child would have been as happy, but I can tell you that it has become one of the best running jokes in our family!
Me: "Dad, remember when Pappy gave Sean bread and Nutella for his birthday?"
My dad: "Remember when she gave me a toilet seat?!"
True story.
This one is for you, "Sunshine".

Can you use a stand mixer for sourdough?
Yes, you can use a stand mixer for making sourdough bread. A stand mixer can be very helpful, especially for handling the dough's heavy mixing and kneading, which can be labor-intensive and take a good amount of time if done by hand.

Can you use a paddle attachment instead of a dough hook for sourdough?
Yes, you can use a paddle attachment instead of a dough hook for sourdough. It has been advised to use the paddle attachment initially to mix the ingredients and then to switch to the dough hook to knead the dough. However, I personally do not do this. I find that keeping the paddle attachment on to knead the dough works just as good as the dough hook. Less to clean up and worry about too!

Equipment for This Simple Sourdough Bread
KitchenAid Mixer or stand Mixer
Dough hook attachment or paddle attachment
Sharp knife
Mixing bowl
Sheet of plastic wrap, tea towel, beeswax wraps, or a fitted bowl cover
Sheet of parchment paper for baking (optional)
Dough scraper (optional)

Ingredients:
- 500 grams of flour or bread flour (4 cups)
- 85 grams unsalted butter, softened, cut into cubes (6 tbsp.)
- 50 grams (¼ cup) sugar
- 10 grams fine sea salt (1 ½ teaspoons)
- 100 grams bubbly, active sourdough starter (½ cup)
- 240 grams (1 cup) warm water
- 1 tbsp pure vanilla extract
- Olive oil (to coat the bowl and pan)
1 egg lightly beaten (egg wash)
Add-In
- ¾ cup hazelnut spread (Nutella Hazelnut Spread)

Stand Mixer Sourdough Bread Recipe
The Night Before
- Combine the flour, active starter, butter, salt, sugar, vanilla, and water in bowl of the stand mixer. Using the paddle attachment or the dough hook, knead the dough on low speed until it is stretchy, about 5-10 minutes with the stand mixer.
- Scrape down the sides of the bowl to remove the dough from the mixer and roll it into a tight ball.
- At this point the dough can be transferred to a glass bowl or a ceramic bowl for the bulk fermentation, or for best results, you can proceed to the following recommendation of two stretch and folds which will help with gluten development and lift your bread creating an amazing crumb.

Stretch and Fold (OPTIONAL)
- Start the first set of stretch and folds about 30 minutes into the bulk rise, followed by another set 30 minutes later (for a total of 2 sets). To perform the stretch and folds, grab the right side of the dough, stretch it out, and fold it over to the left side of the center. Rotate the bowl 90 degrees, stretch the right side again, and fold it to the left. Repeat this process two more times. After completing the stretch and folds, prepare the dough for its first rise. Place the dough, smooth side up, in a glass bowl coated with olive oil. Cover the bowl with a damp towel, plastic wrap, or a tightly fitting lid, and let it rise overnight or for at least eight hours in a warm place on your countertop. This is where the dough will rise and develop its flavor.
SHAPING THE DOUGH AND ADDING THE HAZELNUT SPREAD


The Next Day
- On a lightly floured work surface, roll the dough out into a large rectangle until it is about ½” thick.
- Spread the chocolate hazelnut spread evenly onto the shaped dough.
- Starting from one side, roll the dough up tightly and pinch in the ends.
- Transfer the dough into a greased loaf pan, and allow it to at least double in size, which usually takes about 2-4 hours. The rise time also depends on the temperature of your kitchen; it will take longer in a cooler environment and less time if it’s warm.
- When the dough has risen, preheat your oven to 375 degrees.
- Brush the top of the dough with a lightly beaten egg or with plain water. This will help the bread get a beautiful golden brown color.
- Bake the bread for 70 minutes. (In my oven, the bread took 70 minutes to bake. To keep the top from becoming too dark I placed a piece of foil over the top of the bread and baked for an additional 10 minutes or until the bread reached an internal temperature of 190 degrees.)
- Let the bread cool in the loaf pan for 10 minutes before moving it to a cutting board.
- Chocolate hazelnut swirl sourdough can be enjoyed warm or at room temperature.
- Enjoy your loaf of bread!
A NOTE TO THE BAKER
When bread bakes, steam develops inside the dough. Since this loaf isn’t scored on the surface (to preserve the cinnamon swirl), there’s no outlet for the steam to escape. Consequently, the steam may create gaps between the cinnamon swirl and the bread. To help remedy this, I brush the outer half inch edges with water prior to rolling the dough. An egg was is another method used for this issue, however I have found both ways to be a hit or miss.


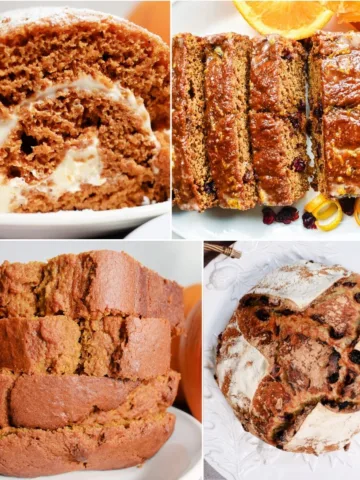
More Wonderful Sourdough Recipes
Sourdough Cinnamon Raisin Bread (Stand Mixer Recipe)
Peanut Butter with Chocolate Sourdough Bread Recipe
Best Sourdough Bread Recipe with Almond and Raisins
Simple Lemon Blueberry Sweet Sourdough Bread Recipe
Easy Italian Sourdough Flatbread Discard Recipe
Easy Same Day Sourdough Bread (Beginner’s Recipe)


Easy Chocolate Hazelnut Swirl Sourdough Bread Recipe
Equipment
- Kitchenaid Mixer or stand mixer
- Dough hook attachment or paddle attachment
- Bread pan
- Sharp knife
- Mixing bowl
- Plastic wrap, tea towel, beeswax wraps, or a fitted bowl cover
- Sheet of parchment paper for baking (optional)
- Dough scraper (optional)
Ingredients
- 500 grams of flour or bread flour 4 cups
- 85 grams unsalted butter softened, cut into cubes (6 tbsp.)
- 50 grams sugar ¼ cup
- 10 grams fine sea salt 1 ½ teaspoons
- 100 grams bubbly active sourdough starter (½ cup)
- 240 grams warm water 1 cup
- 1 tablespoon pure vanilla extract
- 1 egg lightly beaten egg wash, or water
Add-In
- ¾ cup hazelnut spread Nutella Hazelnut Spread
Instructions
The Night Before
- Combine the flour, active starter, butter, salt, sugar, vanilla, and water in bowl of the stand mixer. Using the paddle attachment or the dough hook, knead the dough on low speed until it is stretchy, about 5-10 minutes with the stand mixer.
- Scrape down the sides of the bowl to remove the dough from the mixer and roll it into a tight ball.
- At this point the dough can be transferred to a glass bowl or a ceramic bowl for the bulk fermentation, or for best results, you can proceed to the following recommendation of two stretch and folds which will help with gluten development and lift your bread creating an amazing crumb.
Stretch and Fold (OPTIONAL)
- Start the first set of stretch and folds about 30 minutes into the bulk rise, followed by another set 30 minutes later (for a total of 2 sets).
- To perform the stretch and folds, grab the right side of the dough, stretch it out, and fold it over to the left side of the center.
- Rotate the bowl 90 degrees, stretch the right side again, and fold it to the left.
- Repeat this process two more times.
- After completing the stretch and folds, prepare the dough for its first rise.
- Place the dough, smooth side up, in a glass bowl coated with olive oil.
- Cover the bowl with a damp towel, plastic wrap, or a tightly fitting lid, and let it rise overnight or for at least eight hours in a warm place on your countertop.
- This is where the dough will rise and develop its flavor.
The Next Day
- On a lightly floured work surface, roll the dough out into a large rectangle until it is about ½” thick.
- Spread the chocolate hazelnut spread evenly onto the shaped dough.
- Starting from one side, roll the dough up tightly and pinch in the ends.
- Transfer the dough into a greased loaf pan, and allow it to at least double in size, which usually takes about 2-4 hours. The rise time also depends on the temperature of your kitchen; it will take longer in a cooler environment and less time if it’s warm.
- When the dough has risen, preheat your oven to 375 degrees.
- Brush the top of the dough with a lightly beaten egg or with plain water. This will help the bread get a beautiful golden brown color.
- Bake the bread for 70 minutes. (In my oven, the bread took 70 minutes to bake. To keep the top from becoming too dark I placed a piece of foil over the top of the bread and baked for an additional 10 minutes or until the bread reached an internal temperature of 190 degrees.)
- Let the bread cool in the loaf pan for 10 minutes before moving it to a cutting board.
- Chocolate hazelnut swirl sourdough can be enjoyed warm or at room temperature.
- Enjoy your loaf of bread!