
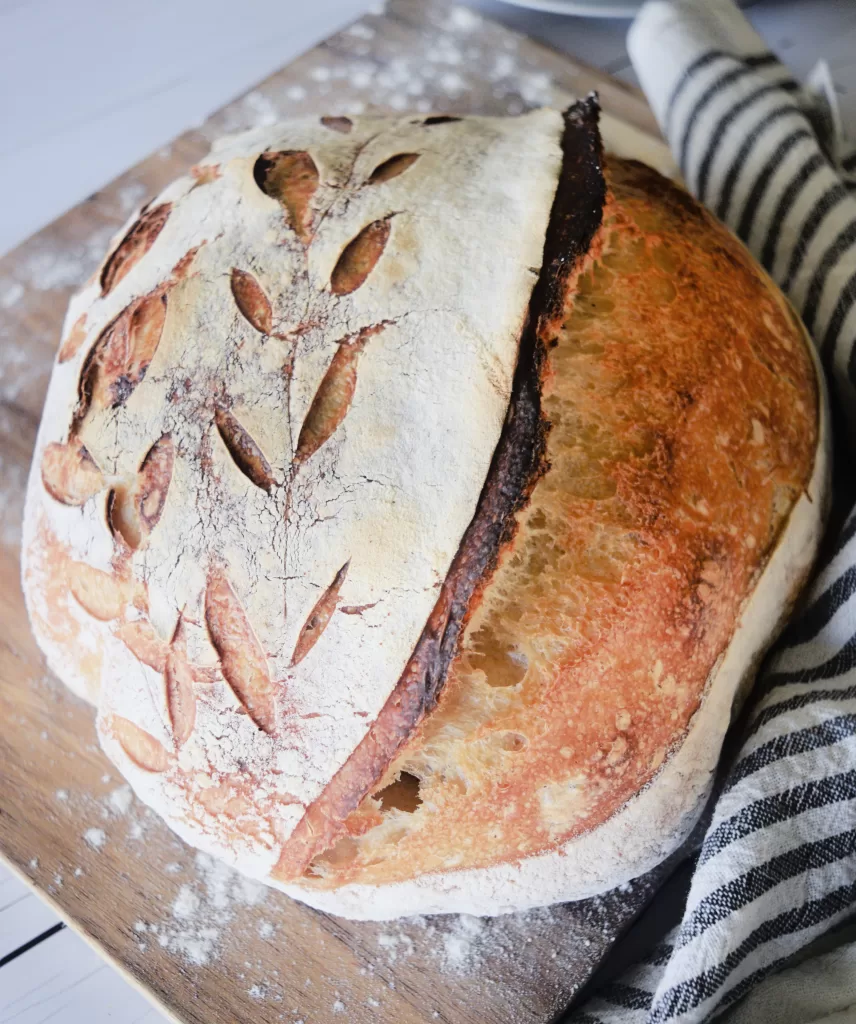
If you’re looking to improve your artisan baking game, then look no further than this easy high hydration sourdough bread recipe! In all of my years of bread baking, I have found that higher hydration is the way to go. Unlike low hydration doughs, which are easier to handle but result in a tighter crumb, higher hydration recipes use a higher water content to create a more open, airy interior and a beautifully crispy crust.

A wetter dough may be more challenging to shape, but the results are worth it! Whether you’re new to sourdough or ready to level up, learning to work with a higher hydration dough is key to achieving bakery-quality bread at home. With just four simple ingredients, you’ll get a naturally leavened, deeply flavorful loaf, perfect for slicing, toasting, or pairing with your favorite spreads.

Table of Contents
This post contains affiliate links, which means I make a small commission at no extra cost to you. See my full disclosure here.
What is a high hydration dough?
A high hydration dough refers to bread dough that contains a large percentage of water relative to the amount of flour, typically 75% hydration or higher. This means that for every 100 grams of flour, there are at least 75 grams of water. High hydration doughs are known for producing artisan-style loaves with a softer, more moist interior, a lighter, more open crumb, and a beautifully crispy crust. While they can be more challenging to handle due to their sticky, slack texture, the results are well worth it! Through proper technique and fermentation, high hydration dough develops incredible flavor and structure, making it one of our favorites!

What is a 100% Hydration Starter?
For this recipe, you’ll need an active sourdough starter that’s 100% hydration — this means it’s made with equal parts flour and water by weight. To feed your starter for use in this recipe, use this formula:
- 50g flour + 50g water = 100g starter (by weight, not volume)
This creates a bubbly, pourable starter that blends well into high hydration doughs and ensures consistent rise and flavor. Mix well and let it sit at room temperature until doubled in size and bubbly — usually 4–6 hours, depending on room temperature.

Ingredients
- 400g bread flour or all-purpose flour
- 320g water
- 100g active sourdough starter (100% hydration – see note below)
- 10g fine sea salt or himalayan salt (1 ¾ teaspoons)
High Hydration Sourdough
Bread Recipe
STEP 1: (Autolyse) In a large bowl, mix together 400 grams of flour and 320 grams of water. Stir until no dry flour remains. Cover and let rest for 30–45 minutes.

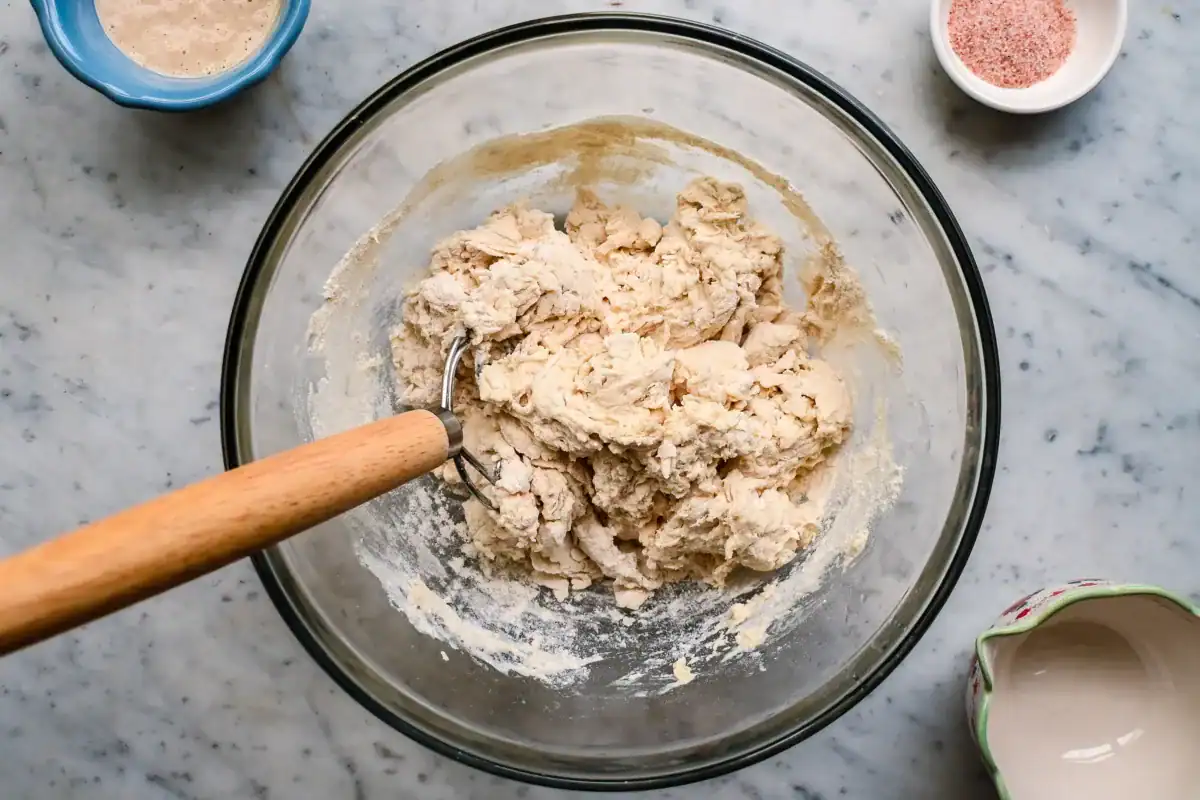
STEP 2: Add 100g active sourdough starter and 10g (1 ¾ teaspoons) salt. Mix thoroughly using a wooden spoon, or a Danish dough whisk. This is a pretty wet dough and will be sticky. This is expected with its hydration level. Let the dough rest at room temp, covered with plastic wrap or a damp kitchen towel for 30 minutes.

STEP 3: After the 30 minutes, perform 3 sets of stretch and folds, spaced 30 minutes apart. To stretch and fold, wet hands, lift and stretch one side of the dough up, then fold it over. Rotate the bowl and repeat on all four sides. (SEE TIPS) Cover the bread dough again with plastic wrap or a damp cloth and place in a warm place. Let the dough rise for about 6-8 hours, or until it has doubled in size.

STEP 4: After the first rise, wet hands and shape the dough into a tight round or oval shape and place it seam-side up in a generously floured banneton basket or towel-lined bowl. Cover the proofing basket with a damp towel or plastic bag and place in the fridge for 10–14 hours.

STEP 5: Next day, place dough seam-side down on a piece of parchment paper and into a Dutch oven. Score the top of the dough with a sharp razor blade. Then cover the dutch oven with the lid. Place the dutch oven into the oven and set the oven temperature to 425°F (no need to preheat).
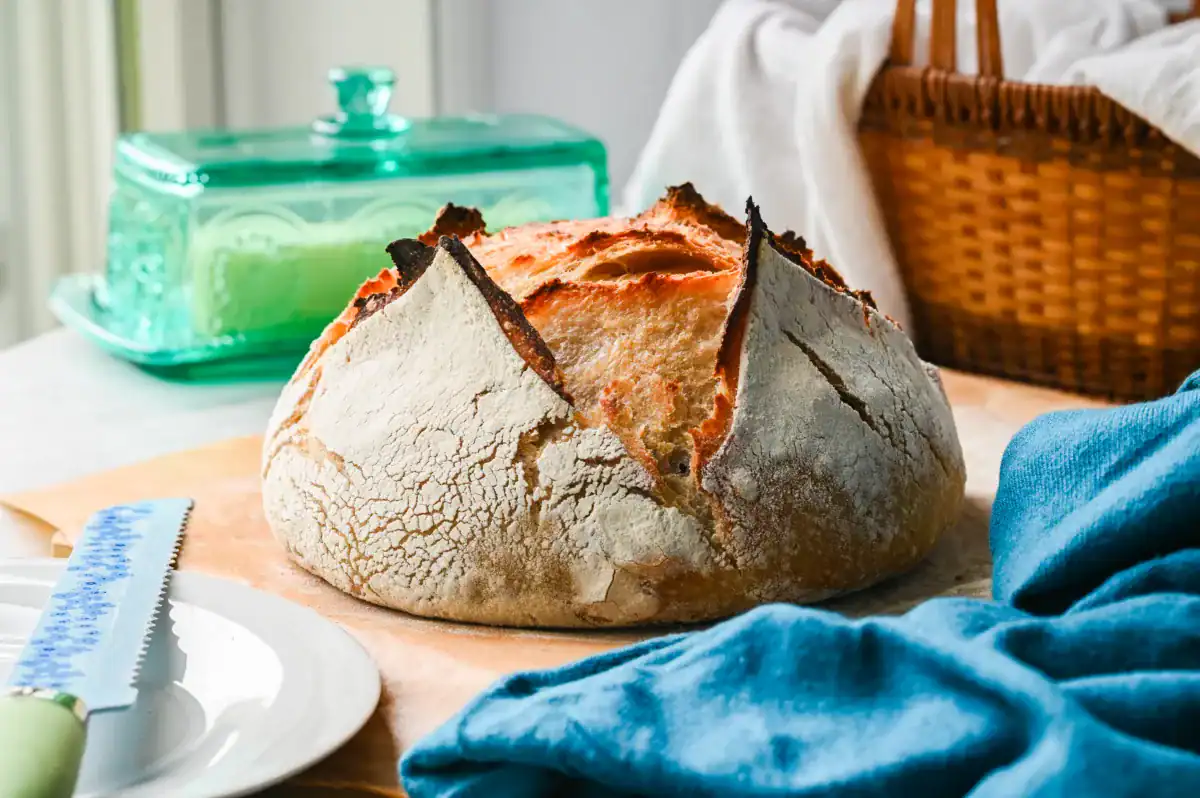
STEP 6: Bake covered for 50 minutes. If the crust has reached your desired color, remove the loaf and transfer it to a cooling rack. If a deeper color is preferred, continue baking uncovered in 5-minute intervals until the crust is golden and crisp.

STEP 7: Transfer to a wire rack. Let cool completely (at least 1 hour) before slicing.
Tips for the Higher Hydration Sourdough Bread
- It is important that your hands are wet when performing the stretch and folds. I have found that it helps keep the dough from sticking to your fingers.
- I have found that store-bought flour becomes very packed down during shipping, because of this I have had the best results in achieving a true high-hydration dough when using a kitchen scale. It tends to be very accurate compared to measuring cups.
Frequently Asked Questions
What does “high hydration” mean in sourdough baking?
High hydration refers to a dough with a higher water-to-flour ratio, usually 75% hydration or more. This makes the dough wetter and stickier but results in bread with a soft, open crumb and a crisp crust.
Why make high hydration sourdough bread?
Higher hydration dough allows for better gluten development, which creates an airy texture and improved flavor. It’s perfect for artisan-style loaves.
Is high hydration dough harder to work with?
It can be a little trickier because the dough is stickier, but with proper folding techniques and some practice, it becomes much easier to handle.
What type of flour is best for this recipe?
Bread flour is ideal for high hydration sourdough because its higher protein content helps develop strong gluten for an airy, open crumb. However, you can also use all-purpose flour — just note that the dough may be a little softer, and you may need to handle it gently during shaping.
How long does it take to make high hydration sourdough bread?
From mixing to baking, it typically takes about 12–24 hours, depending on room temperature and fermentation speed. Most of this time is hands-off.
How do I know when my dough has proofed enough?
Look for a dough that has increased in volume, feels airy, and passes the “poke test” — gently press your finger into the dough; if it slowly springs back, it’s ready.
Can I bake this bread in a regular oven without a Dutch oven?
Yes. While a Dutch oven traps steam for a better crust, you can bake on a baking stone or sheet and create steam by adding a pan of hot water to the oven. In Easy Sourdough Bread Recipe Without A Dutch Oven I show how to do this.
How should I store high hydration sourdough bread?
Once cooled, store it in a paper bag or wrapped in a clean kitchen towel for 1–2 days. For longer storage, slice and freeze in airtight bags.


Tried this recipe?
I would love to see it! Tag me on Instagram @idiesfarm and #idiesfarm so I can share your beautiful creation!

The Best High Hydration Sourdough Bread Easy Recipe
Ingredients
- 400 g bread flour or all-purpose flour
- 320 g water
- 100 g active sourdough starter 100% hydration – see note below
- 10 g fine sea salt (1 ¾ teaspoons)
Instructions
- (Autolyse) In a large bowl, mix together 400 grams of flour and 320 grams of water. Stir until no dry flour remains. Cover and let rest for 30–45 minutes.
- Add 100g active sourdough starter and 10g (1 ¾ teaspoons) salt. Mix thoroughly using a wooden spoon, or a Danish dough whisk. This is a pretty wet dough and will be sticky. This is expected with its hydration level. Let the dough rest at room temp, covered with plastic wrap or a damp kitchen towel for 30 minutes.
- After the 30 minutes, perform 3 sets of stretch and folds, spaced 30 minutes apart. To stretch and fold, wet hands, lift and stretch one side of the dough up, then fold it over. Rotate bowl and repeat on all four sides. (SEE TIPS) Cover the bread dough again with plastic wrap of a damp cloth and place in a warm place. Let the dough rise for about 6-8 hours, or until it has doubled in size.
- After the first rise, wet hands and shape the dough into a tight round or oval shape and place it seam-side up in a generously floured banneton basket or towel-lined bowl. Cover the proofing basket with a damp towel or plastic bag and place in the fridge for 10–14 hours.
- Next day, place dough seam-side down on a piece of parchment paper and into a Dutch oven. Score the top of the dough with sharp razor blade. Then cover the dutch oven with the lid. Place the dutch oven in the oven and set the oven temperature to 425°F (no need to preheat).
- Bake covered for 50 minutes. If the crust has reached your desired color, remove the loaf and transfer it to a cooling rack. If a deeper color is preferred, continue baking uncovered in 5-minute intervals until the crust is golden and crisp.
- Transfer to a wire rack. Let cool completely (at least 1 hour) before slicing.
Notes
-
- It is important that your hands are wet when performing the stretch and folds. I have found that it helps keep the dough from sticking to your fingers.
-
- I have found that store-bought flour becomes very packed down during shipping, because of this I have had the best results in achieving a true high-hydration dough when using a kitchen scale. It tends to be very accurate compared to measuring cups.