Easy Tutorial on How to Sew Reusable Bowl Covers
Whether this is your first sewing project or not, you will find this easy tutorial on how to sew reusable covers simple to understand, quick to whip up, and an easy to do! This easy project is not just for the beginner, it is for the ridiculously busy person, that wants to move away from plastic wrap and to a more practical, sustainable, environmentally friendly choice without slaving away at the sewing machine all day. With this sew tutorial you will have cute bowl covers no matter the sizes of bowls, that will bring charm to your table, keep the money in your bank account, and that is a better choice for the environment.
This post contains affiliate links, which means I make a small commission at no extra cost to you. See my full disclosure here.
Table of Contents
Common Questions
Can you make a reusable bowl cover?
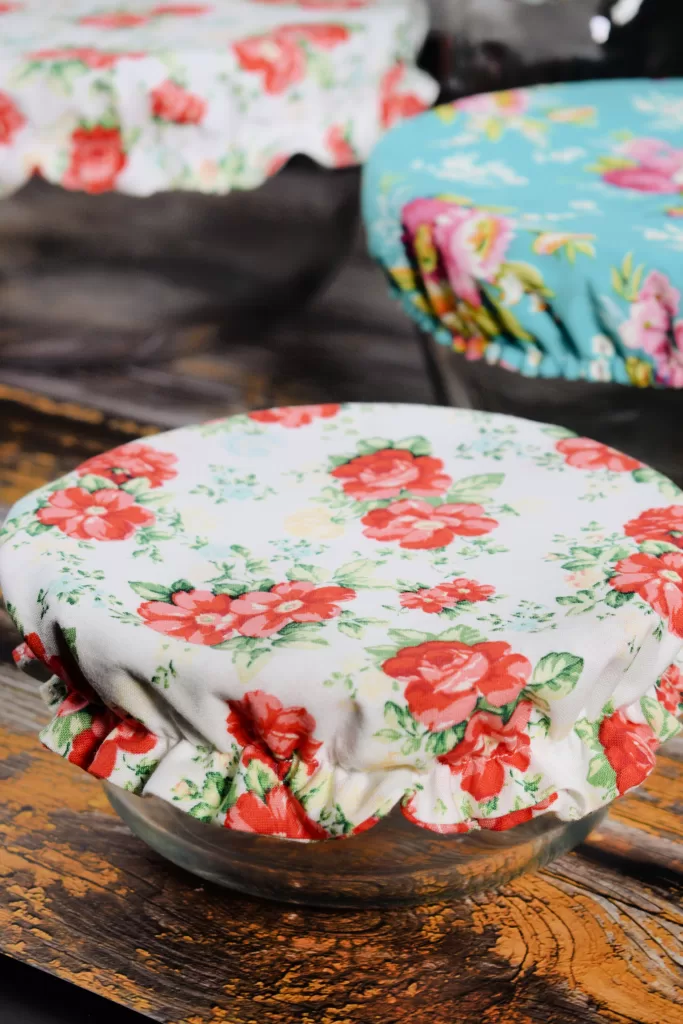
Yes, you can make reusable bowl covers! Not only are they easy to make, but these cloth bowl covers are functional, inexpensive, and simple to use too! They are perfect for food prep, outdoor dining, or even picnics. Just slip your diy fabric bowl covers over the bowl rim of your serving bowls, and viola! Instant protection from those pesky flies, ants, or in my part of the country–stink bugs!
Are reusable bowl or casserole covers easy to make?
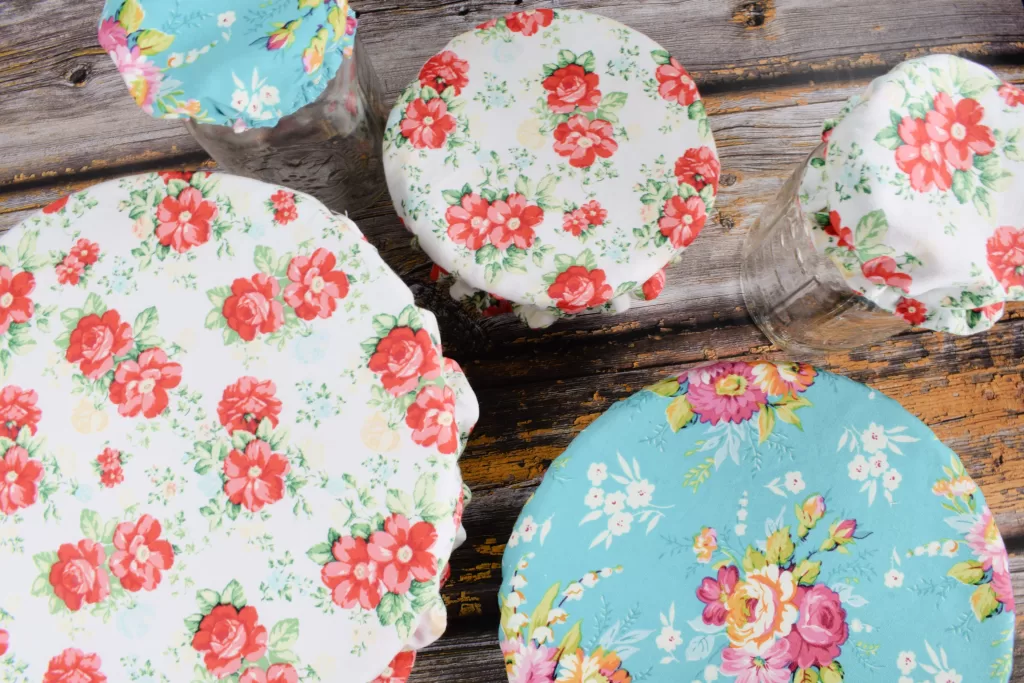
These DIY bowl covers are one of the most simple sewing projects I have ever made. It is truly a perfect project for a beginner. It took me about and hour to make 5 covers for a few bowls that were different ranges of size.
What is the best fabric for bowl covers?
The best fabric for bowl covers depends on your specific needs, but generally, the following options are highly recommended:
- Cotton: Cotton fabric is a popular choice due to its breathability and ease of washing. It is often used for making reusable bowl covers because it is soft, flexible, and can be easily sewn into different sizes and shapes. This is what I use and prefer.
- PUL (Polyurethane Laminate): PUL is a waterproof fabric that is also breathable, making it an excellent choice for bowl covers that need to prevent spills and keep food fresh. It is commonly used for making reusable food wraps and covers.
- Oilcloth: This is a cotton fabric that has been treated with an oil-based coating, making it water-resistant and durable. Oilcloth is easy to clean and provides a good barrier to moisture.
- Beeswax-coated Cotton: This eco-friendly option combines the breathability of cotton with the preservative properties of beeswax. Beeswax-coated cotton is moldable, which helps create a good seal around the bowl. Great for when storing in the fridge.
- Ripstop Nylon: Lightweight and water-resistant, ripstop nylon is a good option for those who need a durable and easy-to-clean fabric. It is often used for making outdoor gear and can be repurposed for bowl covers.
- Linen: Linen is a natural fiber that is breathable and has natural antibacterial properties. It is a good choice for bowl covers that need to allow some air circulation while keeping insects and debris out.
Ultimately, the best fabric will depend on your specific use case, whether you prioritize ease of cleaning, breathability, waterproofing, or environmental impact
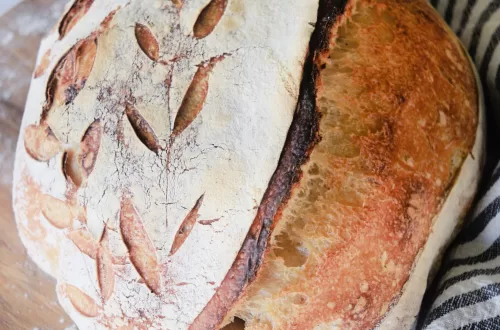
Reusable Fabric Bowl Covers as Bread Proofing Covers
Another great option for these cute fabric bowl covers is to use them as bread proofing covers or a cover for your active sourdough starter. Usually when following a sourdough recipe, the baker will tell you to use a shower cap, cling wrap, or in my case a tea towel. For me, seeing the tea towel draped over the bowl or mason jar (what I keep my sourdough starter in) is very messy looking. I decided that making these adorable bowl covers are a perfect idea when making sourdough! It looks cute and clean in my kitchen, and I also like to use different fabrics to make it look more seasonal and fun.
Make a matching banneton cover or bread proofing basket cover with this: How To Make An Easy DIY Basket Liner (Sew Tutorial)
Tips for Making Bowl Covers
- Make sure that you have enough material to cover the circumference of your bowl plus an extra two inches added to the whole circle (at least). This larger circle will insure that you have enough for the seam allowance, overhang, and if you are adding a ruffle.
- Make sure that your material is washed, dried, and pressed. Washing the material before hand will ensure that no shrinking will take place after you make your cover.
- You can do these bowl covers with or without a ruffle. Both versions are listed below but before you make that decision:
Keep in mind that when you add the ruffle you are losing some of the cover, so you may want to add 1/2 inch to 1 inch more to the circumference of the circle, when cutting the material, to compensate this. Just to note, I did not, and mine comes down the bowl just the way I like it, but some people like it to hang down further.
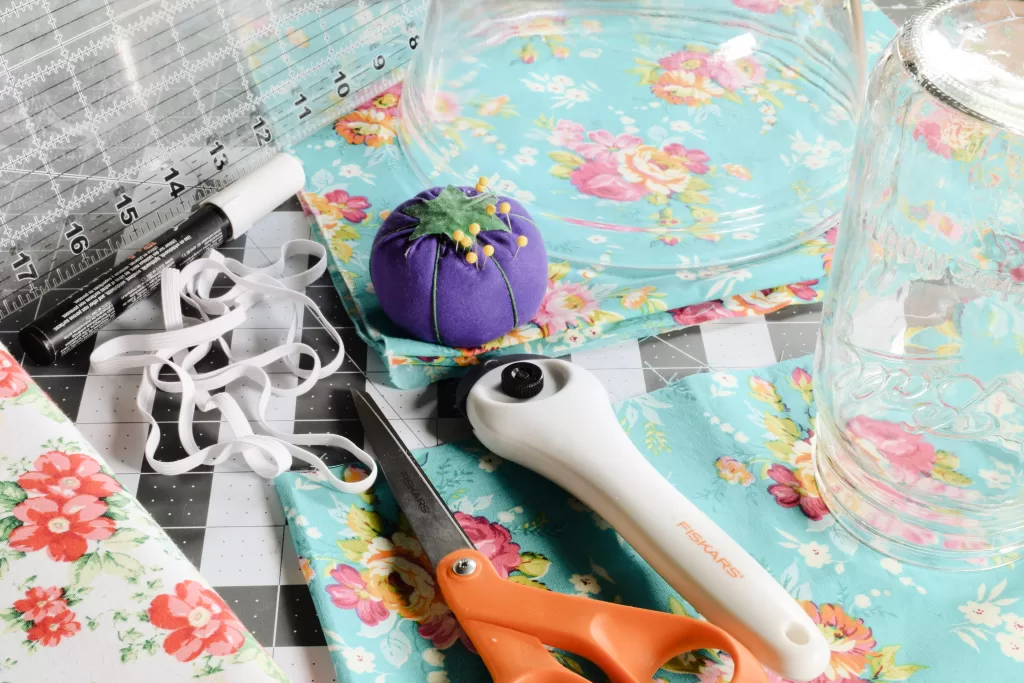
What You Will Need for Cotton Bowl Covers
Sewing machine
2 pieces of fabric or 1 large piece you can fold in half to cut two circles out of (You need it big enough for the circumference of the bowl plus an additional 2 inches for the overhang and seam allowance)
Bowl you would like to cover
Measuring tape or sewing ruler (found here)
Scissors or rotary cutter (found here)
Pencil or chalk marker
Sewing pins or safety pins
Thread
1 package 1/4″ elastic (or larger just adjust your zig zag stitch to a bit smaller than your elastic)
Iron
Ironing board
Step by Step Instructions for Reusable Bowl Covers
Fold your fabric of choice in half so that when you cut out the fabric you will have two pieces of fabric the same size and shape.
*If you are choosing to use a different material for the underside of the reusable linen bowl covers, then make sure the second circle is the exact same size as the first.
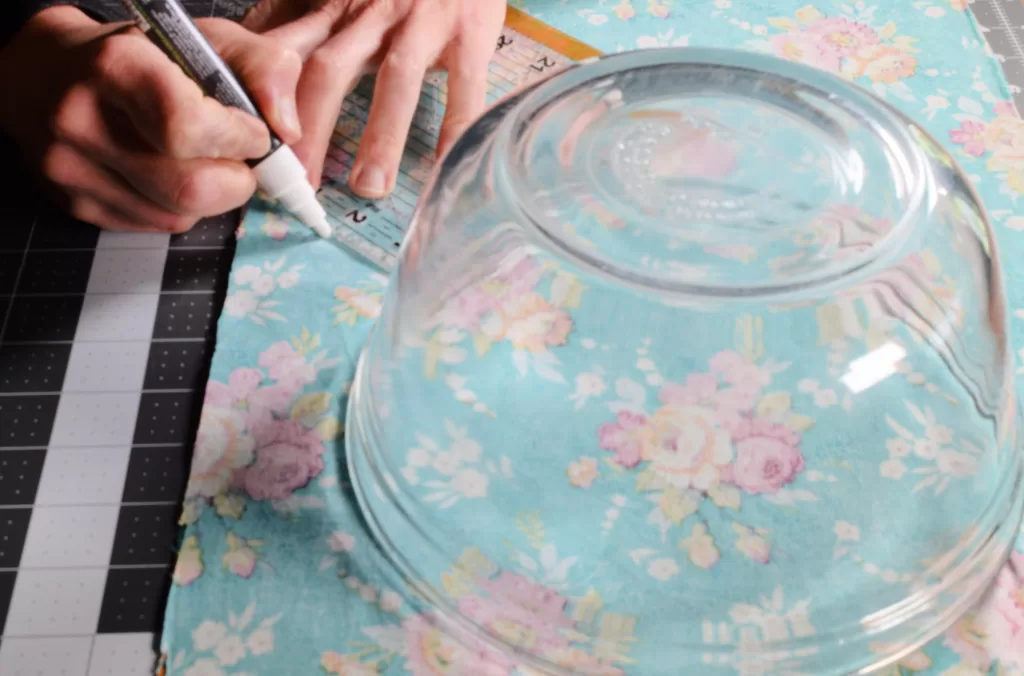
Place the bowl face upside down on the fabric.
Measure out an additional two inch circumference from the outside rim of the bowl.
Draw a line. I use a ruler and guide it outside of the rim of the bowl while drawing my line, making sure the bowl does not move.
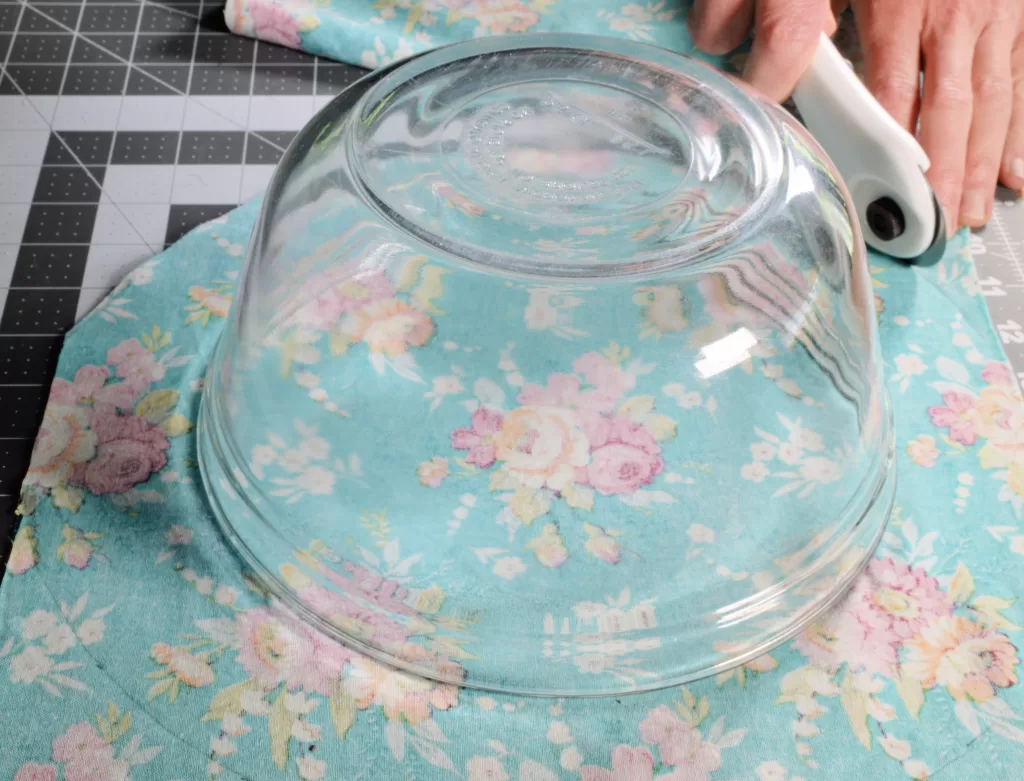
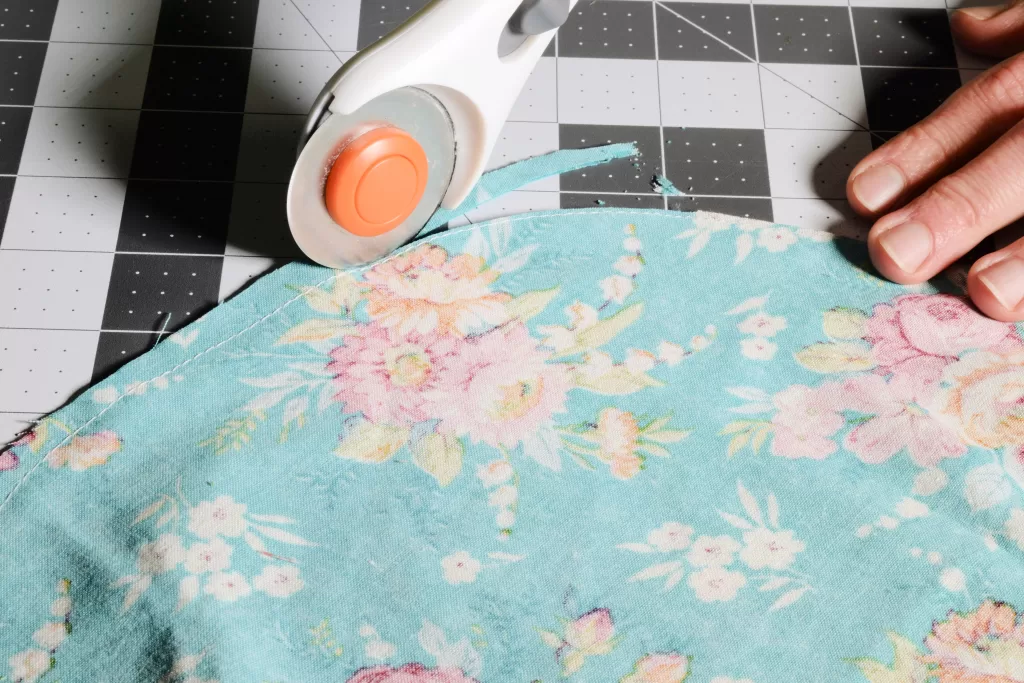
Cut out the material using fabric scissors or a rotary cutter.
Place the printed side of the material together so that both sides of the wrong sides of the material are facing out and the right sides are facing in.
Make sure to line up all raw edges of the fabric.
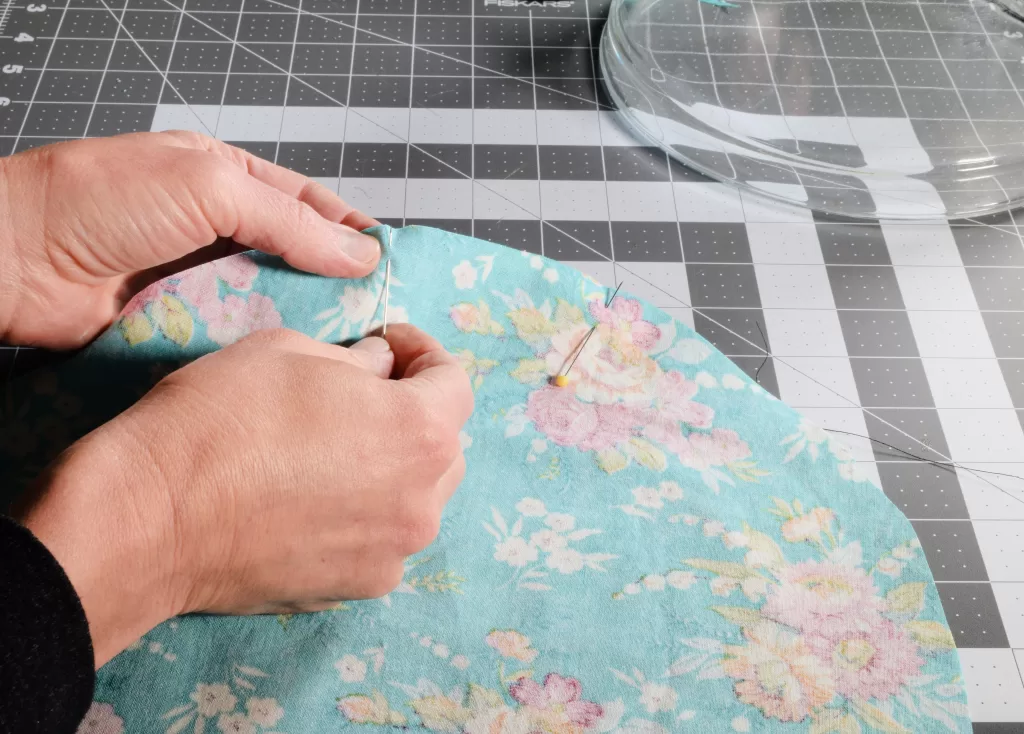
Mark a 2 to 4 inch section off with pins. This section will not be sewn. The opening will allow you to pull the material inside out (after you have sewed the seam) so that the printed material is facing out.
Sew a 1/4 inch straight stitch along the edge of the wrong side of the fabric material starting at the pin closest to you and ending at the next pin. Do not forget to leave the opening open.
Cut some of the 1/4 inch material off making sure to not cut into your stitch! This will help remove some of the bulk when you turn it inside out.
Pull the right side of the material through the opening so that now it is inside out and the printed side is facing out on both sides.
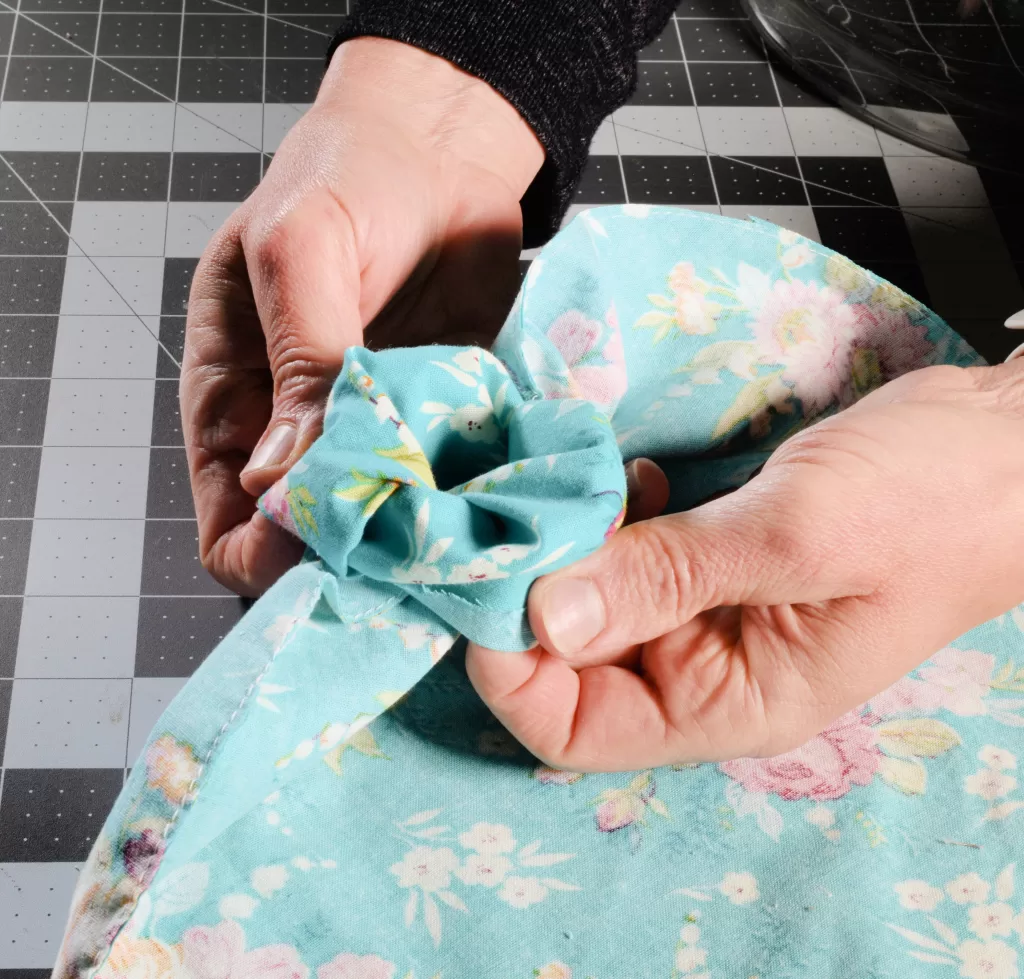
Use your hand to reach inside and smooth out the seam.
Press the seam with a hot iron so that all the material is flat.

Fold in and press the opening so the it matches the rest of the seams.
Choose ruffle version or non ruffle version.
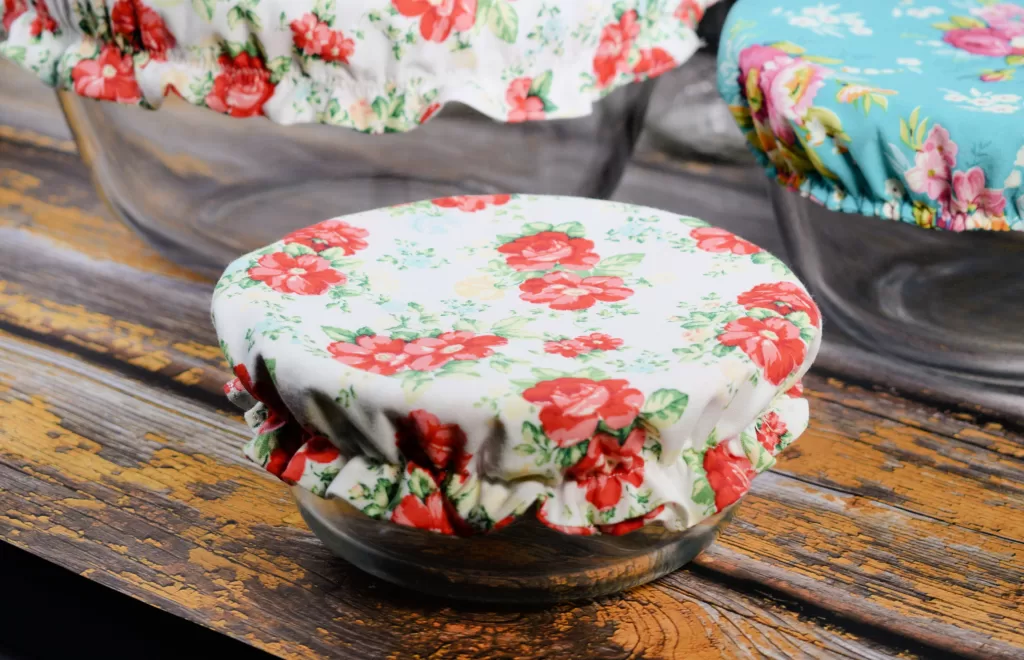
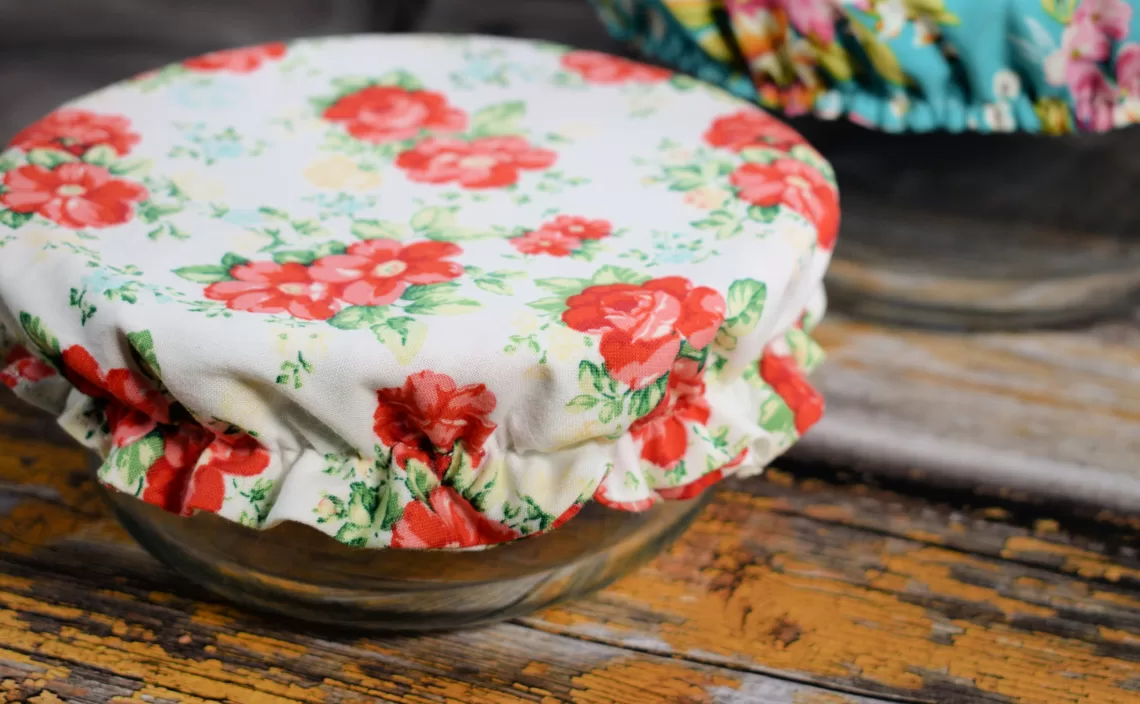
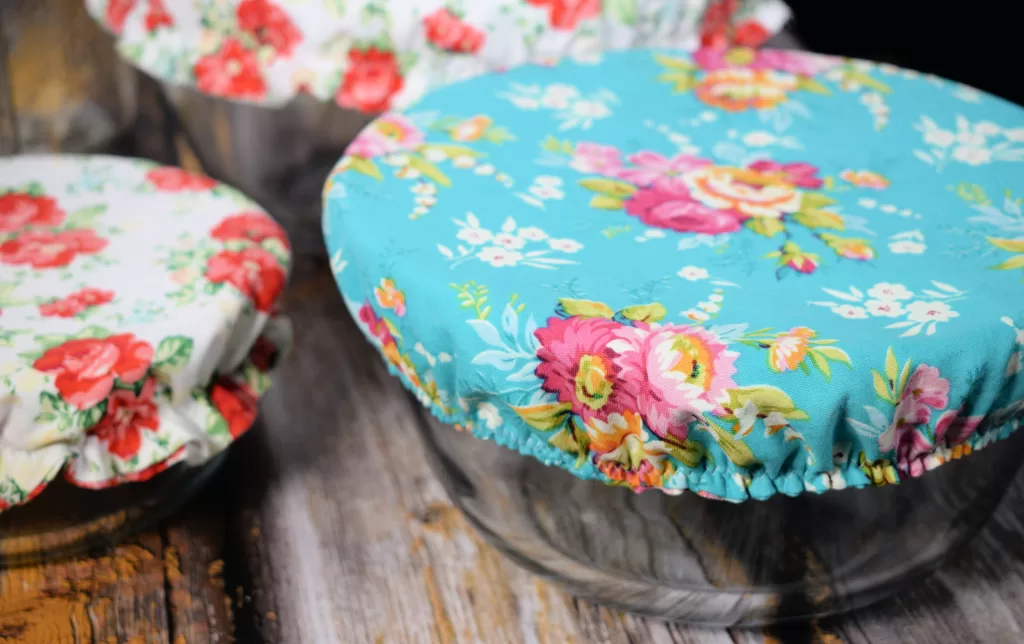
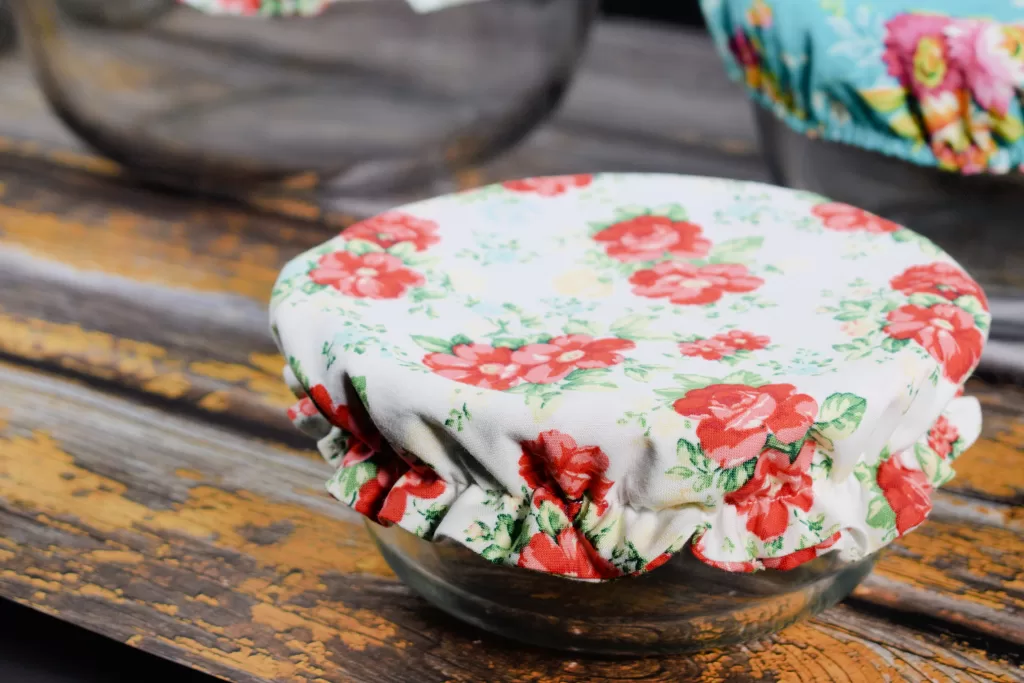
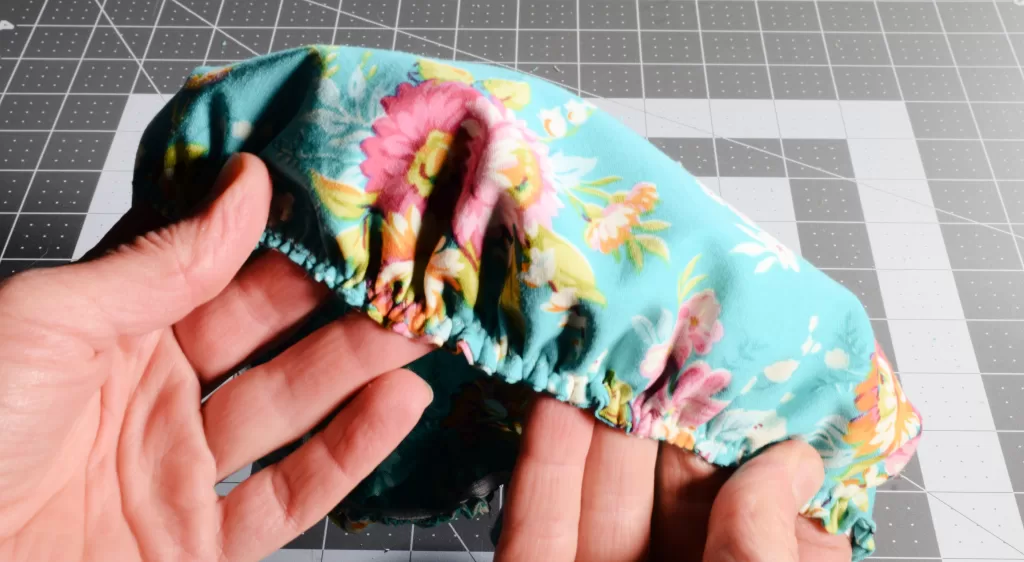
*If you are choosing to place your elastic at the very end of the material (as seen on the blue floral bowl cover–shower cap like) then you will not need to stitch the opening closed as sewing the elastic on will do so. If you are doing the ruffled version (as seen on the white floral bowl cover), then you will need to stitch the opening.
Version Without Ruffles
Prepare your sewing machine with the thread of choice for the material.
Place the sewing machine on the smallest zig-zag stitch so that it stays within the size of the elastic.
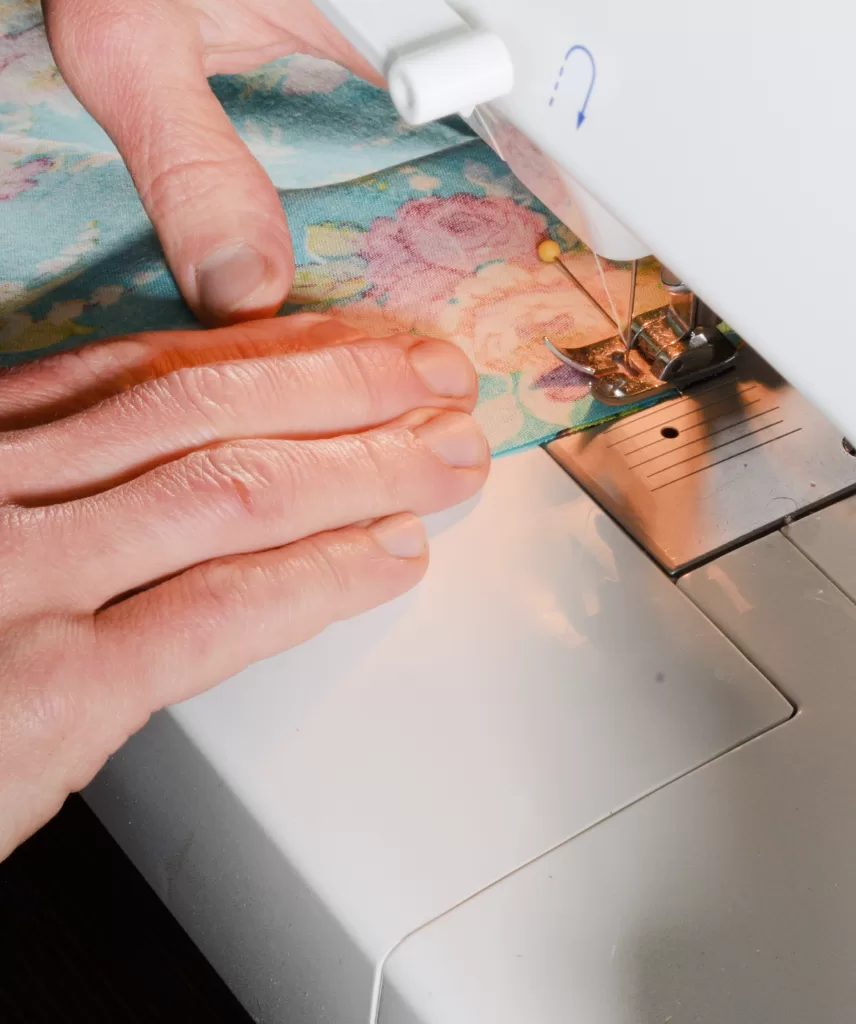
Place the elastic end on the edge of the top fabric.
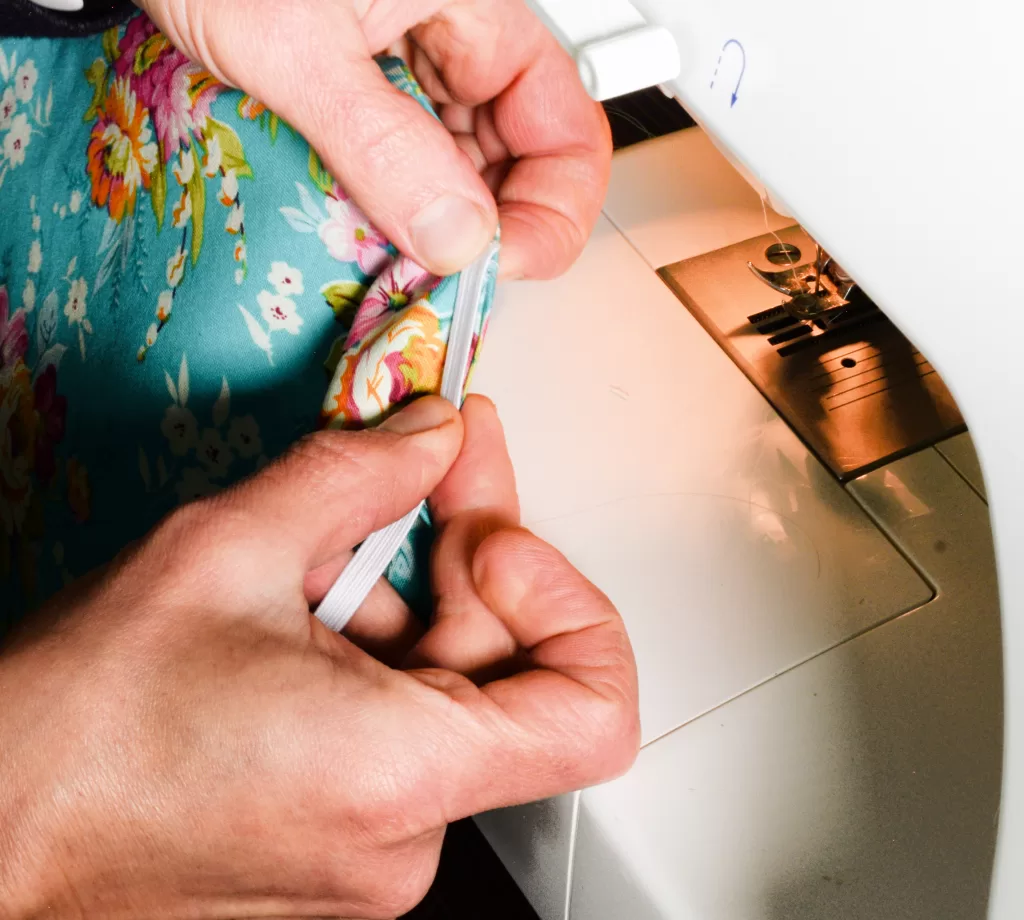
Stitch 3 to 4 stitches to insure the elastic is attached.
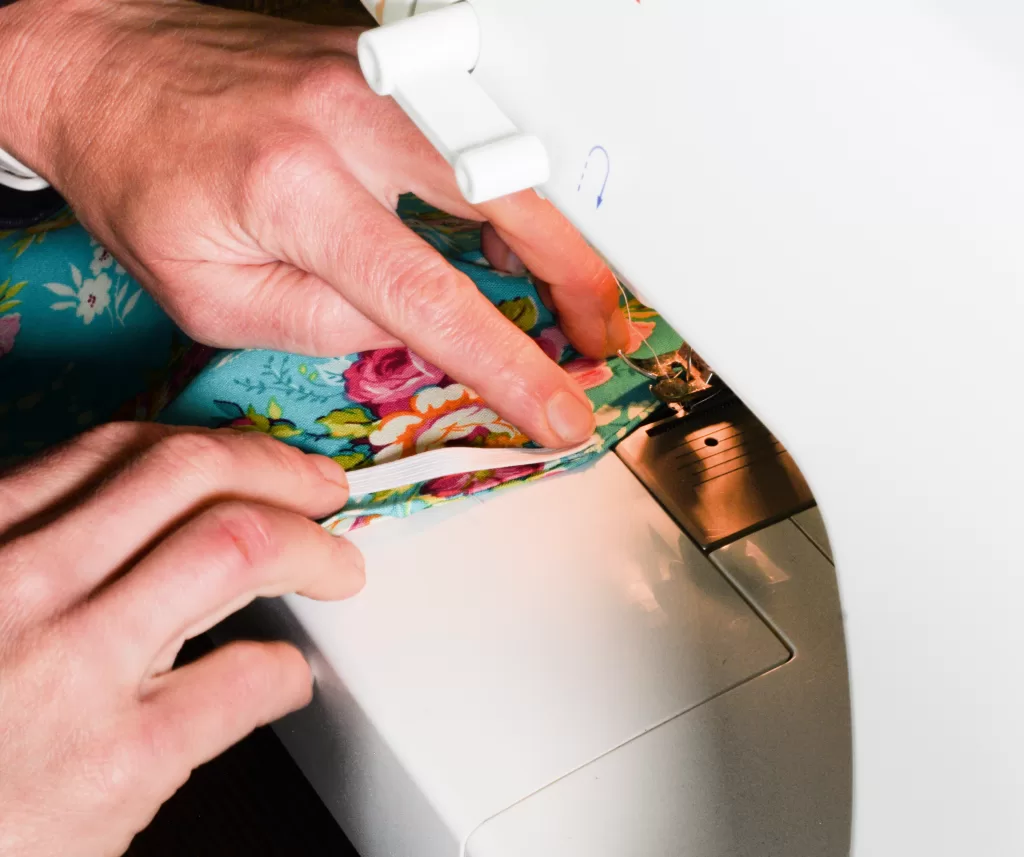
With your right hand, pull the elastic with firm strong tension.
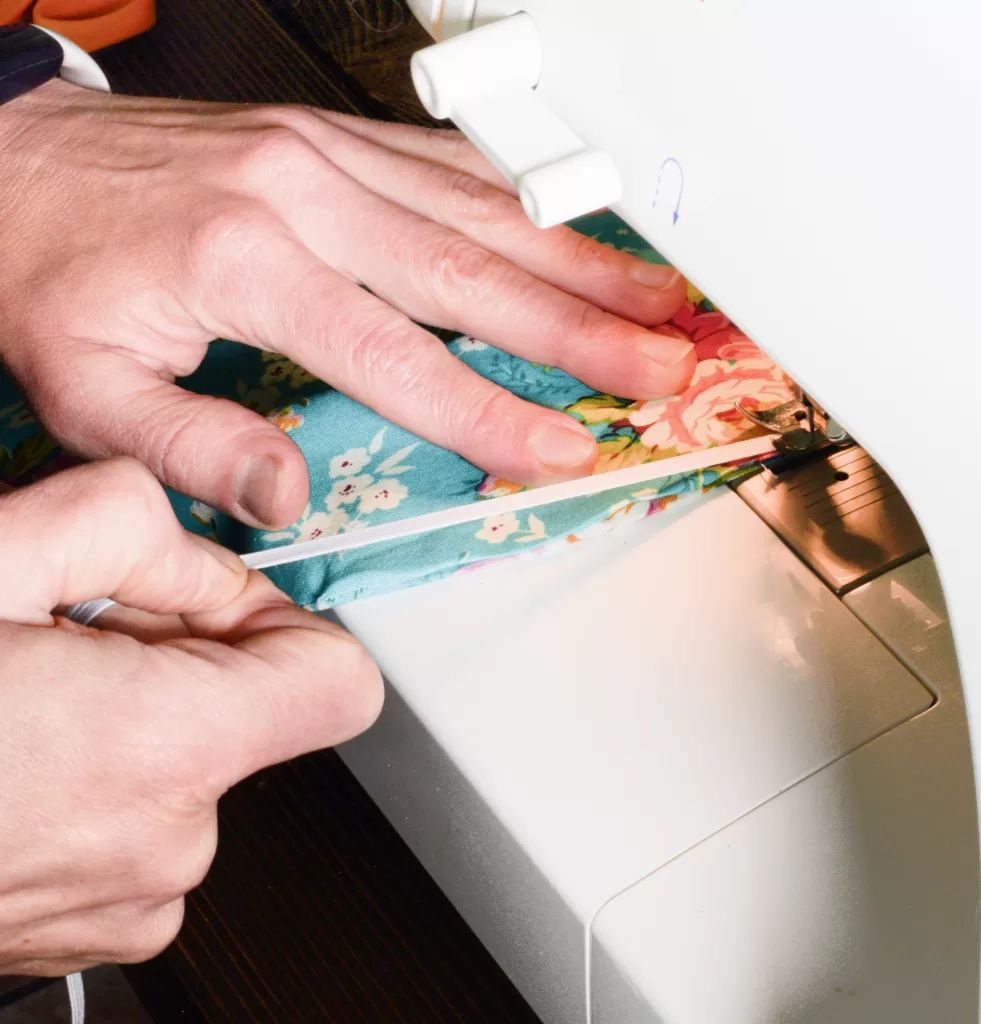
Use your left hand to guide the material, keeping the needle moving along the edge of the circle.
Make sure that you are continuously pulling the elastic while you begin to sew the elastic down.
Once you meet the starting point, sew a couple of stitches of the elastic on the already sewn down elastic so that they overlap and are connected.
Back stitch a couple of stitches to make sure it is secure.
Version with Ruffles
*Keep in mind that when you add the ruffle you are losing some of the cover, so you may want to add 1/2 inch more to 1 inch to the circumference of the circle, when cutting the material, to compensate for this. Just to note, I did not, and mine comes down the bowl just the way I like it, but some people like it to hang down further. Everything is the same as the without ruffles version with the exception of moving the elastic in 1/4 to 1/2 inch.
Prepare your sewing machine with the thread of choice for the material.
Place the sewing machine on the smallest zig-zag stitch so that it stays within the size of the elastic.
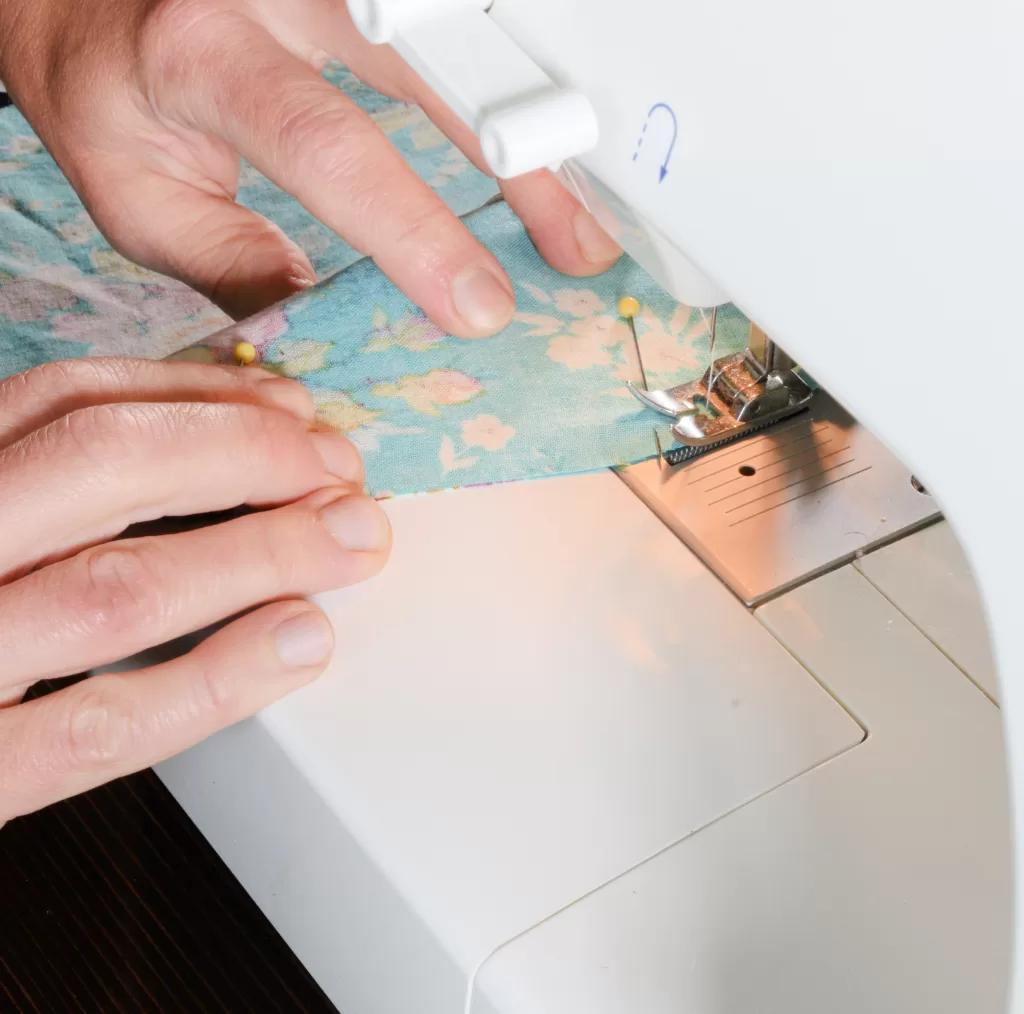
Place the elastic a 1/4 to a 1/2 inch from the top of the fabric.
Stitch 3 to 4 stitches to insure the elastic is attached.
With your right hand, pull the elastic with firm strong tension.
Use your left hand to guide the material, keeping the needle moving along the edge of the circle.
Make sure that you are continuously pulling the elastic while you begin to sew the elastic down.
Once you meet the starting point, sew a couple of stitches of the elastic on the already sewn down elastic so that they overlap and are connected.
Back stitch a couple of stitches to make sure it is secure.
Happy sewing!
Other Fun and Easy Sewing Projects
How To Make An Easy DIY Basket Liner (Sew Tutorial)
How To Make An Easy DIY Basket Liner (Sew Tutorial)

Easy Tutorial on How to Sew Reusable Bowl Covers
Whether this is your first sewing project or not, you will find this easy tutorial on how to sew reusable covers simple to understand, quick to whip up, and an easy to do!
Instructions
- Fold your fabric of choice in half so that when you cut out the fabric you will have two pieces of fabric the same size and shape.
- *If you are choosing to use a different material for the underside of the reusable linen bowl covers, then make sure the second circle is the exact same size as the first.
- Place the bowl face upside down on the fabric.
- Measure out an additional two inch circumference from the outside rim of the bowl.
- Draw a line. I use a ruler and guide it outside of the rim of the bowl while drawing my line, making sure the bowl does not move.
- Cut out the material using fabric scissors or a rotary cutter.
- Place the printed side of the material together so that both sides of the wrong sides of the material are facing out and the right sides are facing in.
- Make sure to line up all raw edges of the fabric.
- Mark a 2 to 4 inch section off with pins. This section will not be sewn. The opening will allow you to pull the material inside out (after you have sewed the seam) so that the printed material is facing out.
- Sew a 1/4 inch straight stitch along the edge of the wrong side of the fabric material starting at the pin closest to you and ending at the next pin. Do not forget to leave the opening open.
- Cut some of the 1/4 inch material off making sure to not cut into your stitch! This will help remove some of the bulk when you turn it inside out.
- Pull the right side of the material through the opening so that now it is inside out and the printed side is facing out on both sides.
- Use your hand to reach inside and smooth out the seam.
- Press the seam with a hot iron so that all the material is flat.
- Fold in and press the opening so the it matches the rest of the seams.
- Choose ruffle version or non ruffle version.
*If you are choosing to place your elastic at the very end of the material (as seen on the blue floral bowl cover--shower cap like) then you will not need to stitch the opening closed as sewing the elastic on will do so. If you are doing the ruffled version (as seen on the white floral bowl cover), then you will need to stitch the opening.
- Version Without Ruffles
- Prepare your sewing machine with the thread of choice for the material.
- Place the sewing machine on the smallest zig-zag stitch so that it stays within the size of the elastic.
- Place the elastic end on the edge of the top fabric.
- Stitch 3 to 4 stitches to insure the elastic is attached.
- With your right hand, pull the elastic with firm strong tension.
- Use your left hand to guide the material, keeping the needle moving along the edge of the circle.
- Make sure that you are continuously pulling the elastic while you begin to sew the elastic down.
- Once you meet the starting point, sew a couple of stitches of the elastic on the already sewn down elastic so that they overlap and are connected.
- Back stitch a couple of stitches to make sure it is secure.
Version with Ruffles
- *Keep in mind that when you add the ruffle you are losing some of the cover, so you may want to add 1/2 inch more to 1 inch to the circumference of the circle, when cutting the material, to compensate for this. Just to note, I did not, and mine comes down the bowl just the way I like it, but some people like it to hang down further. Everything is the same as the without ruffles version with the exception of moving the elastic in 1/4 to 1/2 inch.
- Prepare your sewing machine with the thread of choice for the material.
- Place the sewing machine on the smallest zig-zag stitch so that it stays within the size of the elastic.
- Place the elastic a 1/4 to a 1/2 inch from the top of the fabric.
- Stitch 3 to 4 stitches to insure the elastic is attached.
- With your right hand, pull the elastic with firm strong tension.
- Use your left hand to guide the material, keeping the needle moving along the edge of the circle.
- Make sure that you are continuously pulling the elastic while you begin to sew the elastic down.
- Once you meet the starting point, sew a couple of stitches of the elastic on the already sewn down elastic so that they overlap and are connected.
- Back stitch a couple of stitches to make sure it is secure.
- Happy sewing!


One Comment
Pingback: