
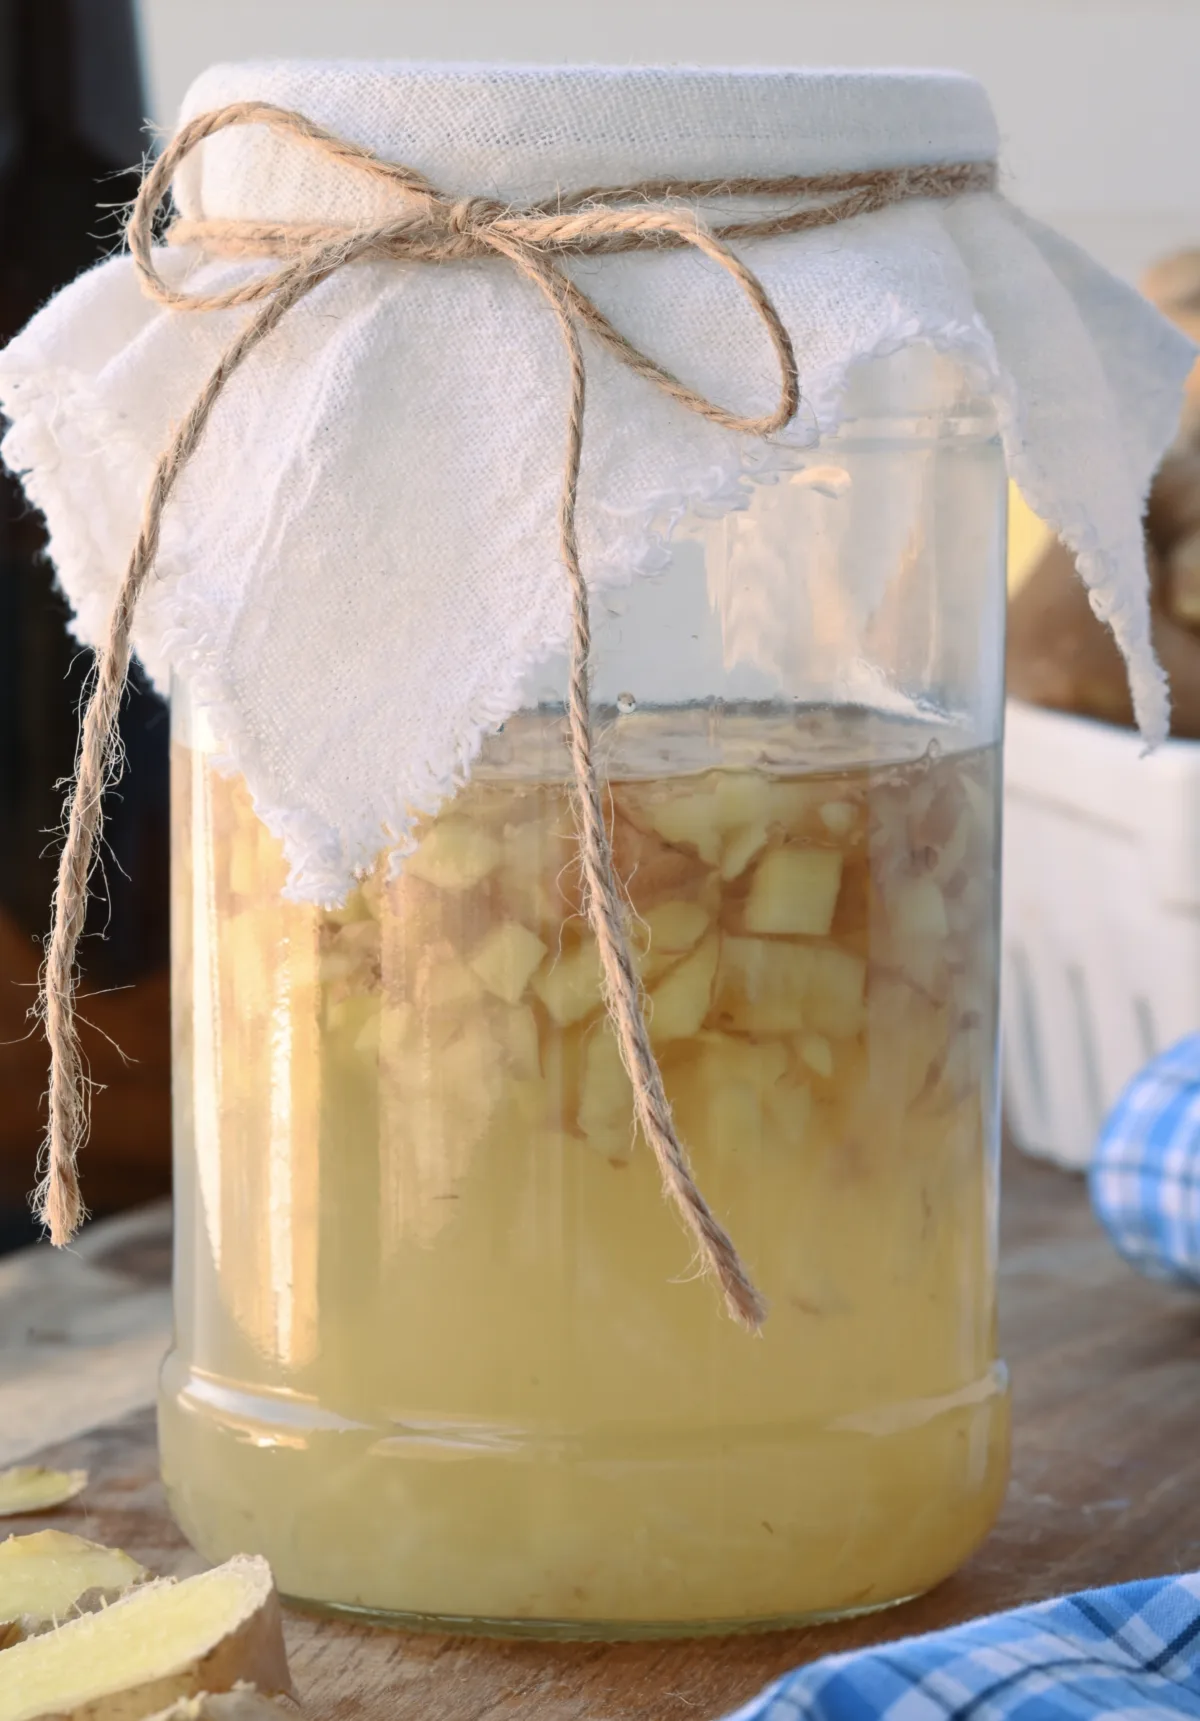
Looking for a natural remedy to support your immune system through flu season? This Elderberry Syrup Recipe is one of the easiest ways to make your own elderberry syrup at home using either fresh elderberries or dried elderberries. This syrup makes a wonderful addition to your own herbal remedies collection, alongside our Fermented Garlic Honey and Apple Cinnamon Fermented Shrub.
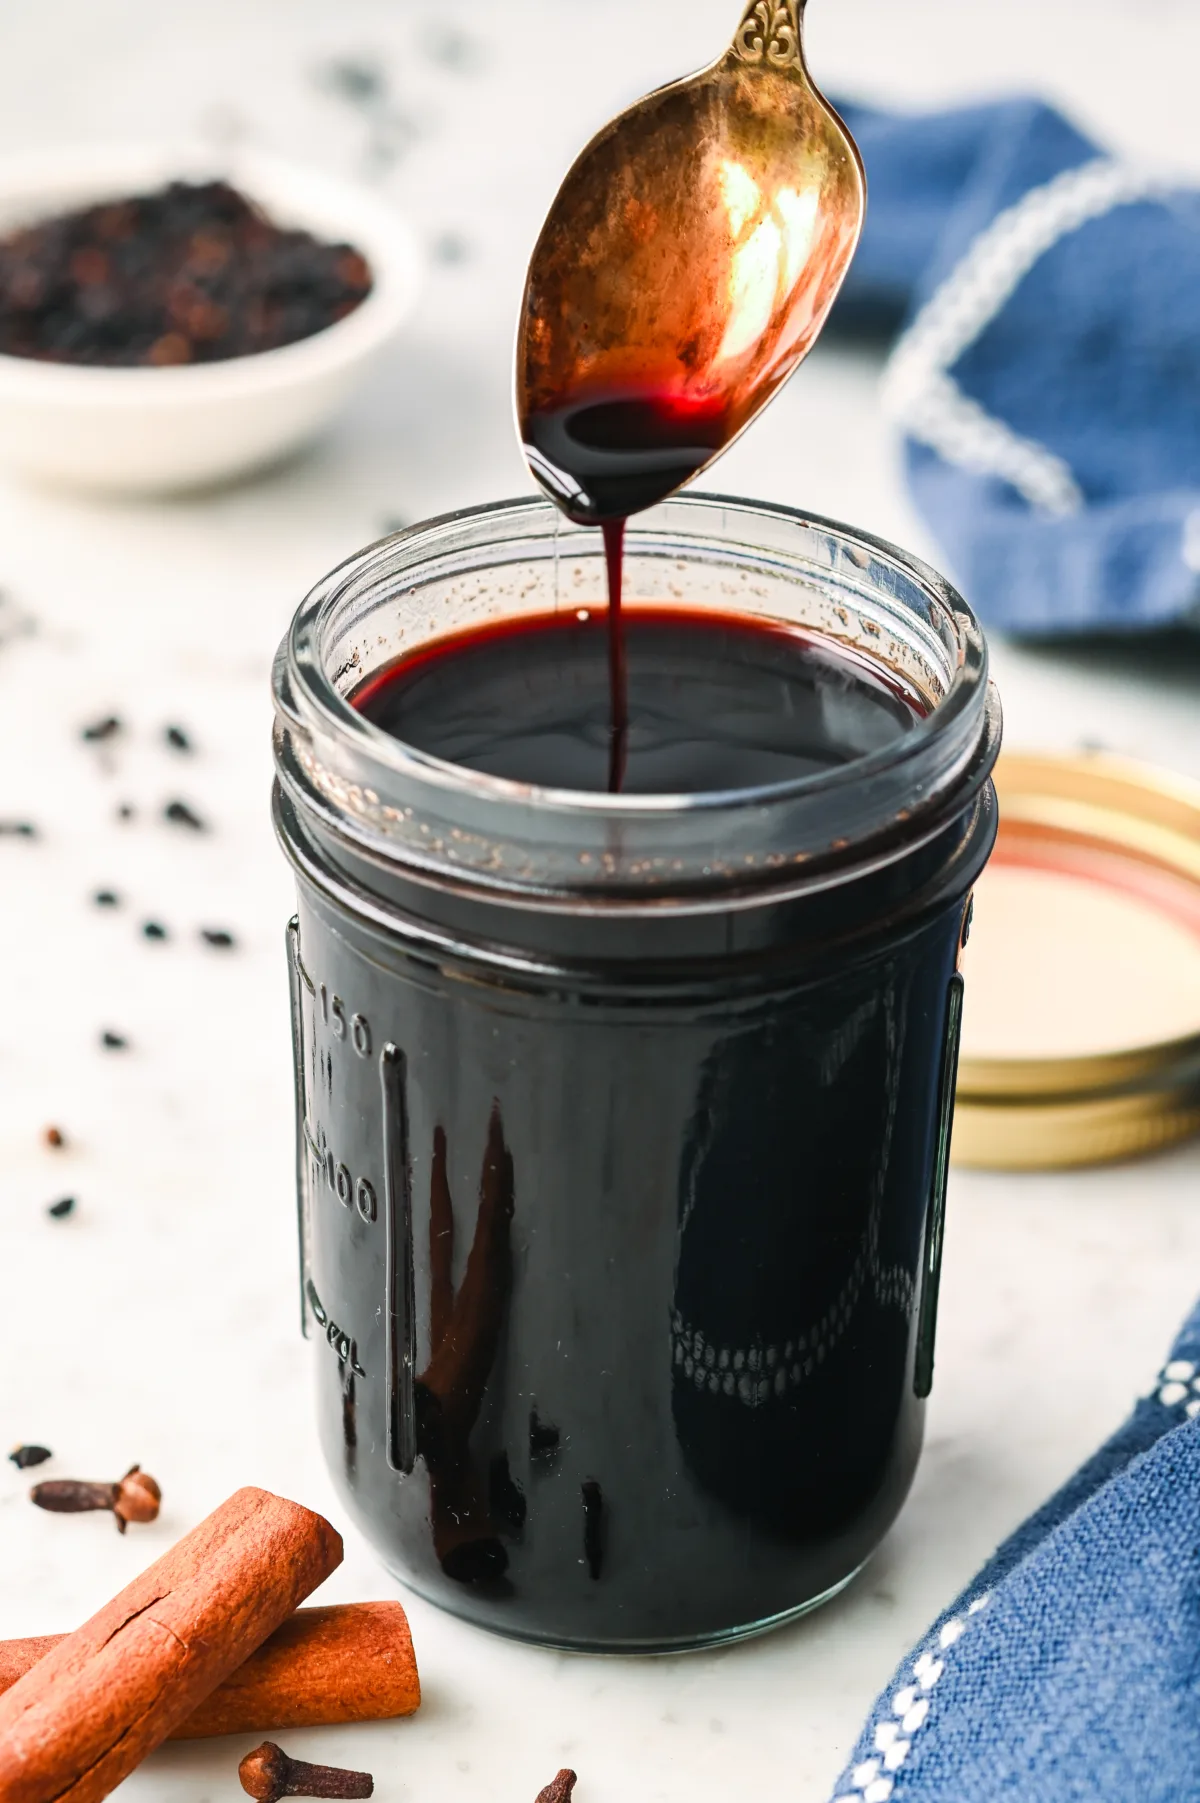
Table of Contents
Elderberries (Sambucus nigra) have been used for medicinal purposes for centuries across North America and Europe. Today, many people rely on their immune-boosting properties, antiviral properties, and the medicinal value of elderberries to help ease flu symptoms and sore throats, or simply as daily immune support during the colder months. The good news is you can easily make your own syrup with just a few simple ingredients.
This post contains affiliate links, which means I make a small commission at no extra cost to you. See my full disclosure here.
Why Make Your Own Elderberry Syrup?
- Immune-supporting benefits: Packed with antioxidants and vitamin C, elderberries are often called the holy grail of natural remedies.
- Cost-effective: Making a homemade elderberry syrup recipe is a great way to save money compared to store-bought elderberry extract.
- Flexible: Use either black elderberries harvested in late summer or organic elderberries you’ve dried and stored. you can also purchase dried elderberries, which I have done and my syrup has come out beautifully every time!
- Flavorful: With the warming touches of cinnamon sticks, whole cloves, and fresh ginger, this delicious syrup recipe is easy to take straight or stir into hot tea, or to get max benefits from the raw honey, a cold tea.
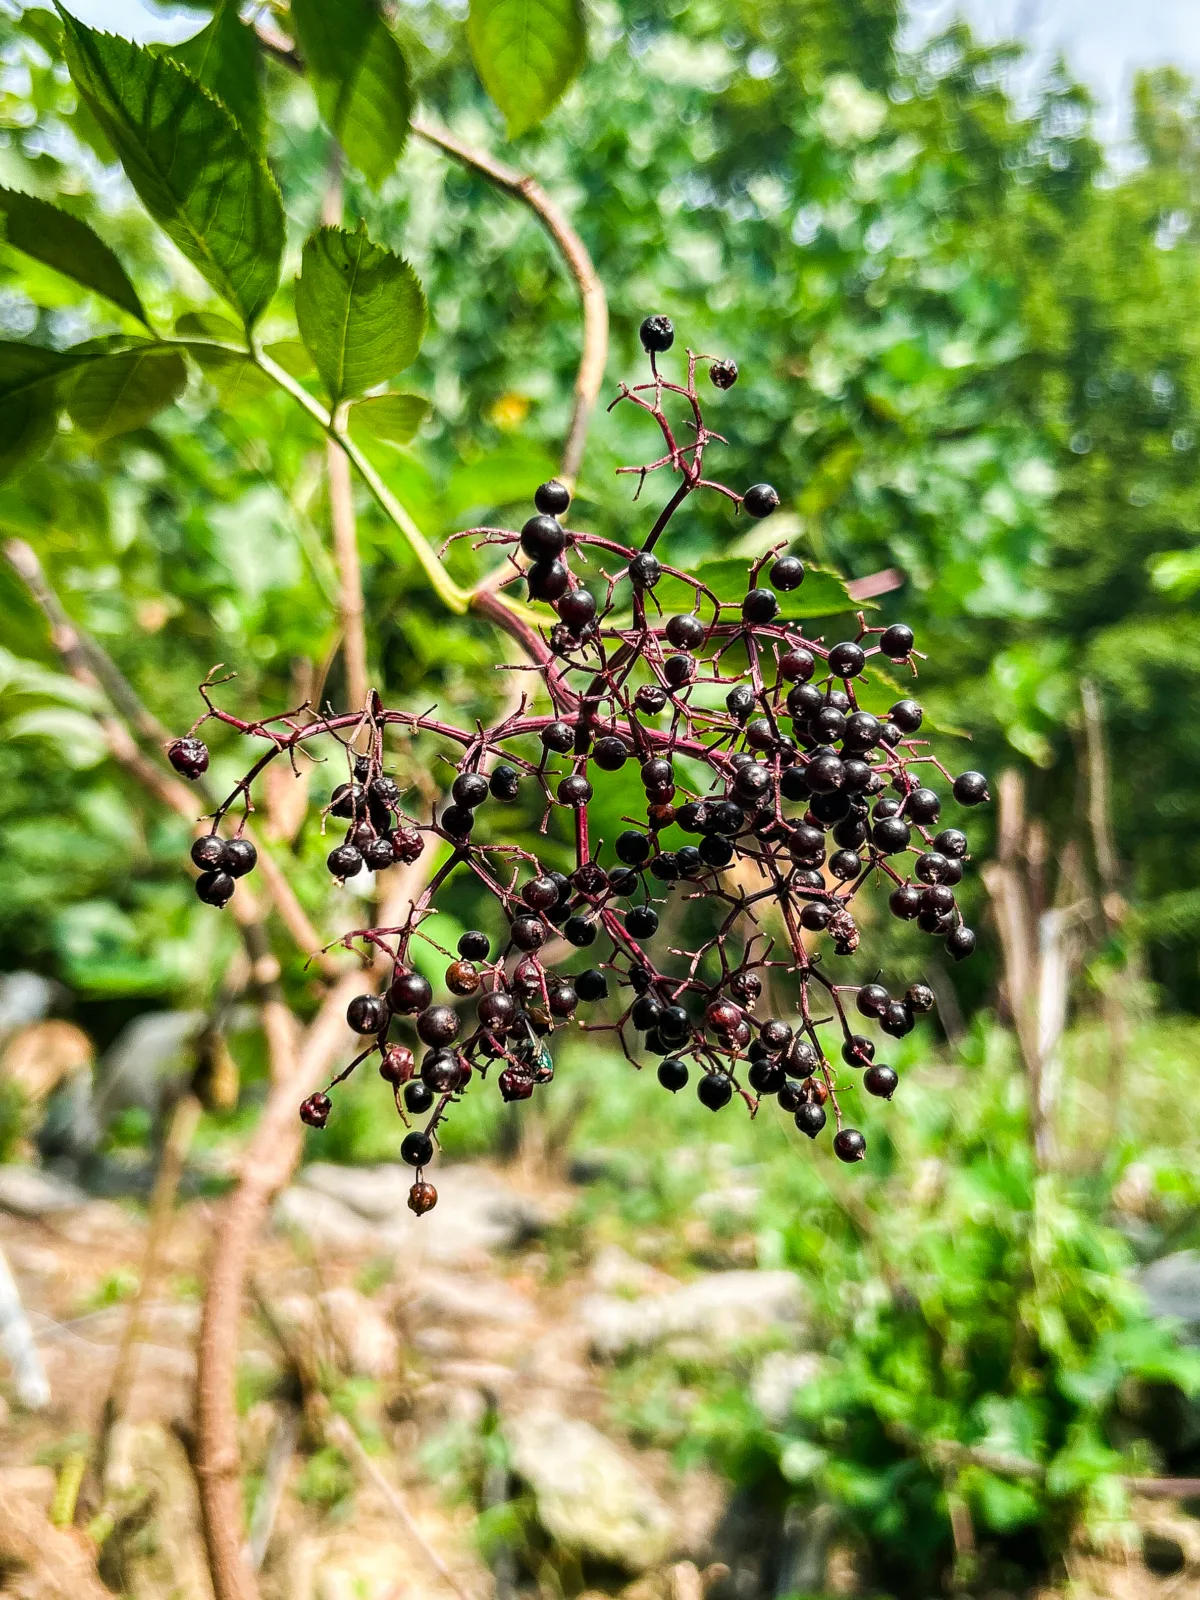
Harvesting Tips for Elderberries
If you’re picking from your own elderberry plant or wild foraging in somewhere in North America, here are a few things to keep in mind:
- Look for ripe black elderberries (Sambucus nigra). The clusters should be deep purple-black and hang heavily from the branch. Avoid unripe berries, which are green or red.
- Watch for tiny white worms. It’s common to spot them here and there inside the clusters. To remove, soak your berries in a large bowl of cold water with a small amount of salt for 20–30 minutes. The worms will usually float to the top, and you can skim them off before rinsing well in fresh cold water. This tends to happen when the elderberries have over ripened. I prefer to avoid them all together and just feed them to my chickens.
- Remove stems carefully. Elderberry stems, leaves, and seeds contain cyanogenic glycosides and should not be consumed. Strip berries gently from the stems before cooking.
- Fresh elderberries don’t store long. If you can’t use them right away, spread them on a baking sheet and freeze. Once frozen, transfer to a freezer bag until you’re ready to cook.
- Drying elderberries is another great way to preserve them for year-round use. Dried berries are convenient for recipes and have a longer shelf life than fresh.
Ingredients You’ll Need
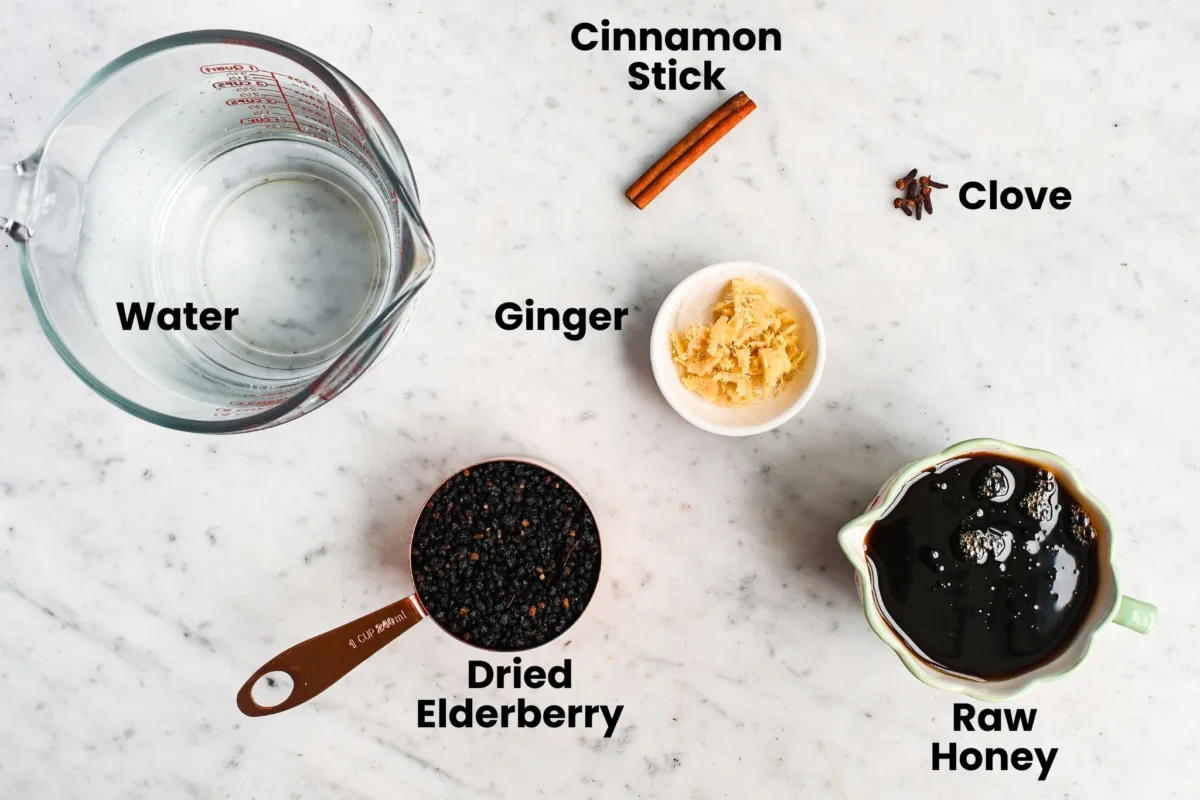
- 1 cup dried elderberries (or 2 cups fresh elderberries, stems removed)
- 4 cups water
- 1 cinnamon stick or 1 teaspoon dried cinnamon
- 4–6 whole cloves
- 1 tablespoon fresh ginger or 1 teaspoon dried ginger
- 1 cup of raw honey (or swap with maple syrup for a vegan version)
Note: This recipe is written as a more concentrated elderberry syrup (1 cup dried berries to 4 cups water). If you prefer a lighter flavor, feel free to use 5–6 cups water and then adjust sweetness to taste at the end.
Step-by-Step Instructions
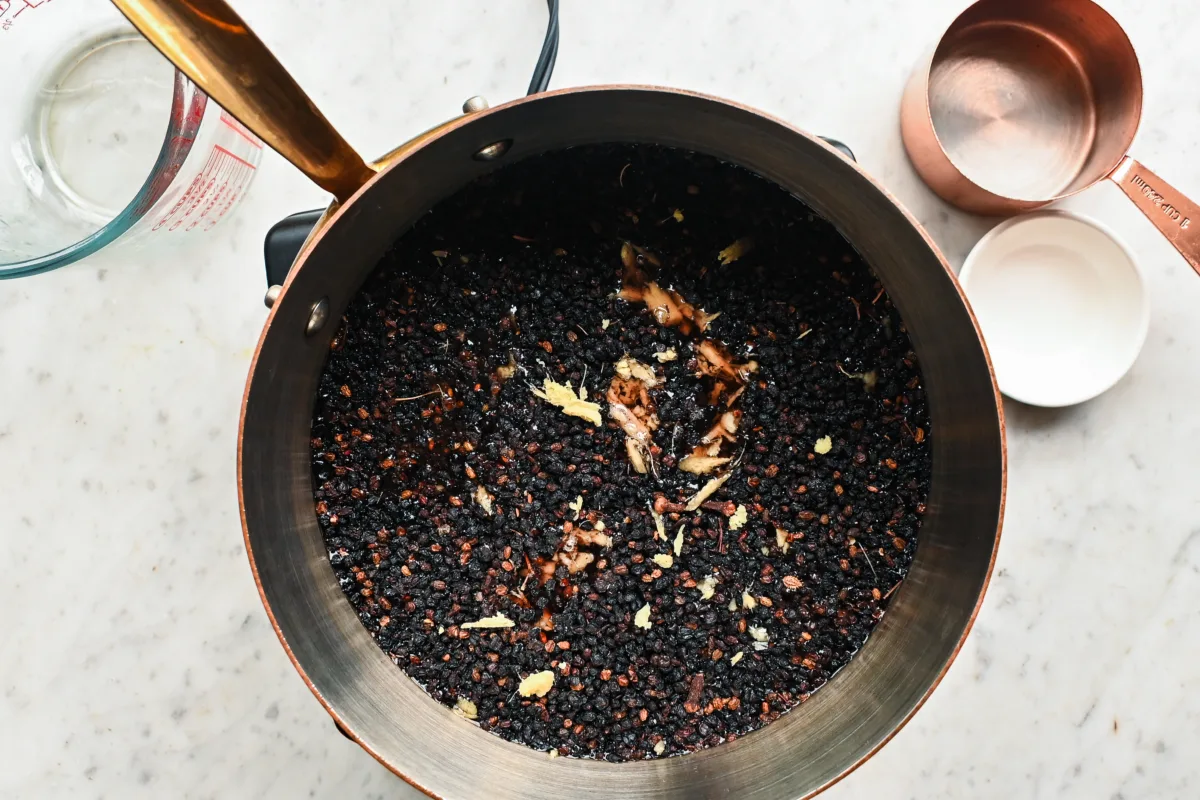
Add dried elderberries (or fresh berries) and 4 cups of water to a large pot or medium saucepan, along with the ginger and cloves. (Do not eat raw berries, unripe berries, or red elderberries — they contain cyanogenic glycosides and are not safe to eat.)
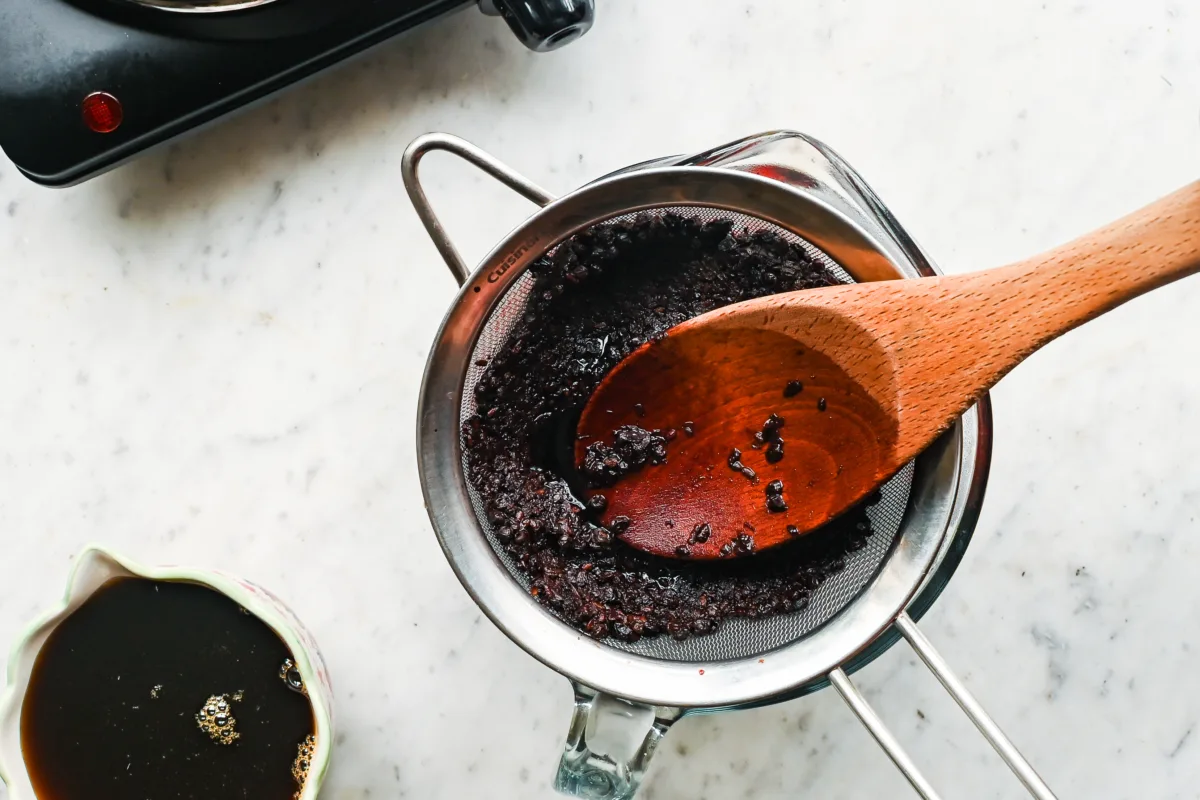
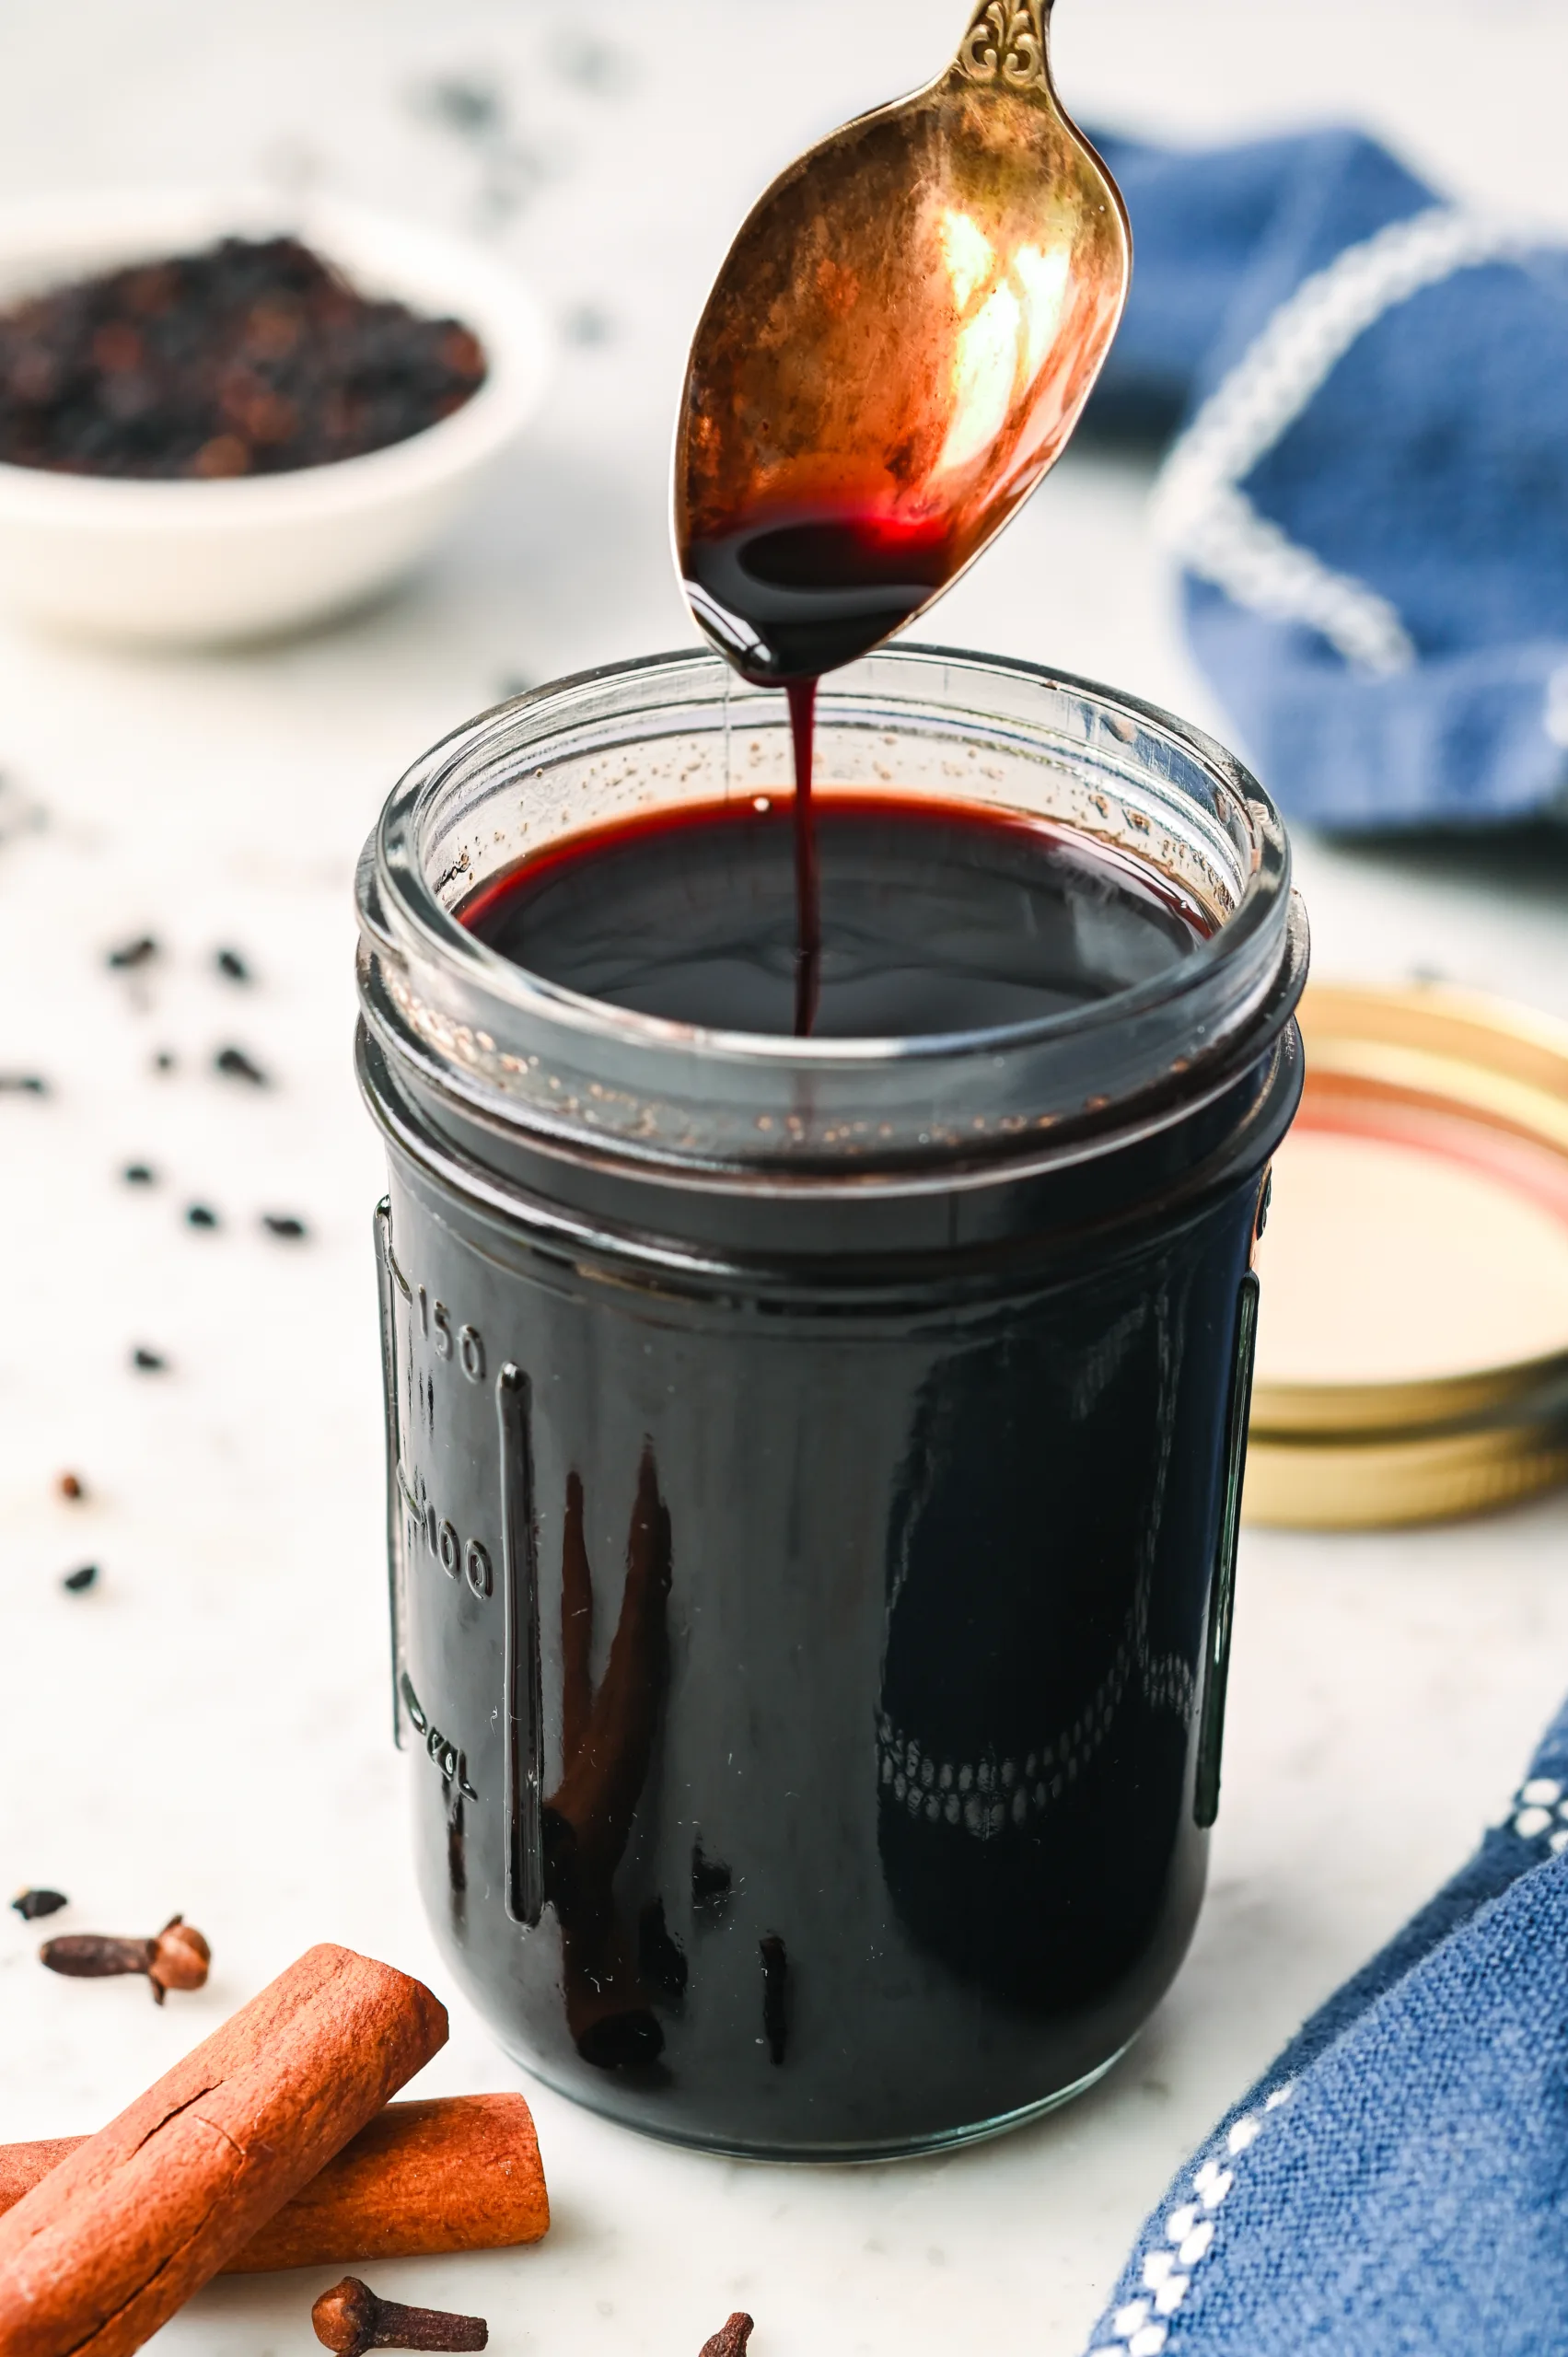
Bring to a gentle boil over medium-high heat, then reduce to medium heat and simmer until the mixture has reduced by about half. With dried elderberries: simmer 40–45 minutes. With fresh elderberries: simmer 25–30 minutes. Then, strain through a fine mesh strainer and press the berries with the back of a wooden spoon to remove all the juice.
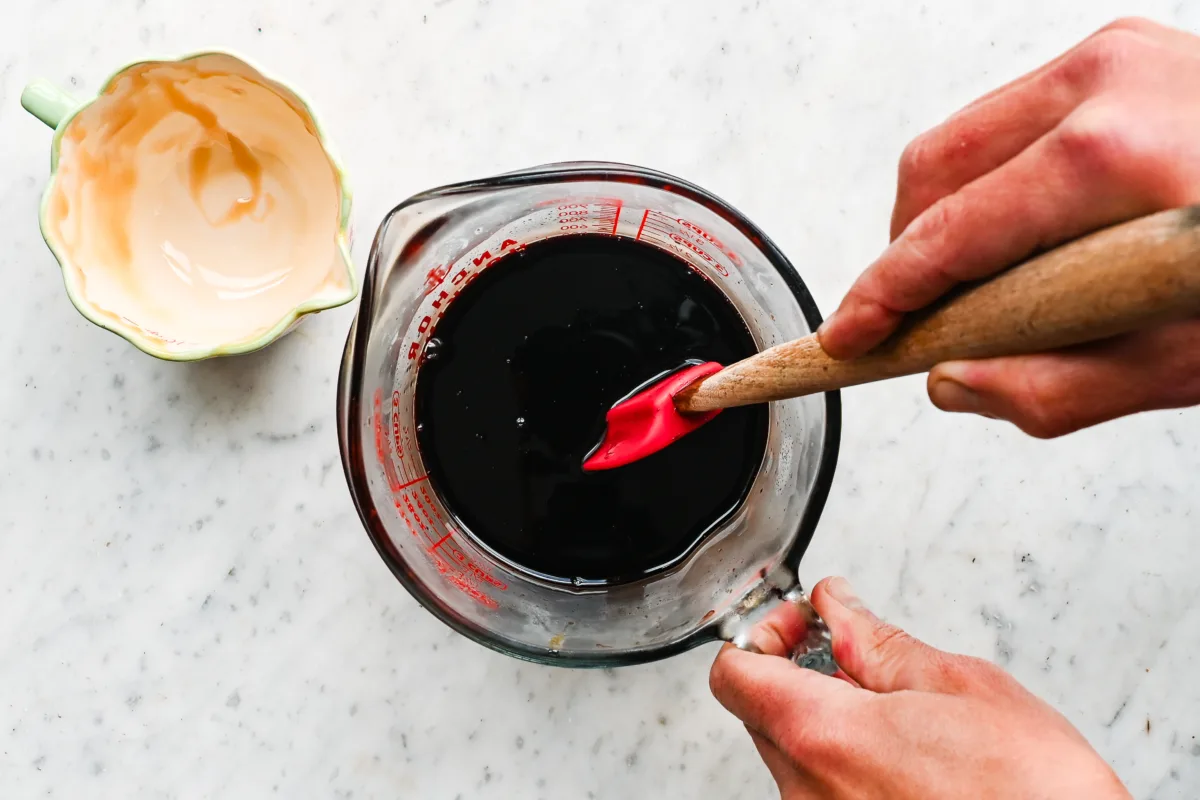
Allow the elderberry juice to cool to room temperature, then stir in the raw honey (or maple syrup). I like to place mine in the fridge for at least half an hour before adding the honey. Mixing while hot can reduce the medicinal benefits of the raw honey.
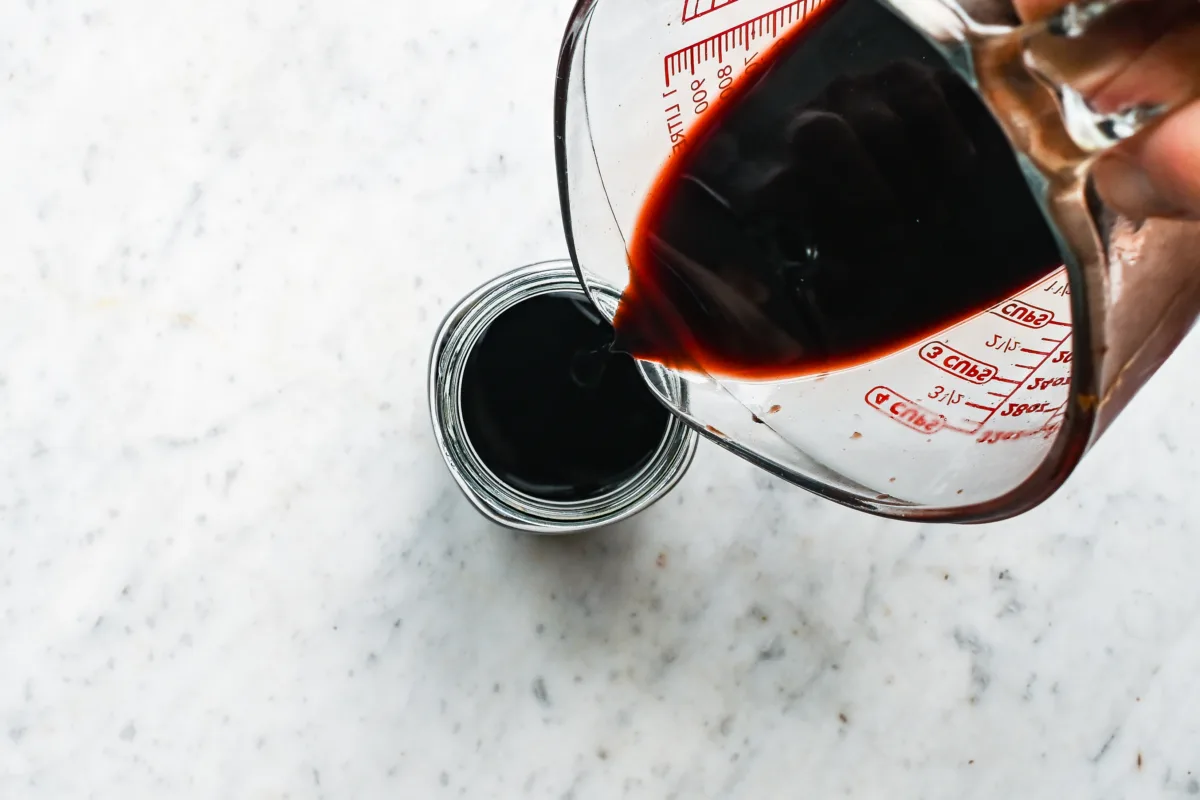
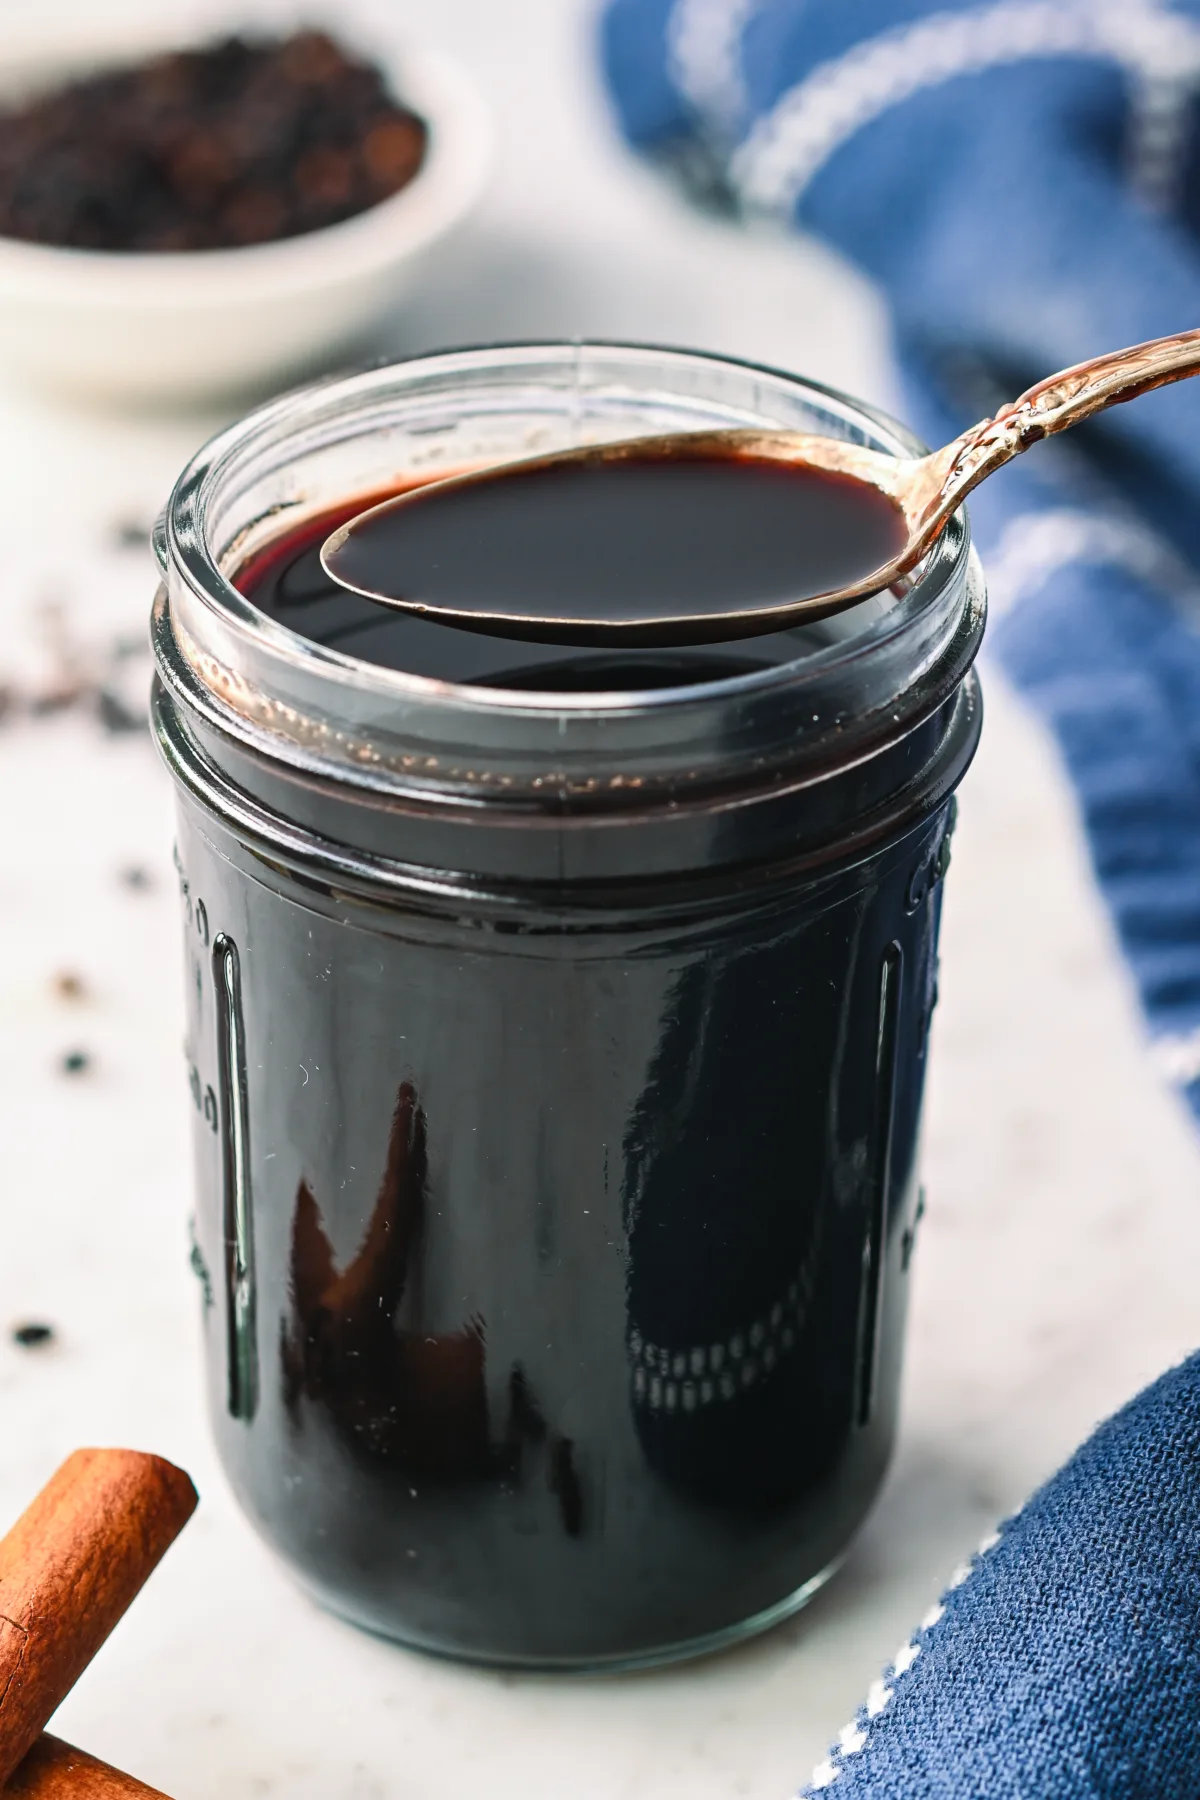
Transfer to a clean glass jar. The shelf life is about 2 months in the fridge, or freeze in small amounts for longer storage.
How to Use Elderberry Syrup
- Daily immune support: Adults take 1 tablespoon daily; children over 1 year can take 1 teaspoon.
- During flu symptoms: Take several times a day as needed.
- Try mixing into herbal teas, drizzling over yogurt, or adding to pie fillings for a touch of sweet flavor and immune-supporting benefits.
Tips
- Never consume raw elderberries or red berries — always cook first.
- If the water content seems too high (too watery) after simmering, just cook a bit longer until reduced.
- For extra warming spices, add star anise or more ground cinnamon.
- This syrup makes a wonderful addition to your own herbal remedies collection, alongside our Fermented Garlic Honey.
Frequently Asked Questions
How long does homemade elderberry syrup last?
Stored in the fridge, the shelf life is about 2 months. For longer storage, freeze in small portions.
Can I make elderberry syrup without honey?
Yes — replace the raw honey with maple syrup for a vegan version, or use sugar to create a classic simple syrup.
Are elderberries really safe?
Yes, when properly prepared. Always cook elderberries before use, and avoid raw elderberries, unripe berries, or red elderberry species. This post is for informational purposes only and should not replace medical advice from your healthcare provider or the drug administration guidelines.
Can I use more water in this elderberry syrup recipe?
Yes! This recipe uses 4 cups of water for 1 cup of dried elderberries, which makes a more concentrated syrup once it simmers down. If you’d like a lighter flavor, you can use 5–6 cups of water instead and then adjust the honey (or maple syrup) to taste at the end. Both versions work—the difference comes down to how strong you like your elderberry syrup.


Tried this recipe?
I would love to see it! Tag me on Instagram @idiesfarm and #idiesfarm so I can share your beautiful creation!
Elderberry Syrup Recipe (with Fresh or Dried Elderberries)
Ingredients
- 1 cup dried elderberries or 2 cups fresh elderberries, stems removed
- 4 cups water
- 1 cinnamon stick or 1 teaspoon dried cinnamon
- 4–6 whole cloves
- 1 tablespoon fresh ginger or 1 teaspoon dried ginger
- 1 cup raw honey or swap for maple syrup for a vegan version
Instructions
- Add dried elderberries (or fresh berries) and 4 cups of water to a large pot or medium saucepan, along with the ginger and cloves. (Do not eat raw berries, unripe berries, or red elderberries — they contain cyanogenic glycosides and are not safe to eat.) Bring to a gentle boil over medium-high heat, then reduce to medium heat and simmer until the mixture has reduced by about half.
- Bring to a gentle boil over medium-high heat, then reduce to medium heat and simmer until the mixture has reduced by about half. With dried elderberries: simmer 40–45 minutes. With fresh elderberries: simmer 25–30 minutes. Then, strain through a fine mesh strainer and press berries with the back of a wooden spoon to remove all the juice.
- Allow the elderberry juice to cool to room temperature, then stir in the raw honey (or maple syrup). I like to place mine in the fridge for at least half an hour before adding the honey. Mixing while hot can reduce the medicinal benefits of the raw honey.
- Transfer to a clean glass jar. The shelf life is about 2 months in the fridge, or freeze in small amounts for longer storage.
Notes
Note: This recipe is written as a more concentrated elderberry syrup (1 cup dried berries to 4 cups water). If you prefer a lighter flavor, feel free to use 5–6 cups water and then adjust sweetness to taste at the end.
How to Use Elderberry Syrup
-
- Daily immune support: Adults take 1 tablespoon daily; children over 1 year can take 1 teaspoon.
-
- During flu symptoms: Take several times a day as needed.
-
- Try mixing into herbal teas, drizzling over yogurt, or adding to pie fillings for a touch of sweet flavor and immune-supporting benefits.
Tips
-
- Never consume raw elderberries or red berries — always cook first.
-
- If the water content seems too high (too watery) after simmering, just cook a bit longer until reduced.
-
- For extra warming spices, add star anise or more ground cinnamon.
-
- This syrup makes a wonderful addition to your own herbal remedies collection, alongside our Fermented Garlic Honey.
Disclaimer
This elderberry syrup recipe is provided for informational purposes only and is not intended as medical advice. The health benefits of elderberry and other medicinal herbs are still being researched, and statements made here have not been evaluated by the Food and Drug Administration. Elderberries contain cyanogenic glycosides and should never be consumed raw; cooking them removes these compounds. Always consult your healthcare provider before using any herbal remedies, especially if you are pregnant, nursing, giving to children, or have underlying health conditions. The author of this blog is not responsible for any adverse effects or consequences resulting from the use of recipes, suggestions, or procedures described here.


Suhlest says
Four cups was not enough water for 1 cup of dried elderberries.
Stephanie says
Thanks so much for your feedback! This recipe is written to be more concentrated since the liquid reduces quite a bit as it simmers, which makes the syrup both potent and flavorful. If you prefer a lighter syrup, you can absolutely add more water (5–6 cups instead of 4) and then sweeten to taste at the end. Both ways will work—it just depends on how strong you’d like your elderberry syrup.
Kathy says
Do you have any tips for getting rid of all of the stems? I’m having my first decent harvest (yay!) but do I need to get every teeny tiny stick? Thanks.
Stephanie says
Congratulations on your harvest—that’s exciting! 🎉 A few tiny stems won’t hurt since they’ll get strained out after simmering, but you’ll want to remove as many larger ones as possible. Don’t stress about every single teeny tiny stick; just do your best and strain well at the end.