
Learning how to make candles at home is a simple and practical skill, especially when you start with beeswax and a mason jar. Beeswax is a natural wax that melts beautifully, gives off a warm glow, and makes homemade candles feel simple and useful. This mason jar candle is a good beginner project because it uses just a few supplies, does not require candle molds, and creates a sturdy container candle you can use or give as a gift.
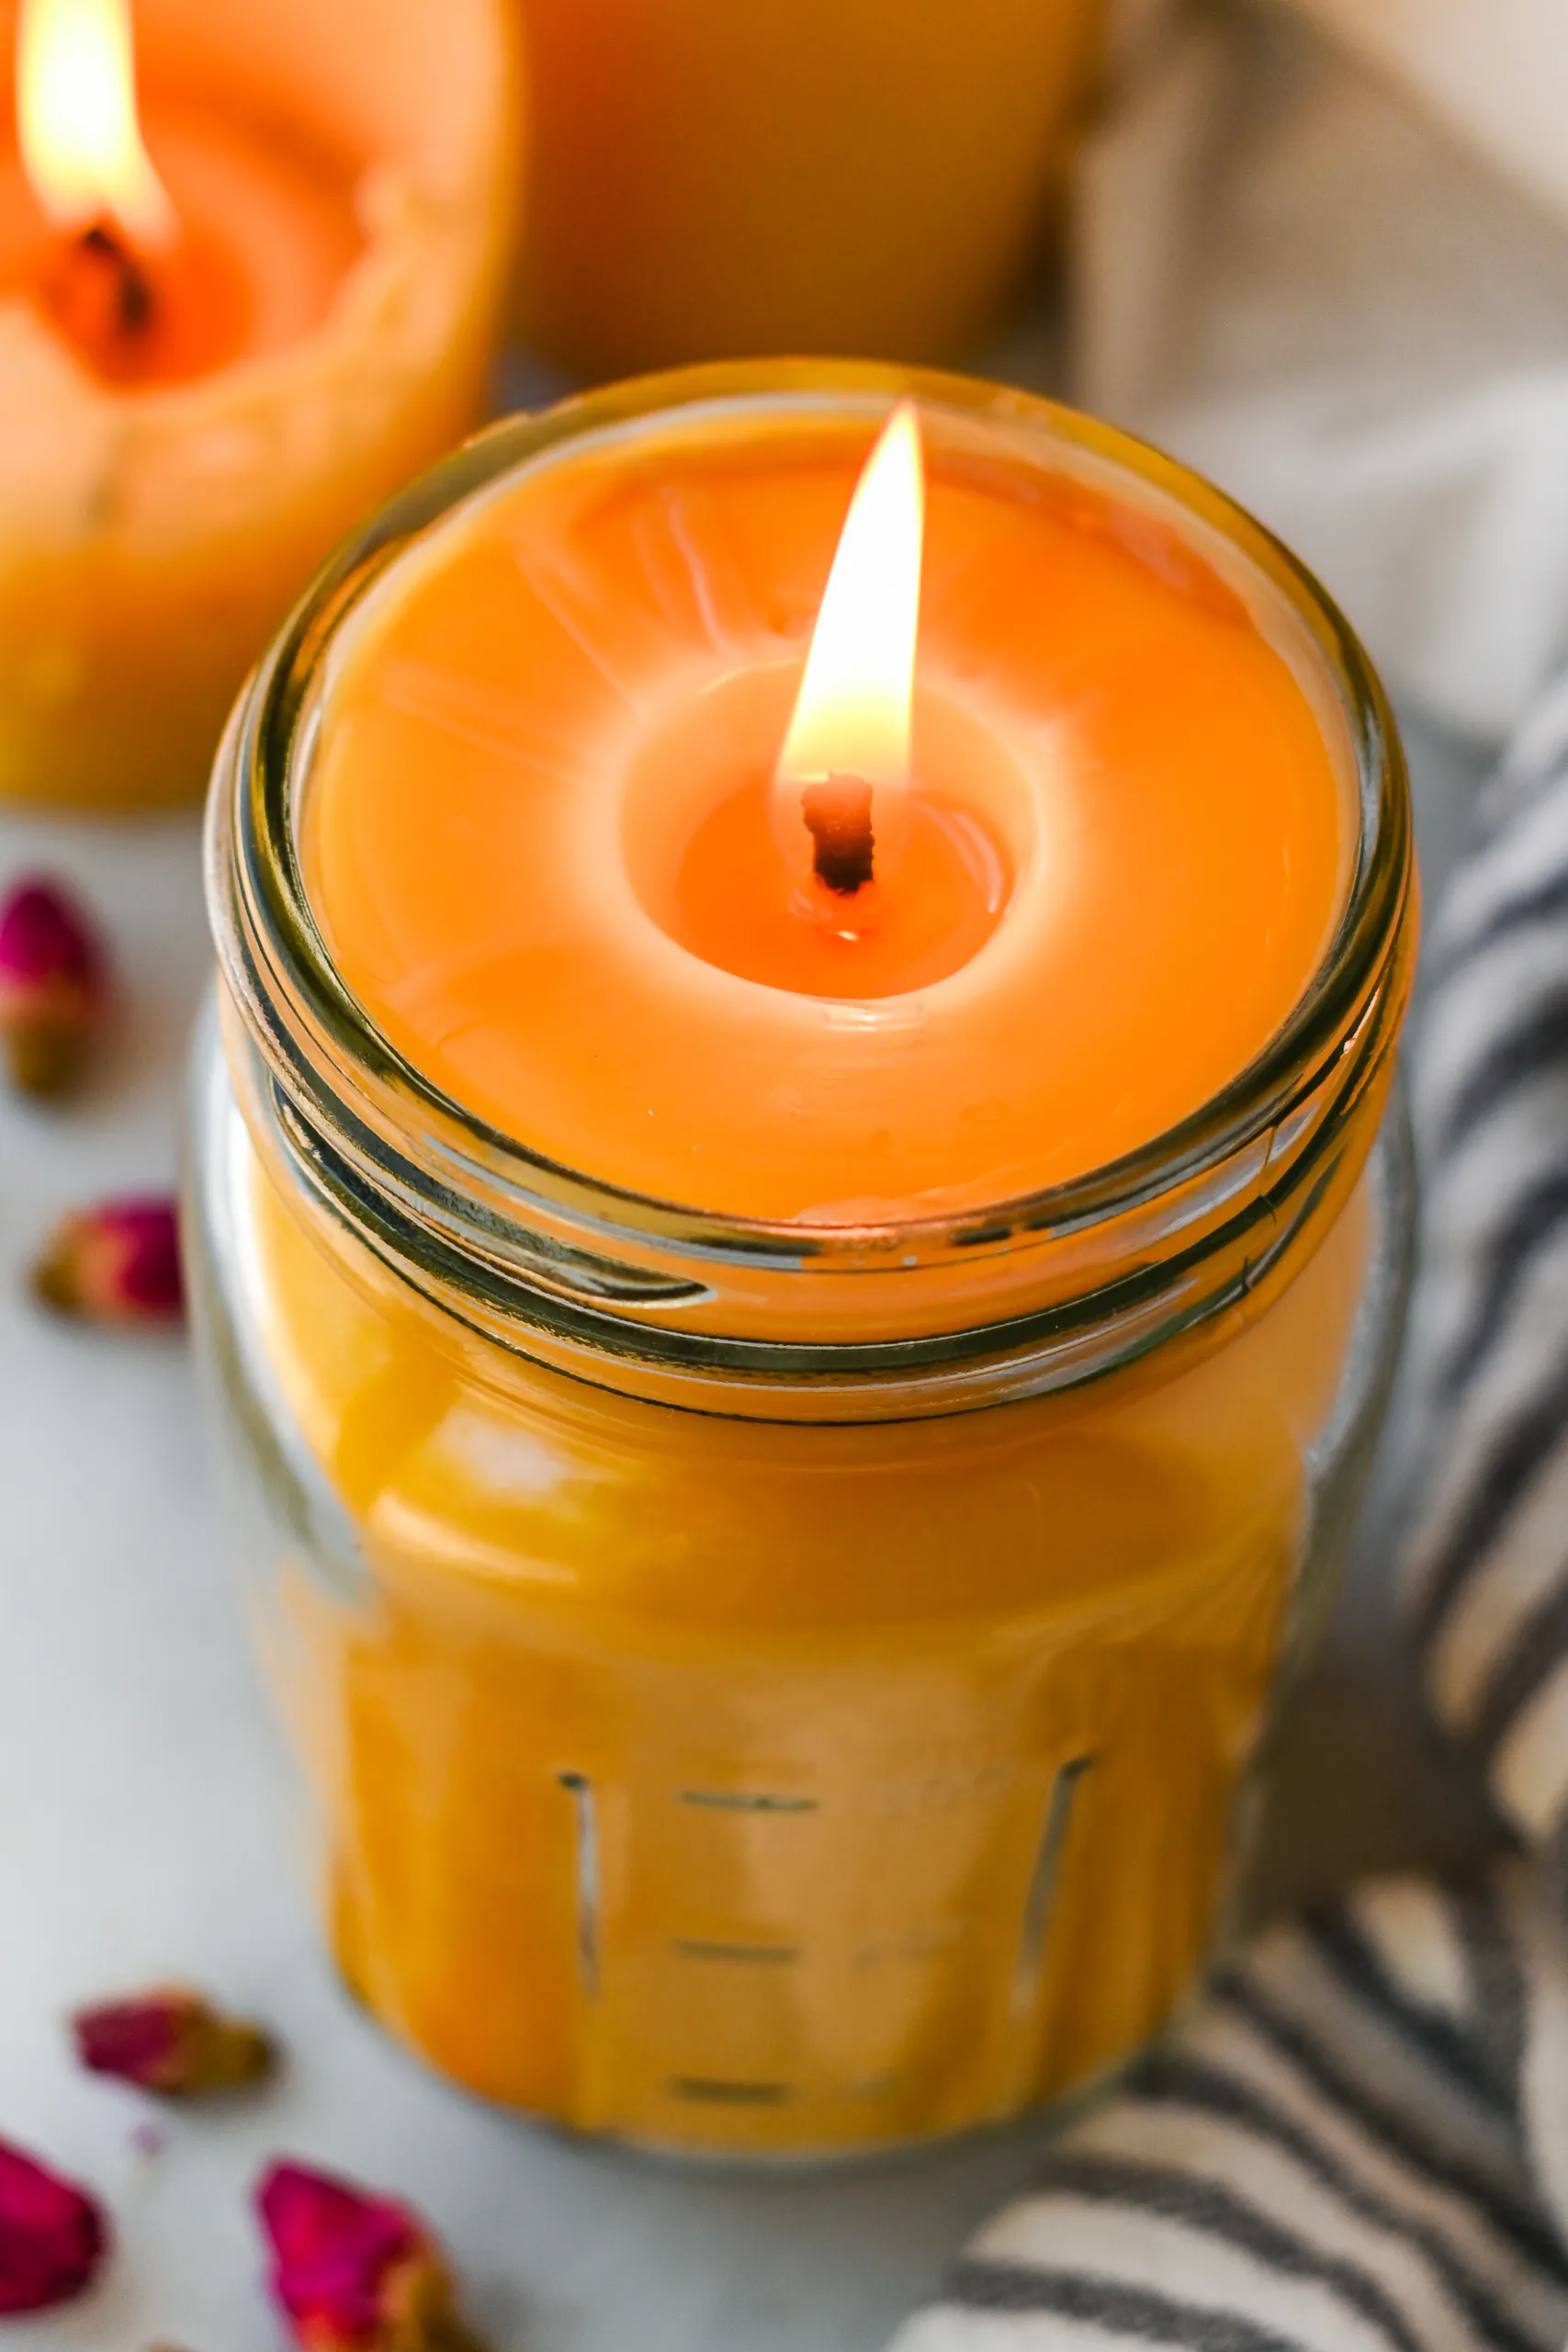
Table of Contents
This post contains affiliate links, which means I make a small commission at no extra cost to you. See my full disclosure here.
If you want to learn how to make candles with beeswax, start by melting beeswax gently in a double boiler, securing a wick in the center of a mason jar, pouring the melted wax into the jar, and letting the candle cool completely before trimming the wick. This method is beginner-friendly and works well for homemade candles using natural wax. You can leave the candle fragrance-free or add a small amount of your favorite essential oil.
I like this project because it keeps candle making simple. There are many ways to make wax candles, including poured candles, rolled candles, and tallow candles, but a beeswax mason jar candle is one of the easiest places to start. If you want to try other methods later, you may also like my guides on How to Make Beeswax Candles at Home for Beginners, How to Make Old-Fashioned Rolled Beeswax Candles, and How to Make Natural Candles From Beef Tallow.
Quick Look at This Project
Prep time: 10 minutes
Melt time: 15 to 20 minutes
Total time: About 2 to 3 hours, including cooling time
Servings: 1 mason jar candle
Texture: Smooth, firm beeswax candle in a jar
Best for: Beginner candle making, homemade candles, and simple natural wax candles
Why I Like Making Beeswax Mason Jar Candles
I like making beeswax candles in mason jars because the process is simple and the finished candle feels sturdy and practical. The jar holds the wax in place, so there is no need to remove the candle from a mold or worry about the shape setting correctly.
This is also a good way to begin making candles at home if you are not ready for a more detailed candle project. Once you learn how to melt the wax, center the wick, and pour the candle, the same basic process can be used for many other container candles.
Beeswax, Soy Wax, and Paraffin Wax
There are several types of wax used in candle making, including beeswax, soy wax, and paraffin wax. Beeswax is a natural wax made by honeybees and is my favorite choice for this project because it is firm, slow-burning, and naturally beautiful.
Soy wax is also popular for homemade candles, especially scented candles, because it works well in jars and holds fragrance oils nicely. A soy candle usually has a softer texture than a beeswax candle. Paraffin wax is another common candle wax, but it is not the wax I use for this project.
For this mason jar candle recipe, beeswax keeps the process simple and gives the finished candle a warm, golden look. If you are comparing different wax candles, beeswax is a wonderful option when you want a more traditional natural wax candle.
Equipment
- double boiler or heat-safe melting pot set over simmering water
- clean mason jar
- cotton candle wick
- wick sticker, hot glue, or another way to secure the wick
- wick holder, pencil, or clothespin
- scissors
- heat-safe spoon or stirrer
- towel or heat-safe surface
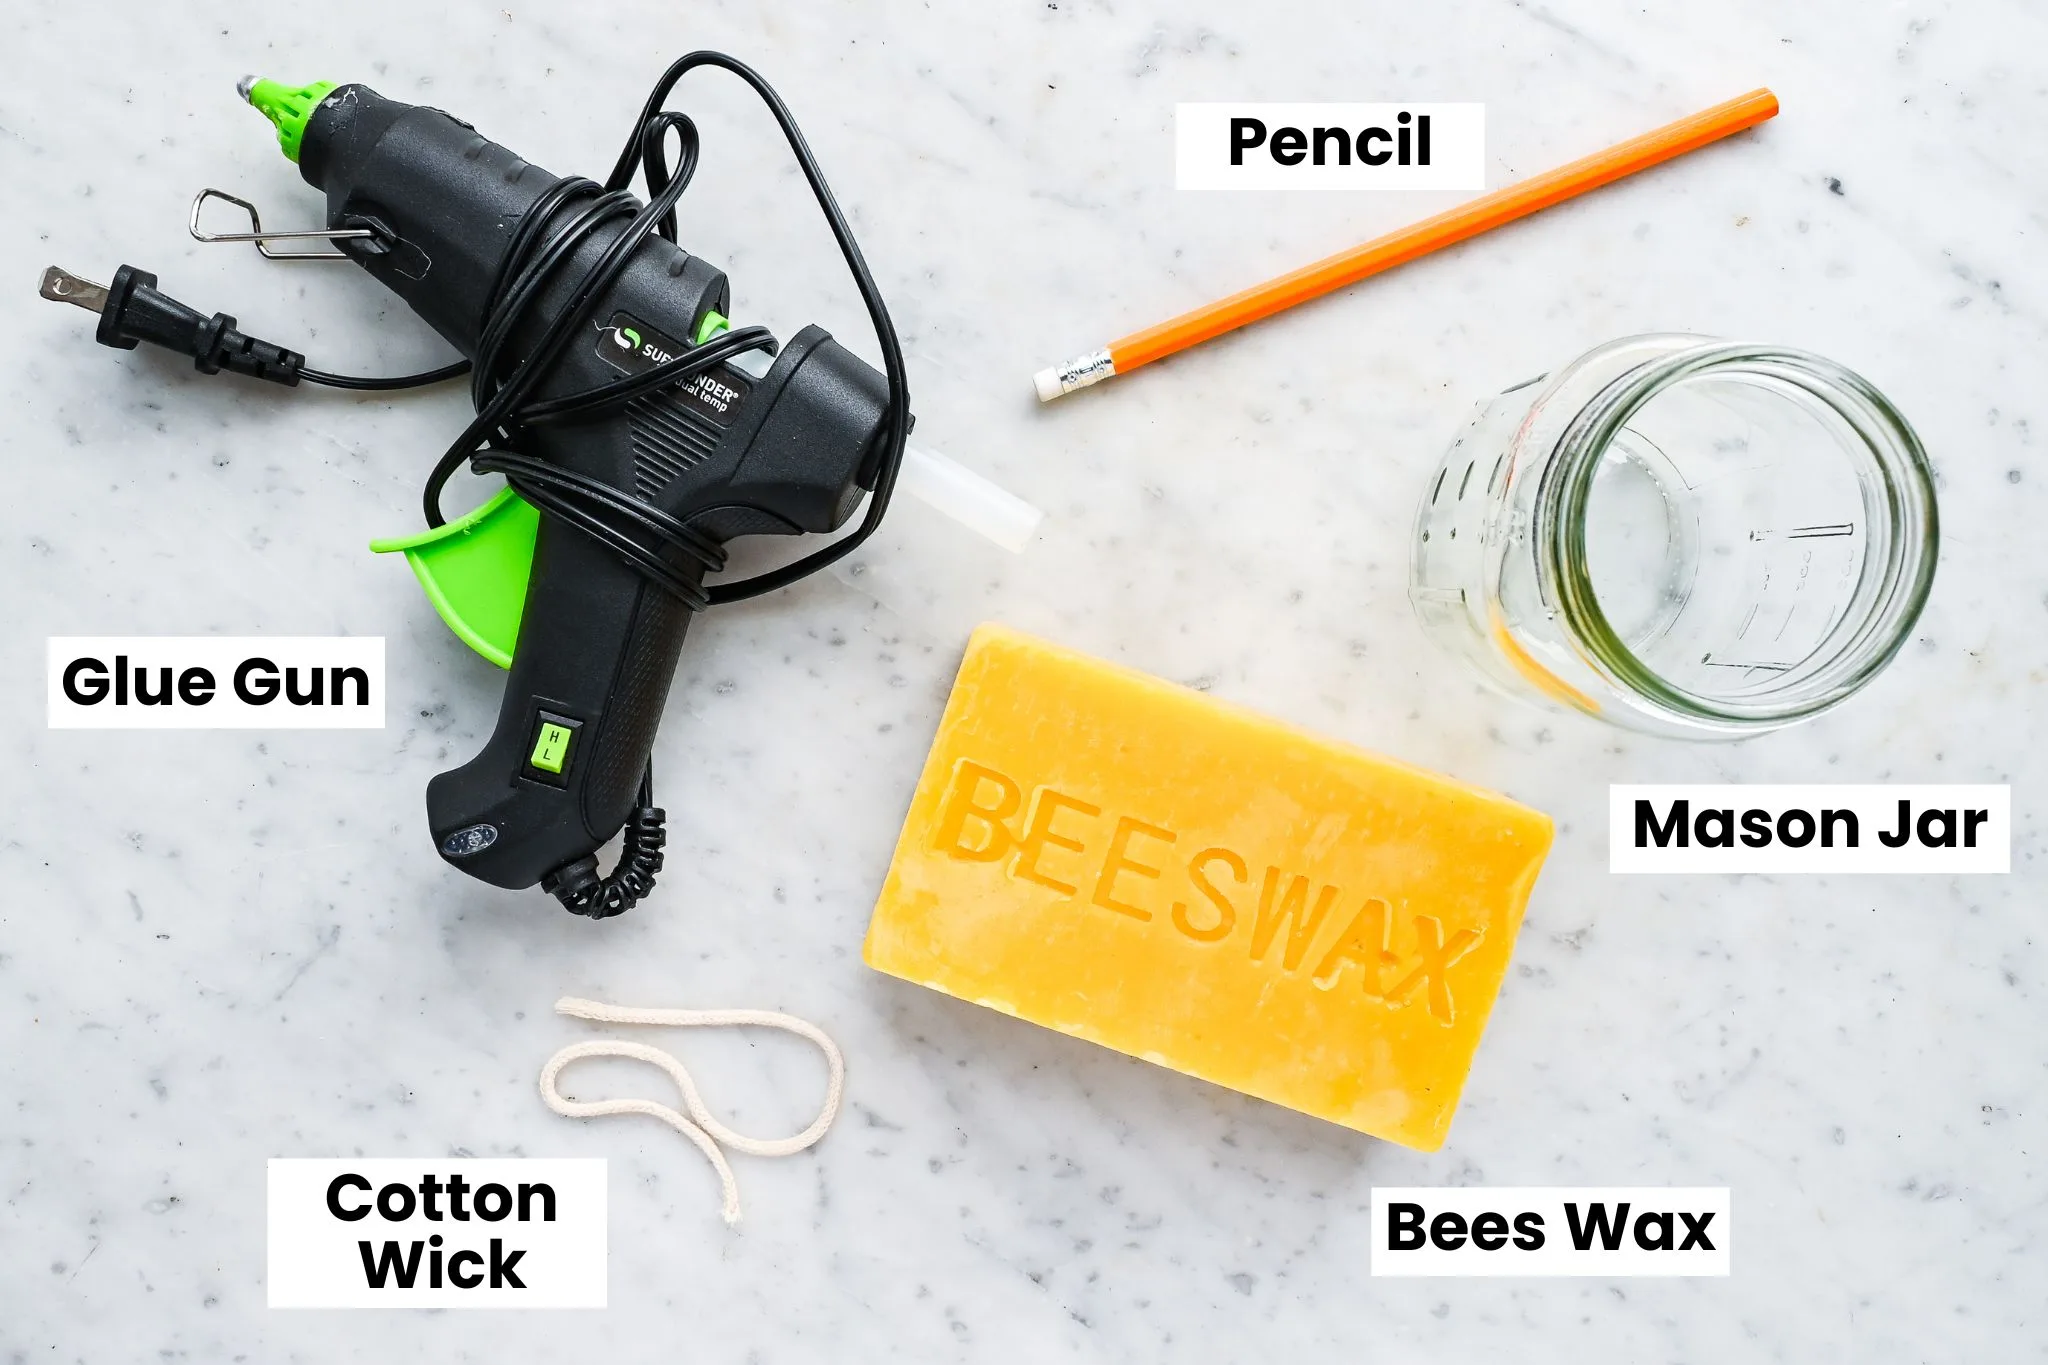
Supplies
- 12 to 14 ounces beeswax pellets, chunks, or grated beeswax
- 1 pint-size mason jar
- cotton wick sized for a 2.75- to 3-inch beeswax container candle
- wick sticker or hot glue
- essential oil, optional
- pencil
For this recipe, I recommend using a pint-size mason jar. It is a good beginner size and gives you a sturdy beeswax candle without making the project too large. Choose a cotton wick sized for a 2.75- to 3-inch container candle. A #4 square braid wick may work as a starting point for beeswax, but wick sizing can vary by brand, so it is always best to do a small test burn before making several candles.
How to Make Candles with Beeswax in a Mason Jar
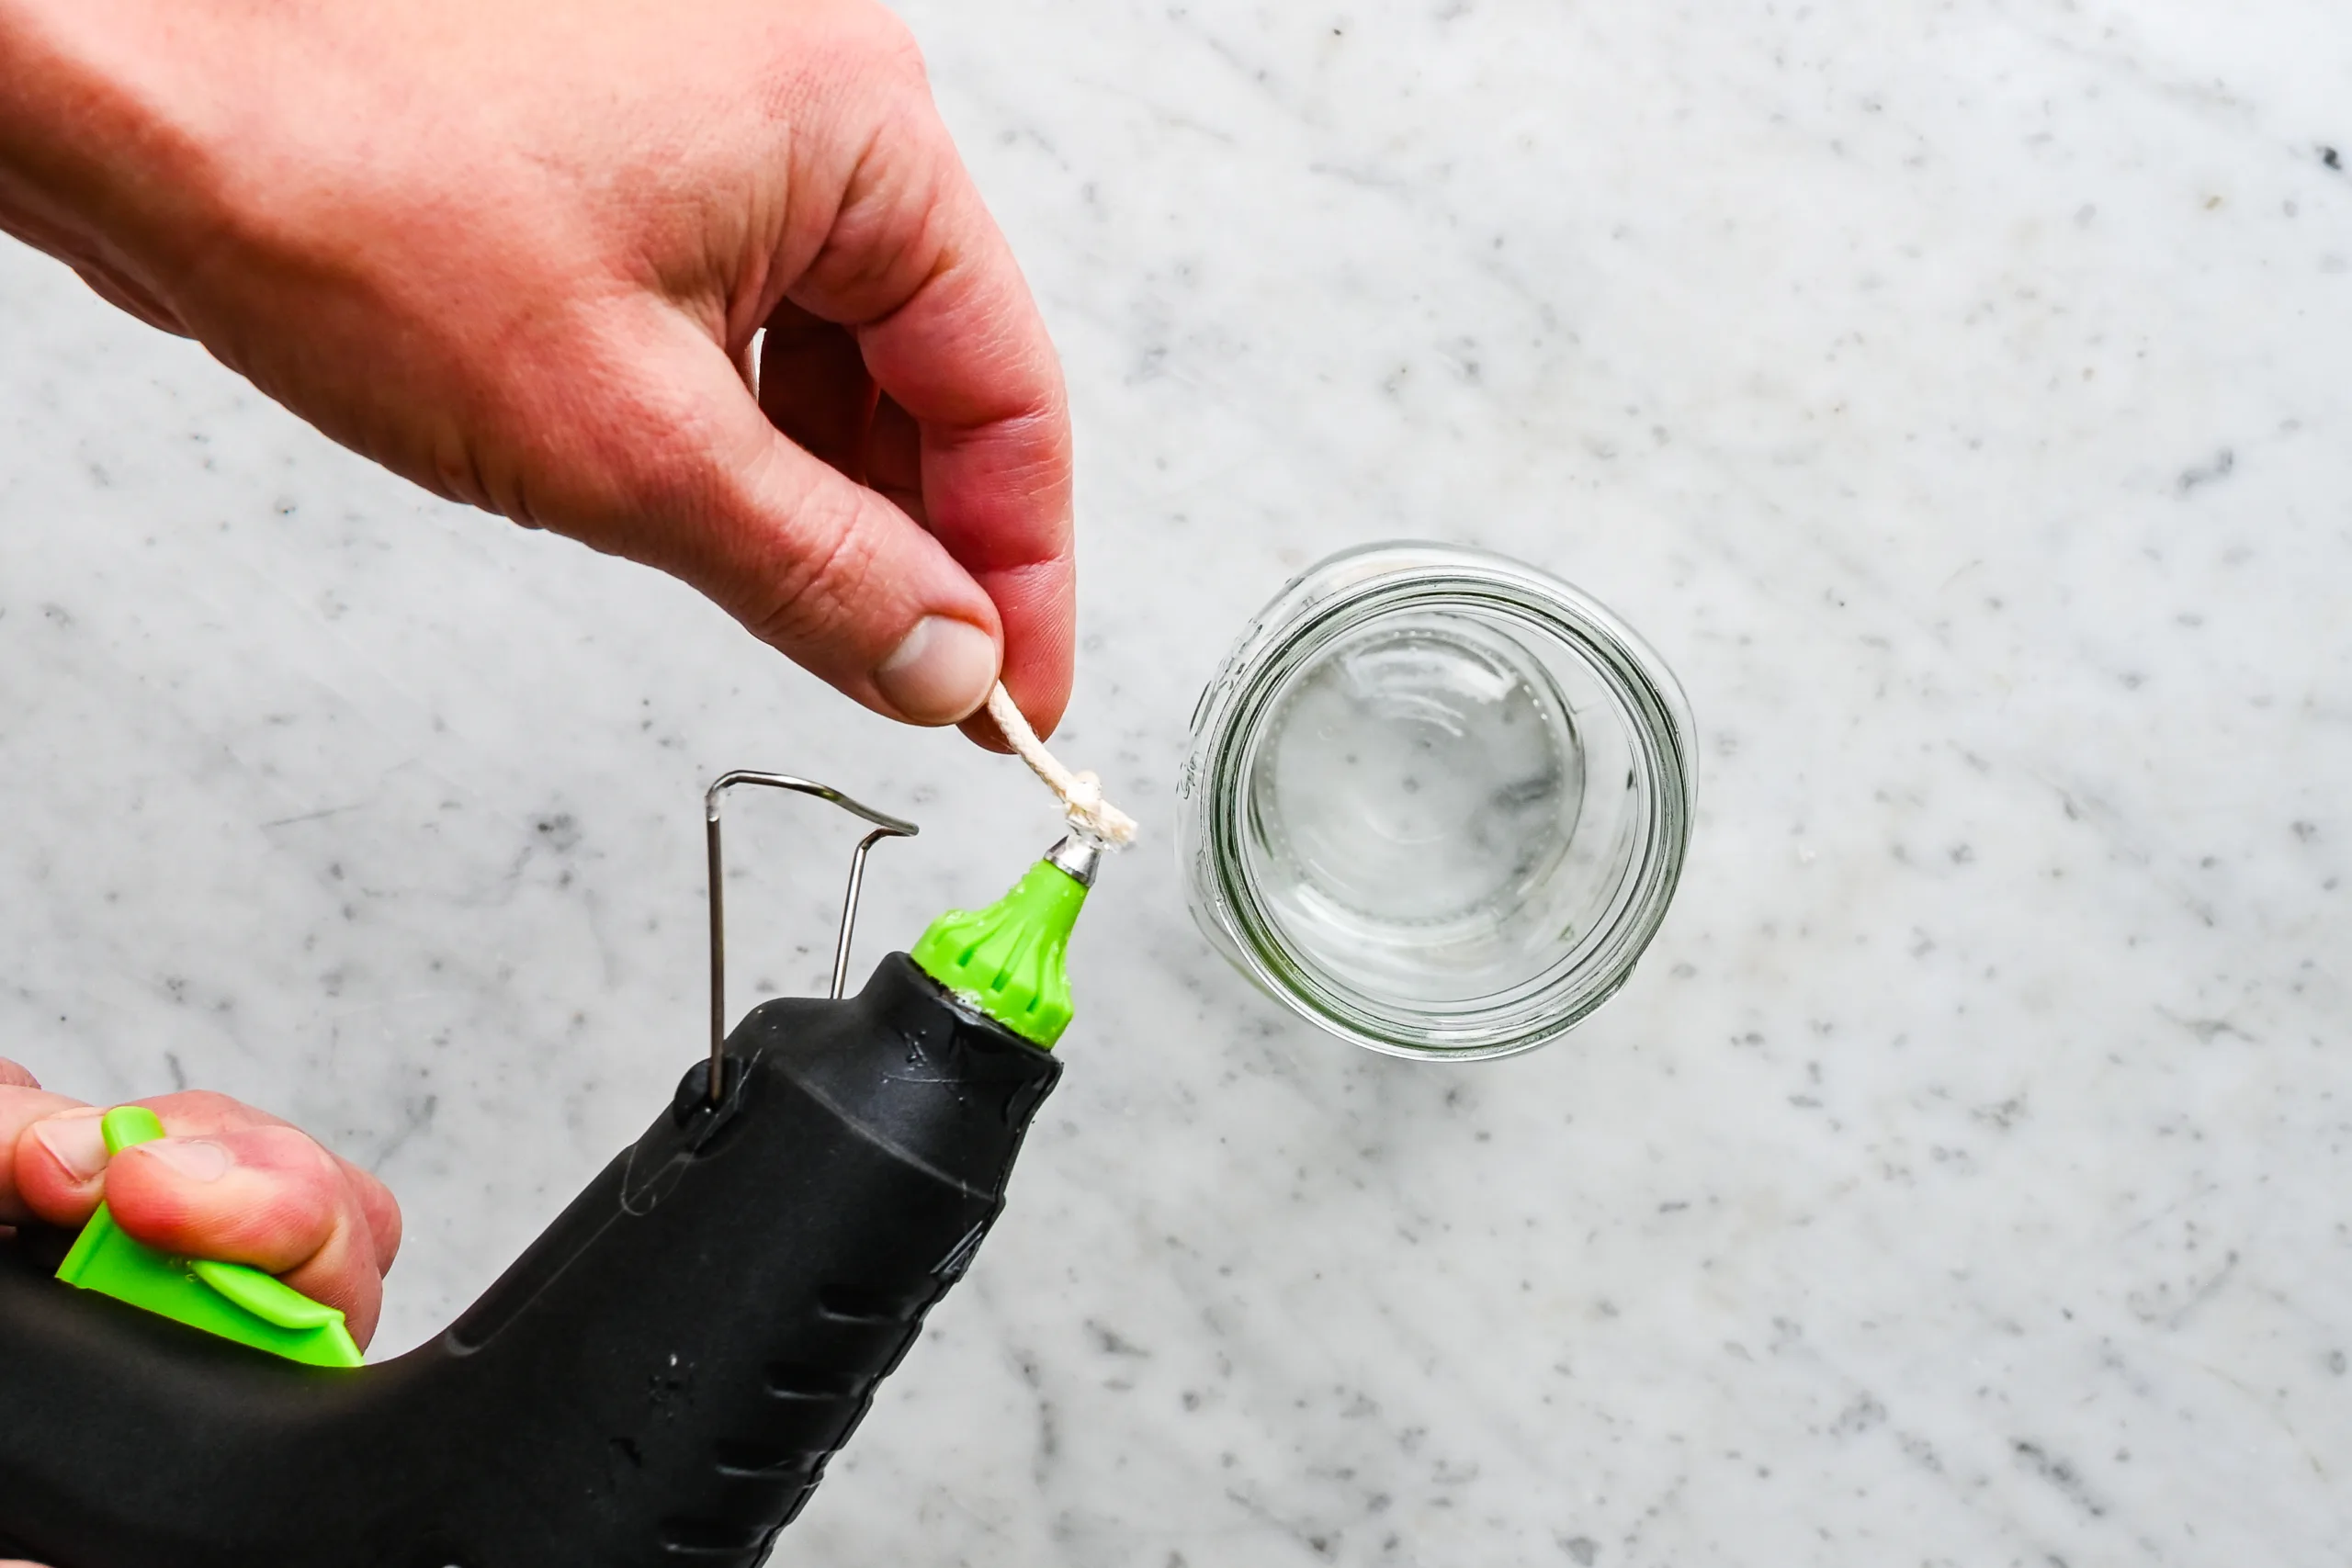
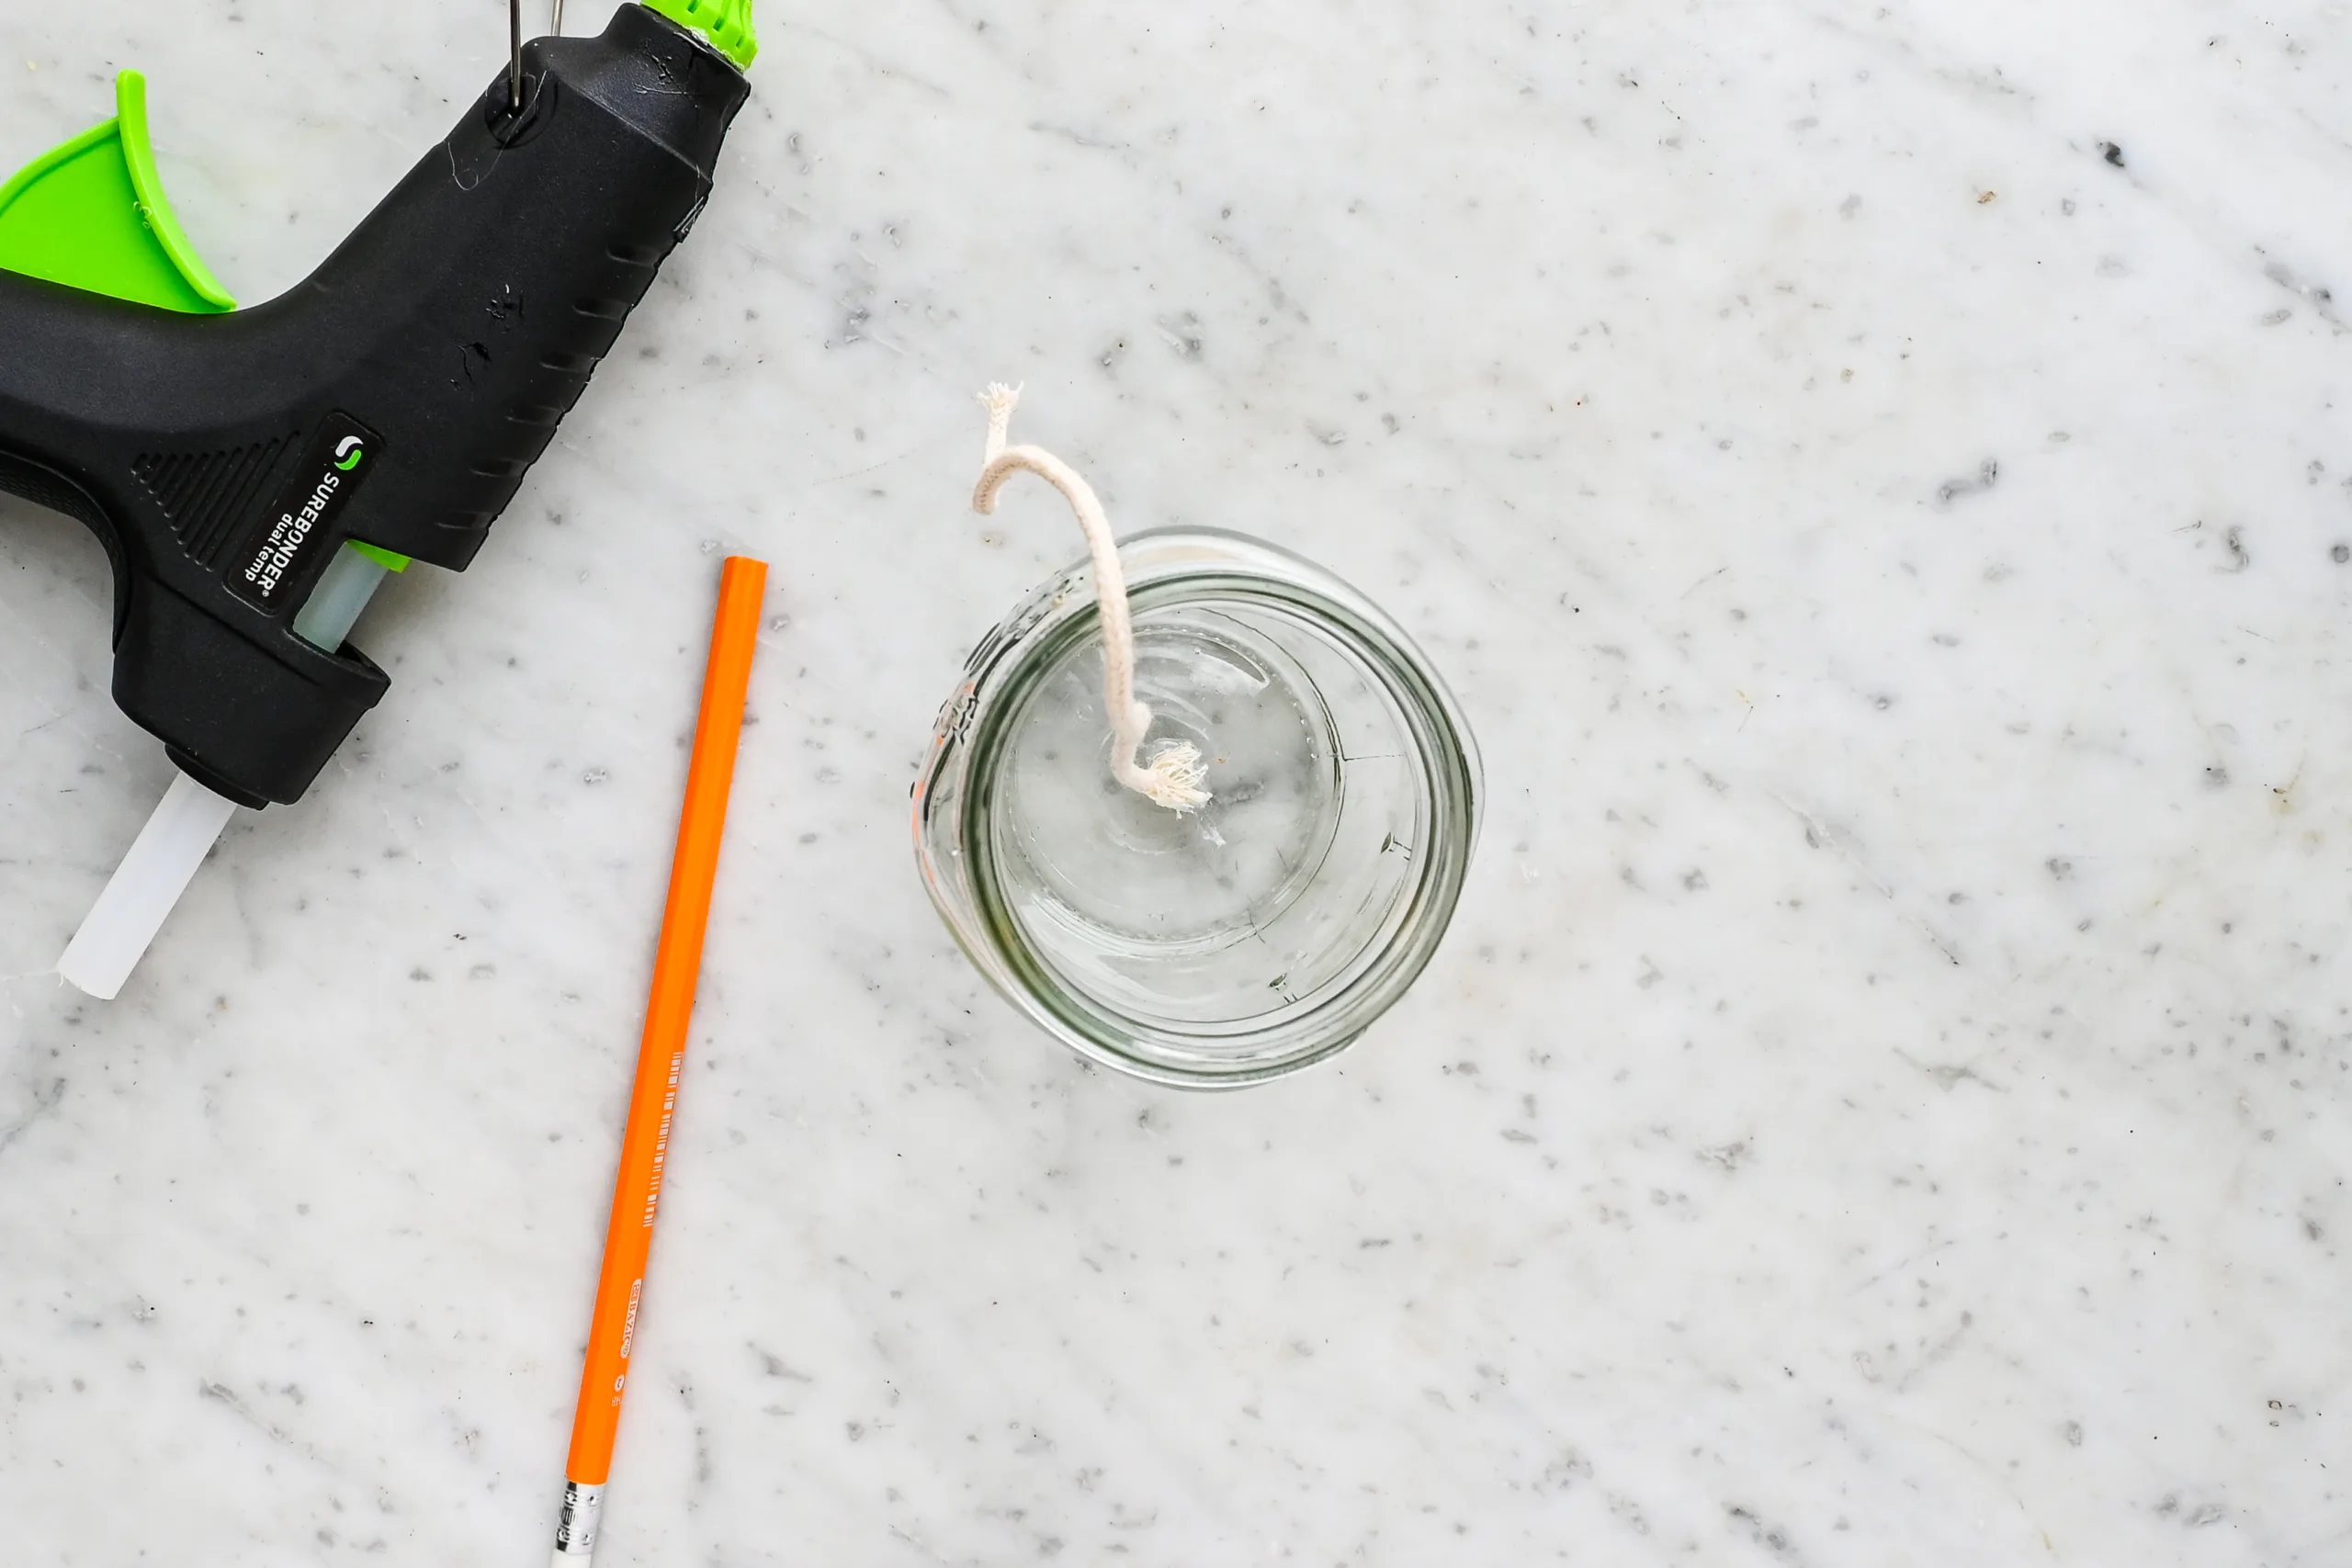
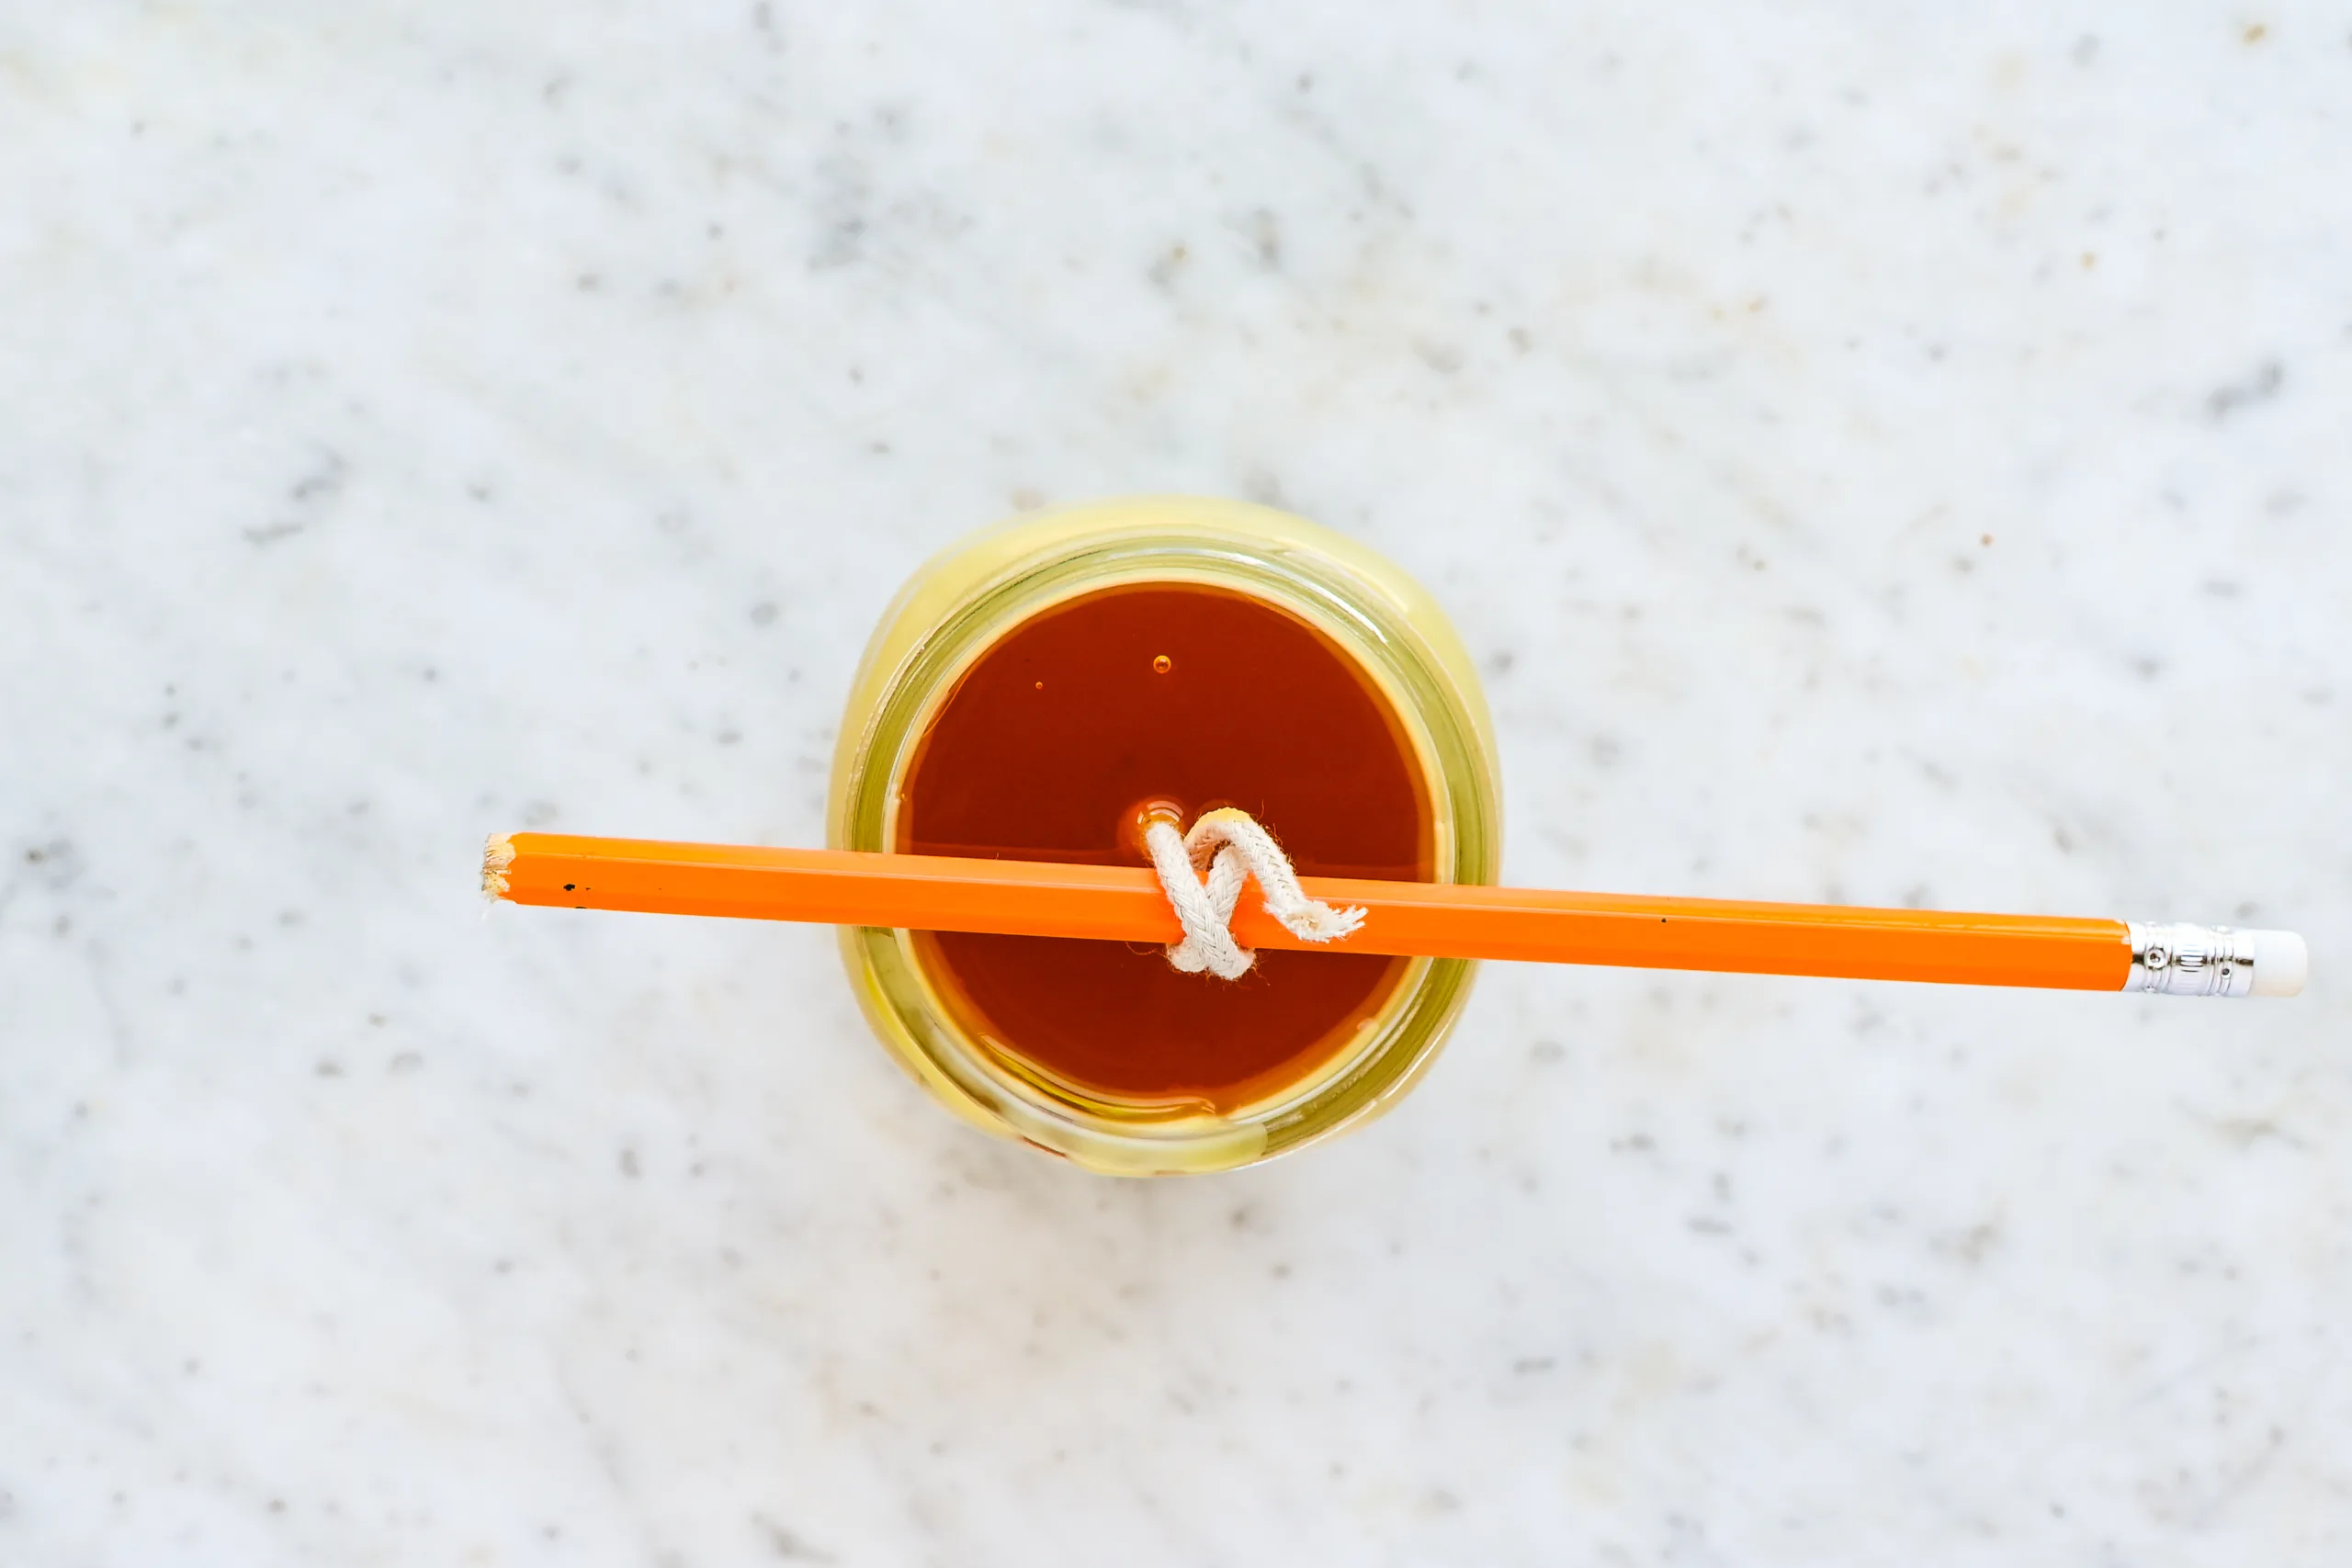
Step 1: Start with a clean, dry mason jar. Make sure there is no moisture inside the jar before adding the wax. Any water left in the jar can affect how the candle sets. Secure the wick to the center bottom of the jar using a wick sticker or a small amount of hot glue.
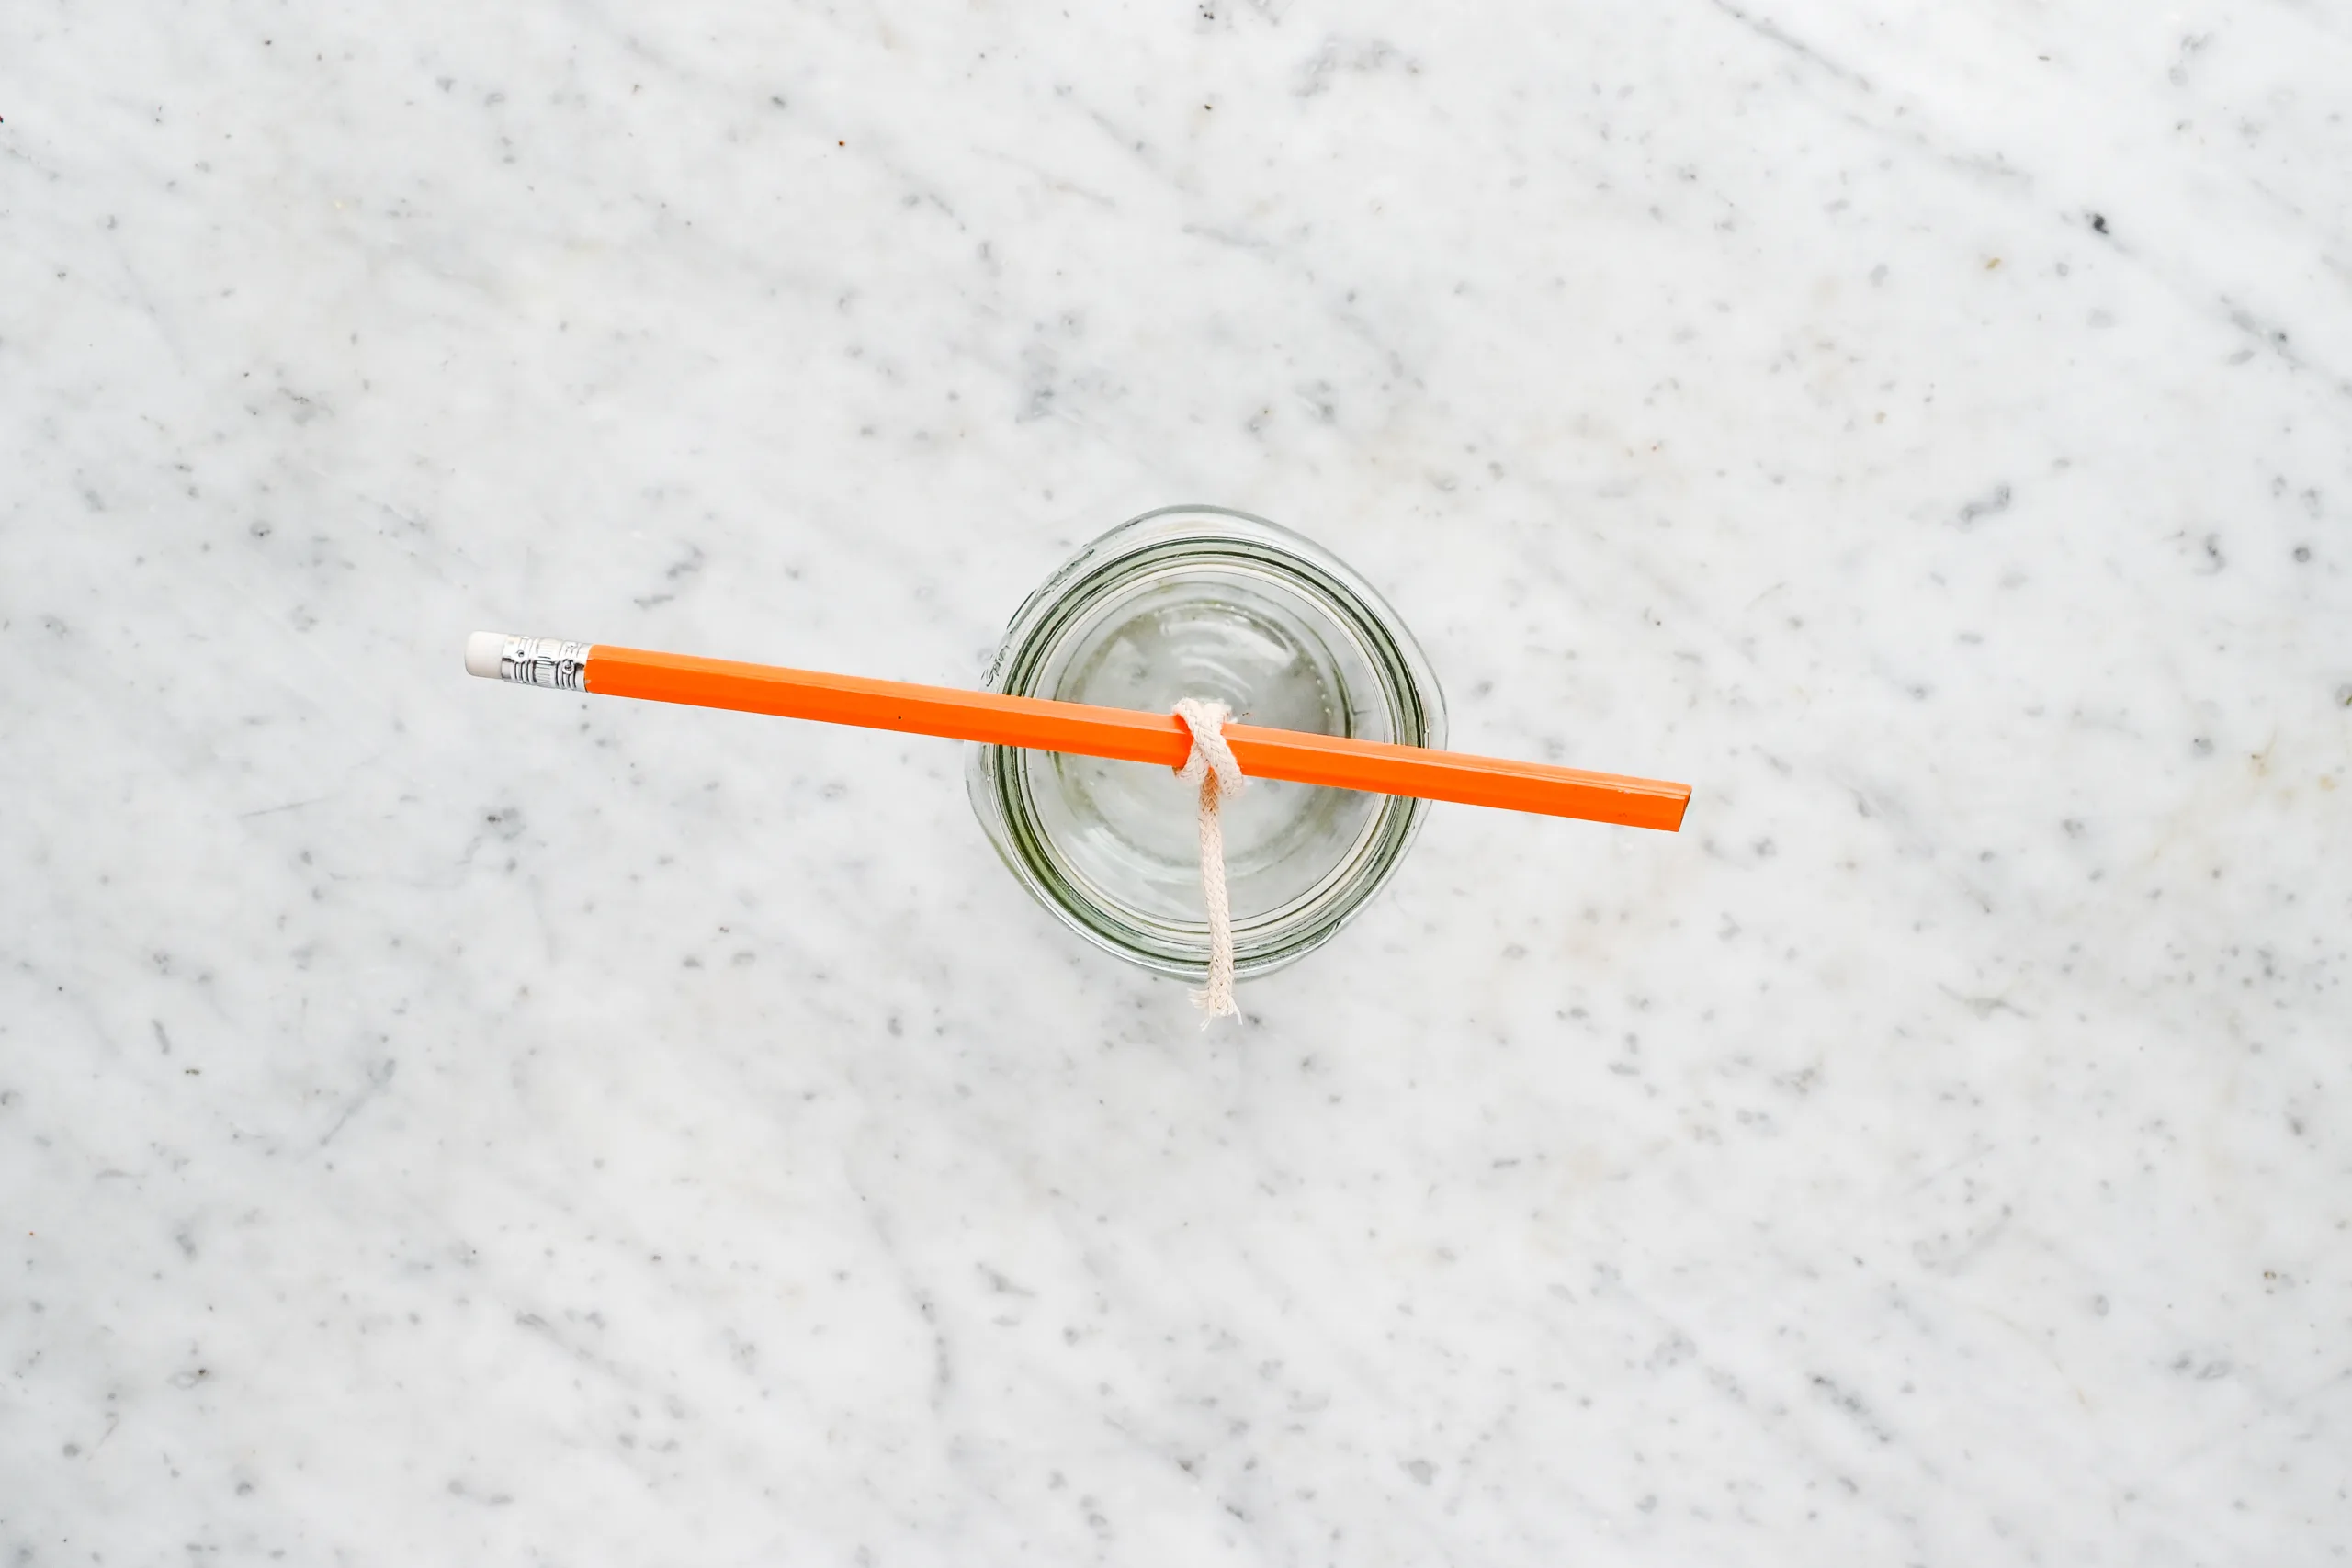
Step 2: Then use a pencil, clothespin, or wick holder across the top of the jar to keep the wick centered.
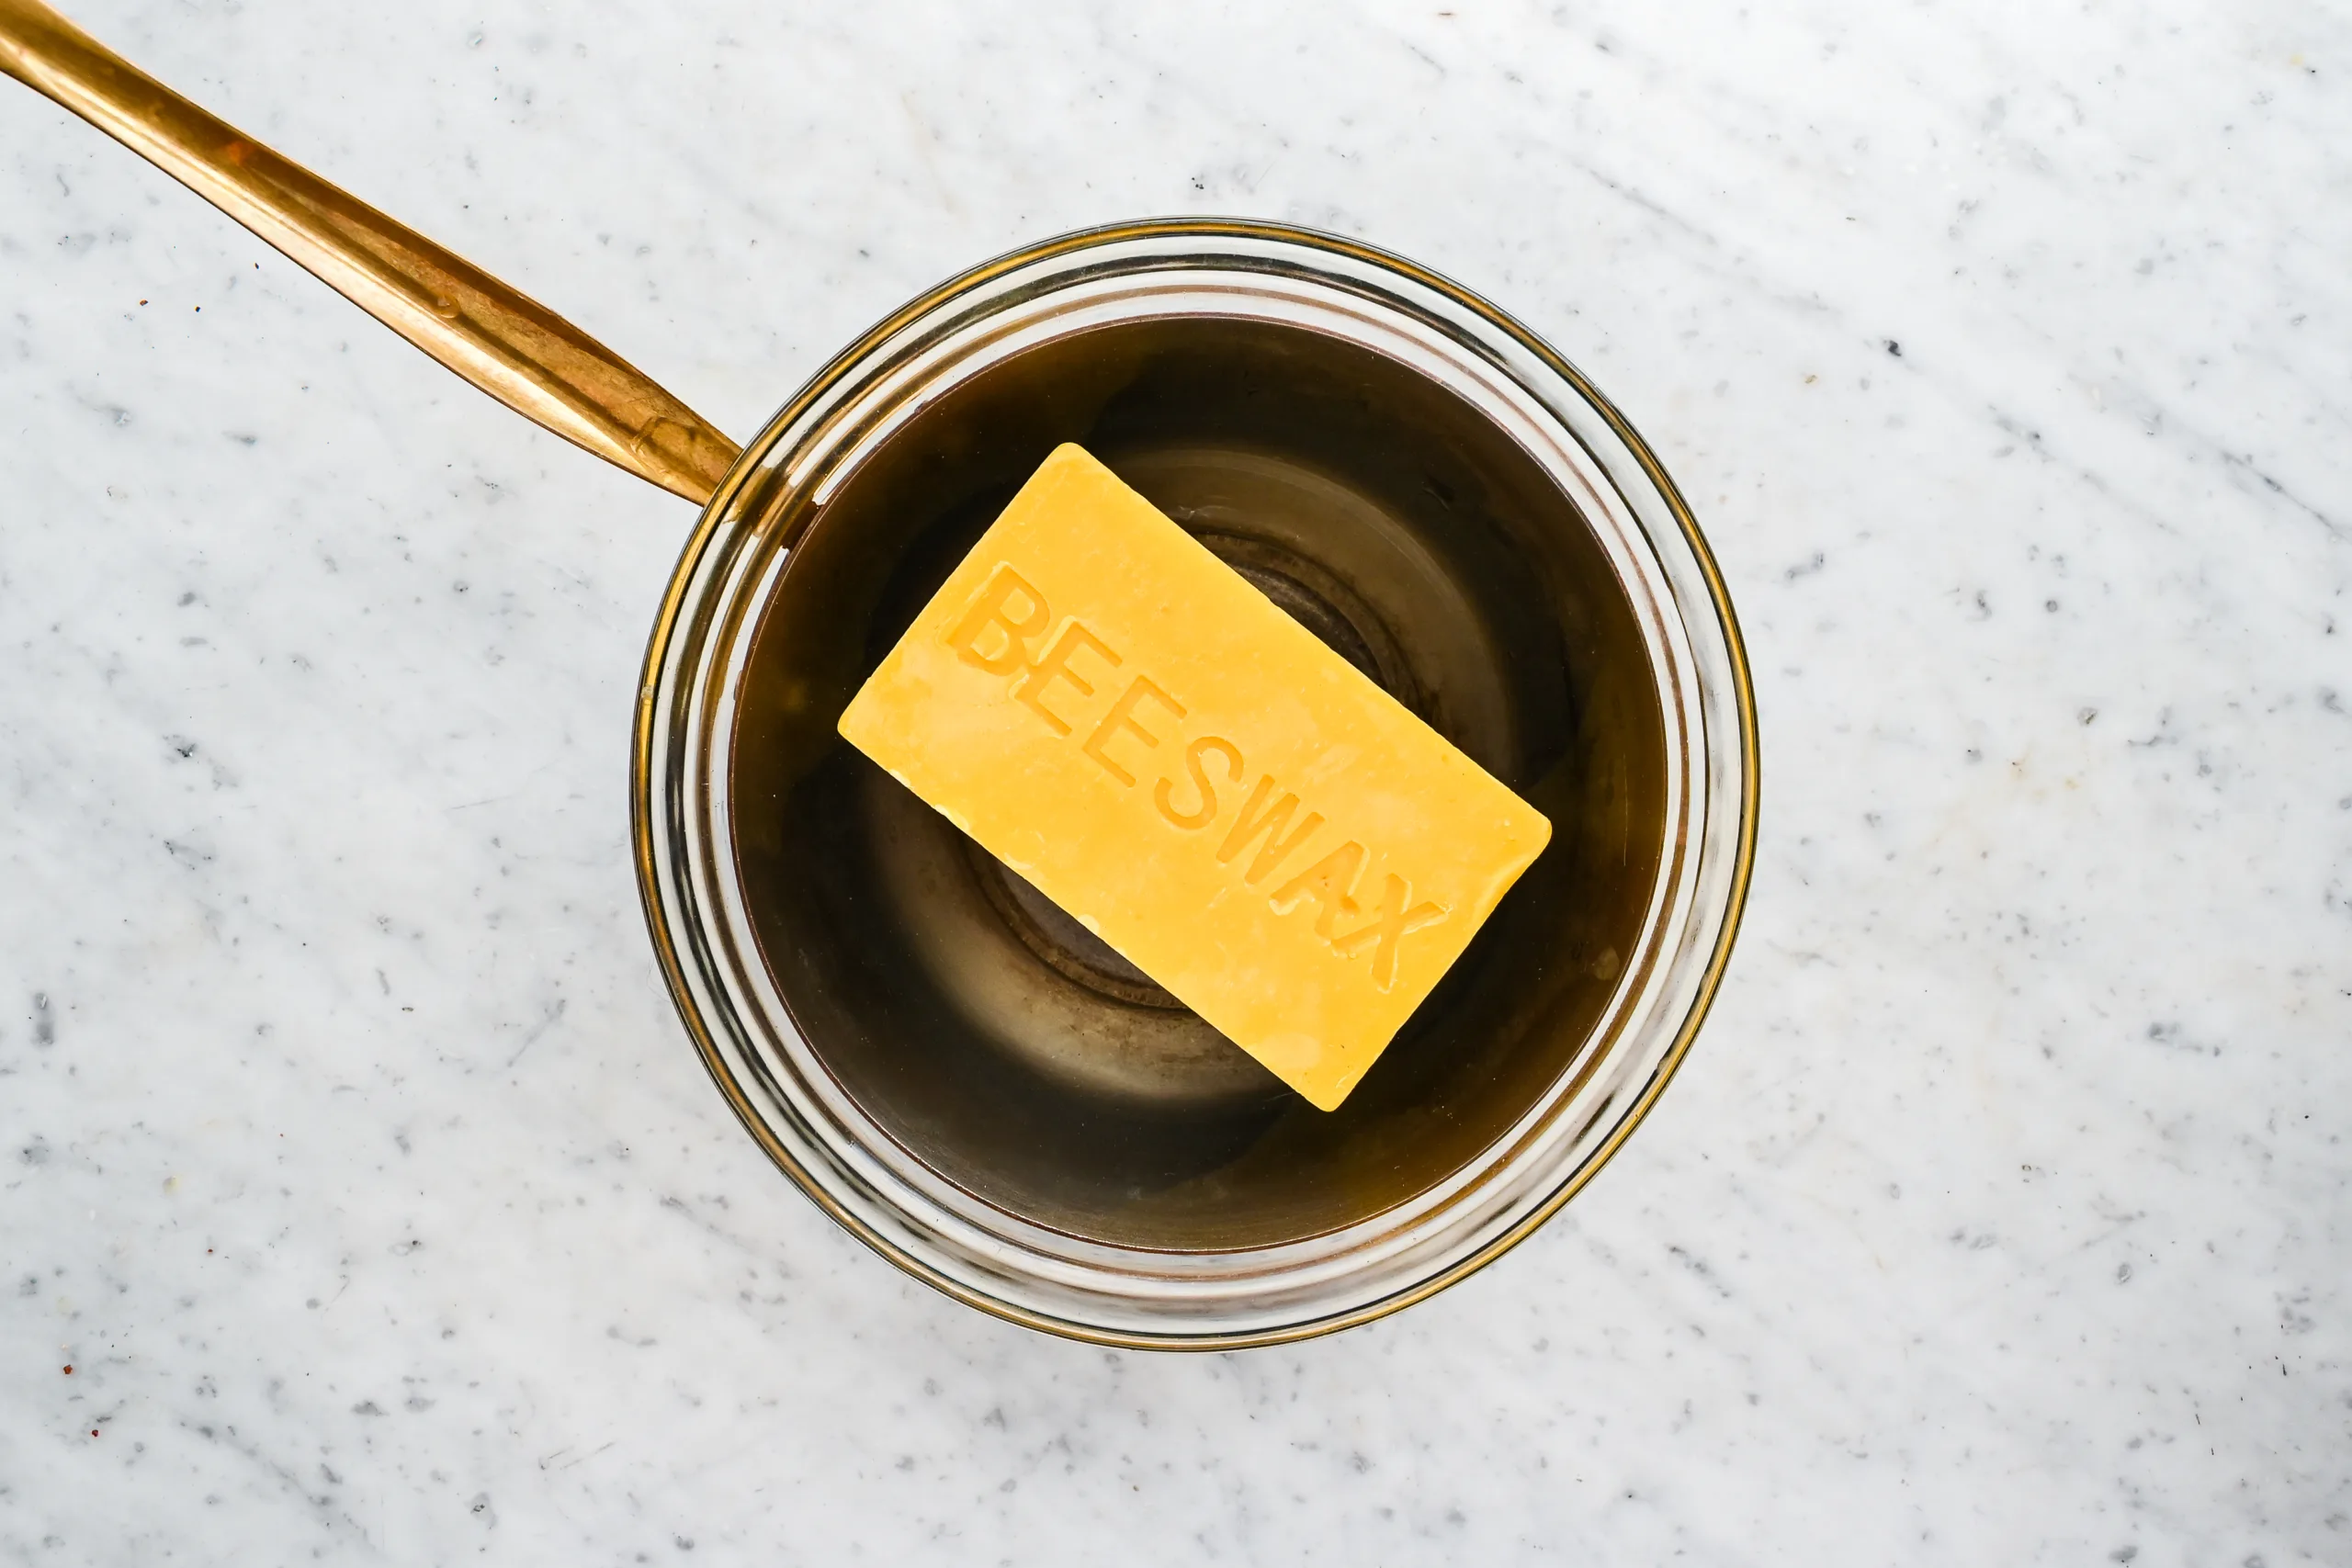
Step 3: Place the beeswax in a double boiler or melting pot over gently simmering water. Heat the wax slowly until it is fully melted, stirring occasionally. Beeswax melts at a higher temperature than some other candle waxes, so gentle, steady heat works best. Avoid heating the wax directly on the stove, since beeswax can scorch if it gets too hot. If you are making a scented candle, let the melted wax cool slightly before adding essential oil. Stir gently so the fragrance blends evenly through the melted wax. If you prefer a more natural beeswax candle, you can skip the oils completely. A plain beeswax candle still has a soft natural scent and a beautiful glow.
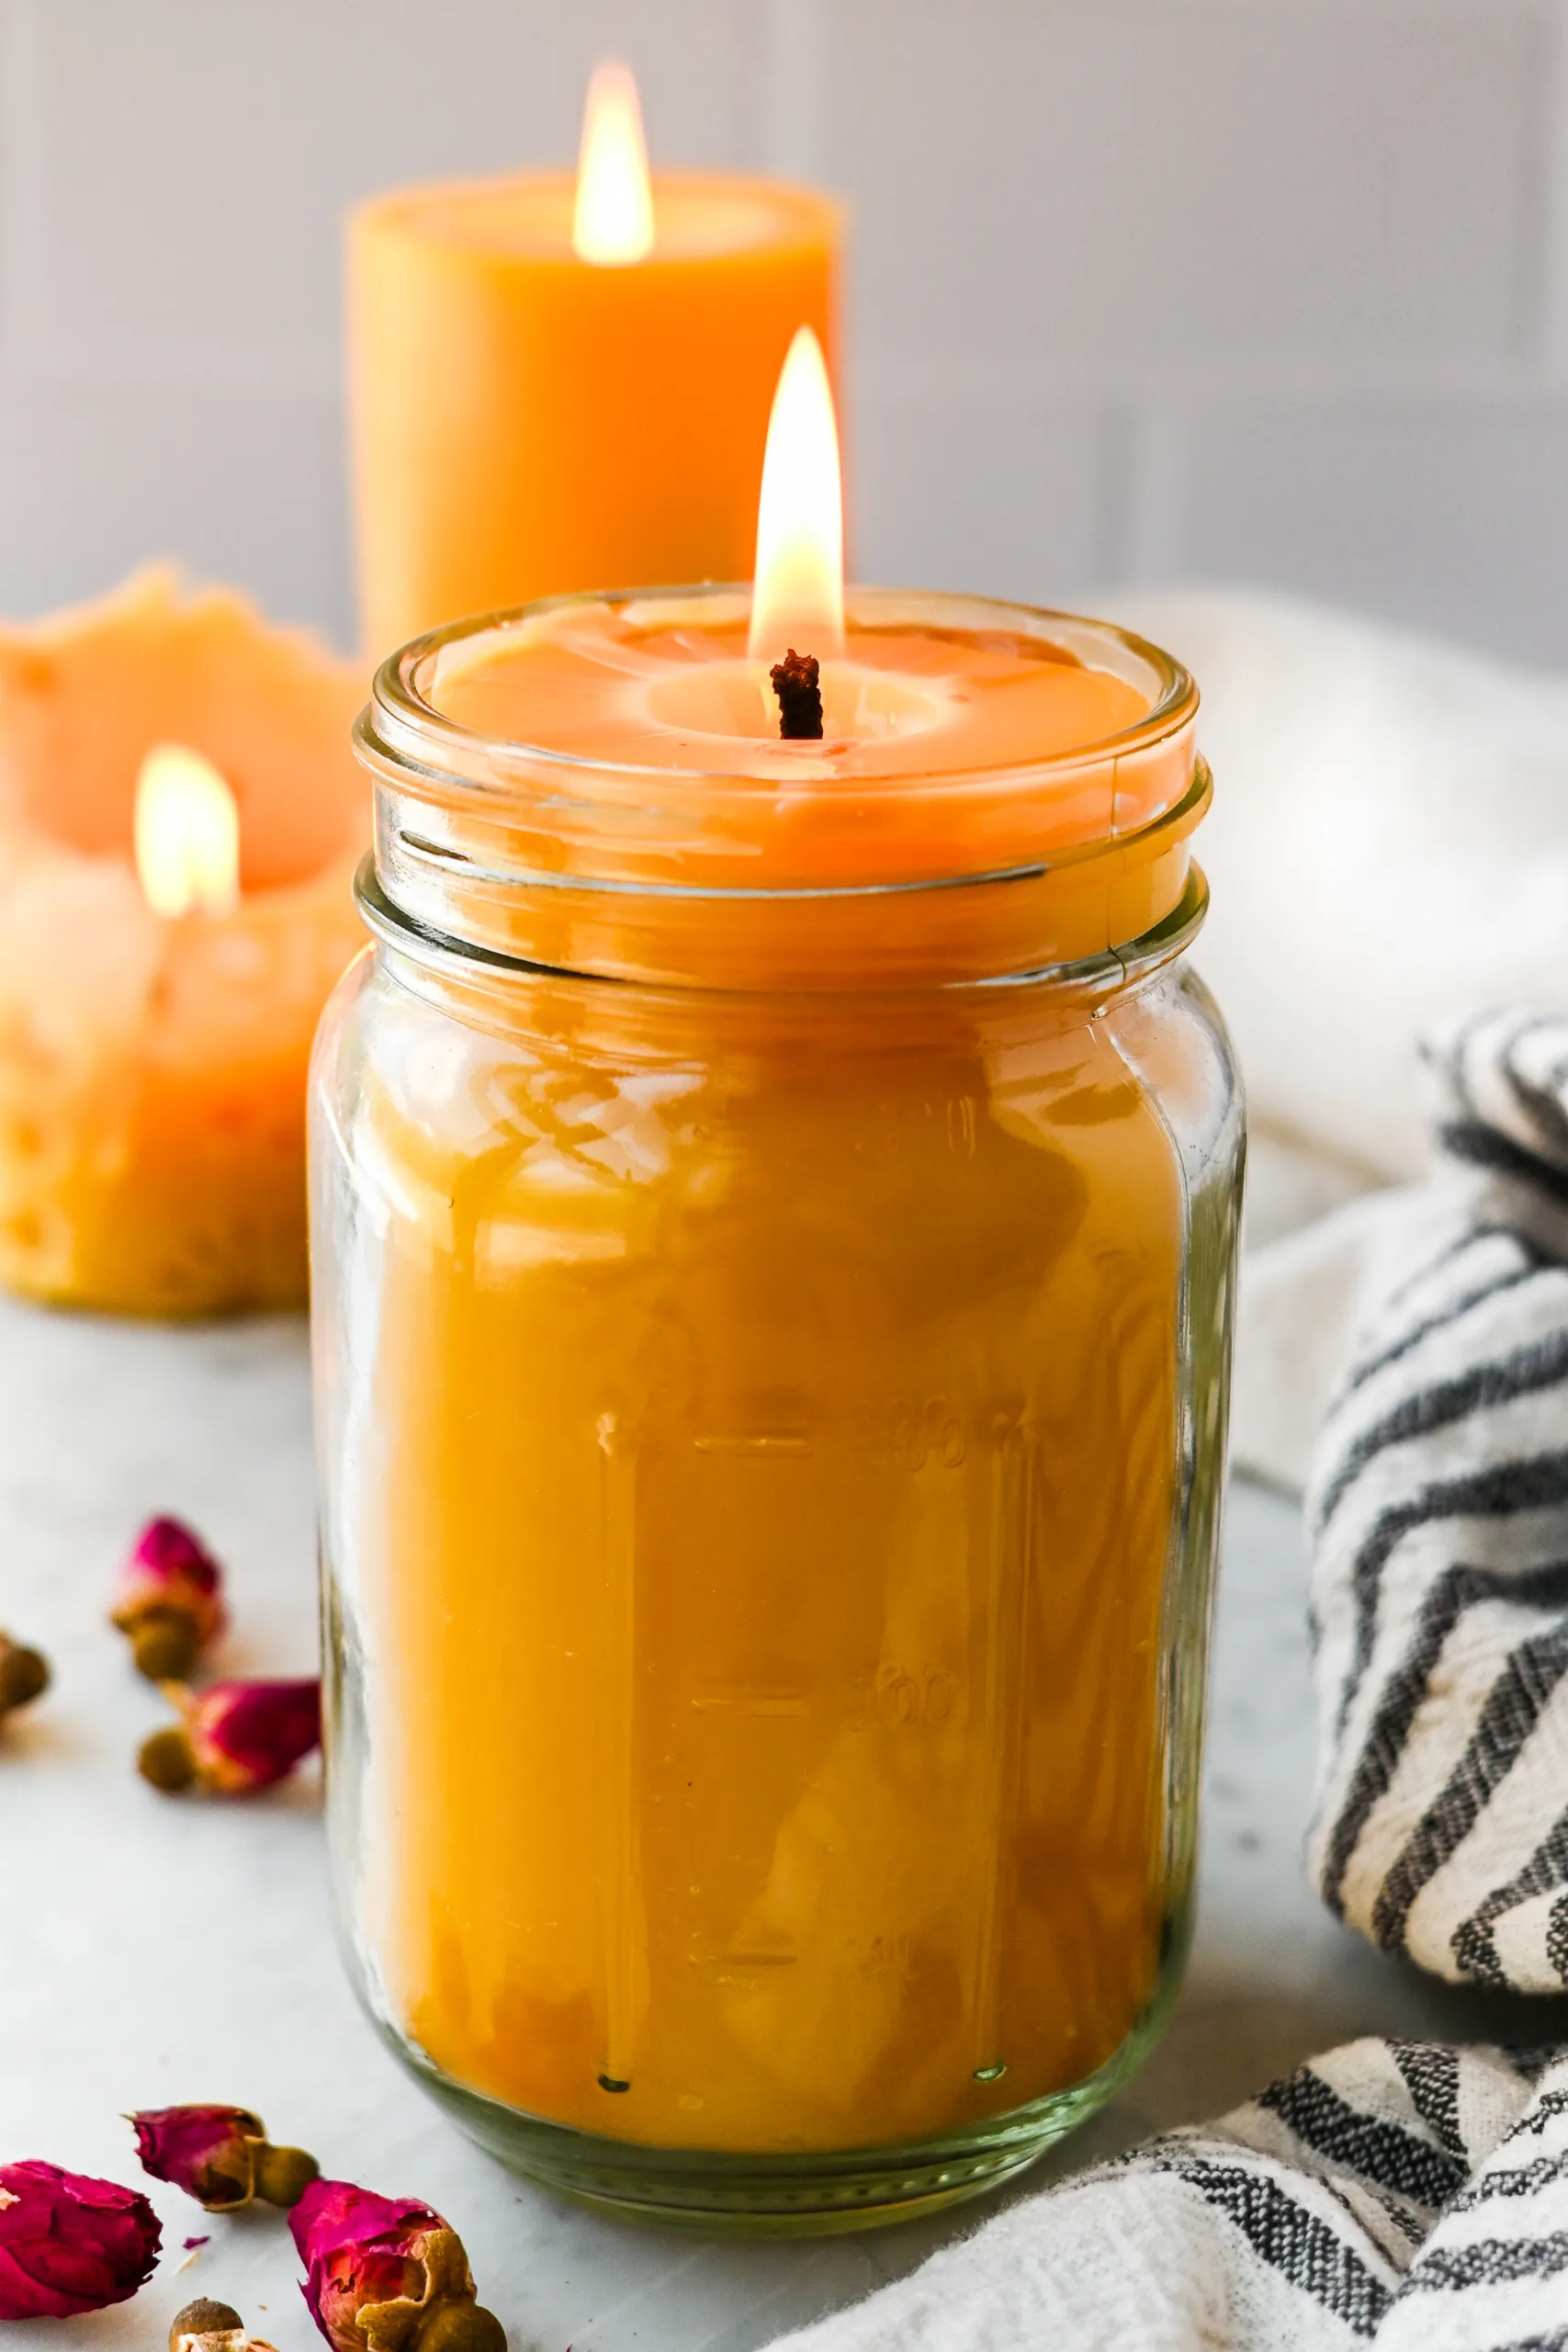
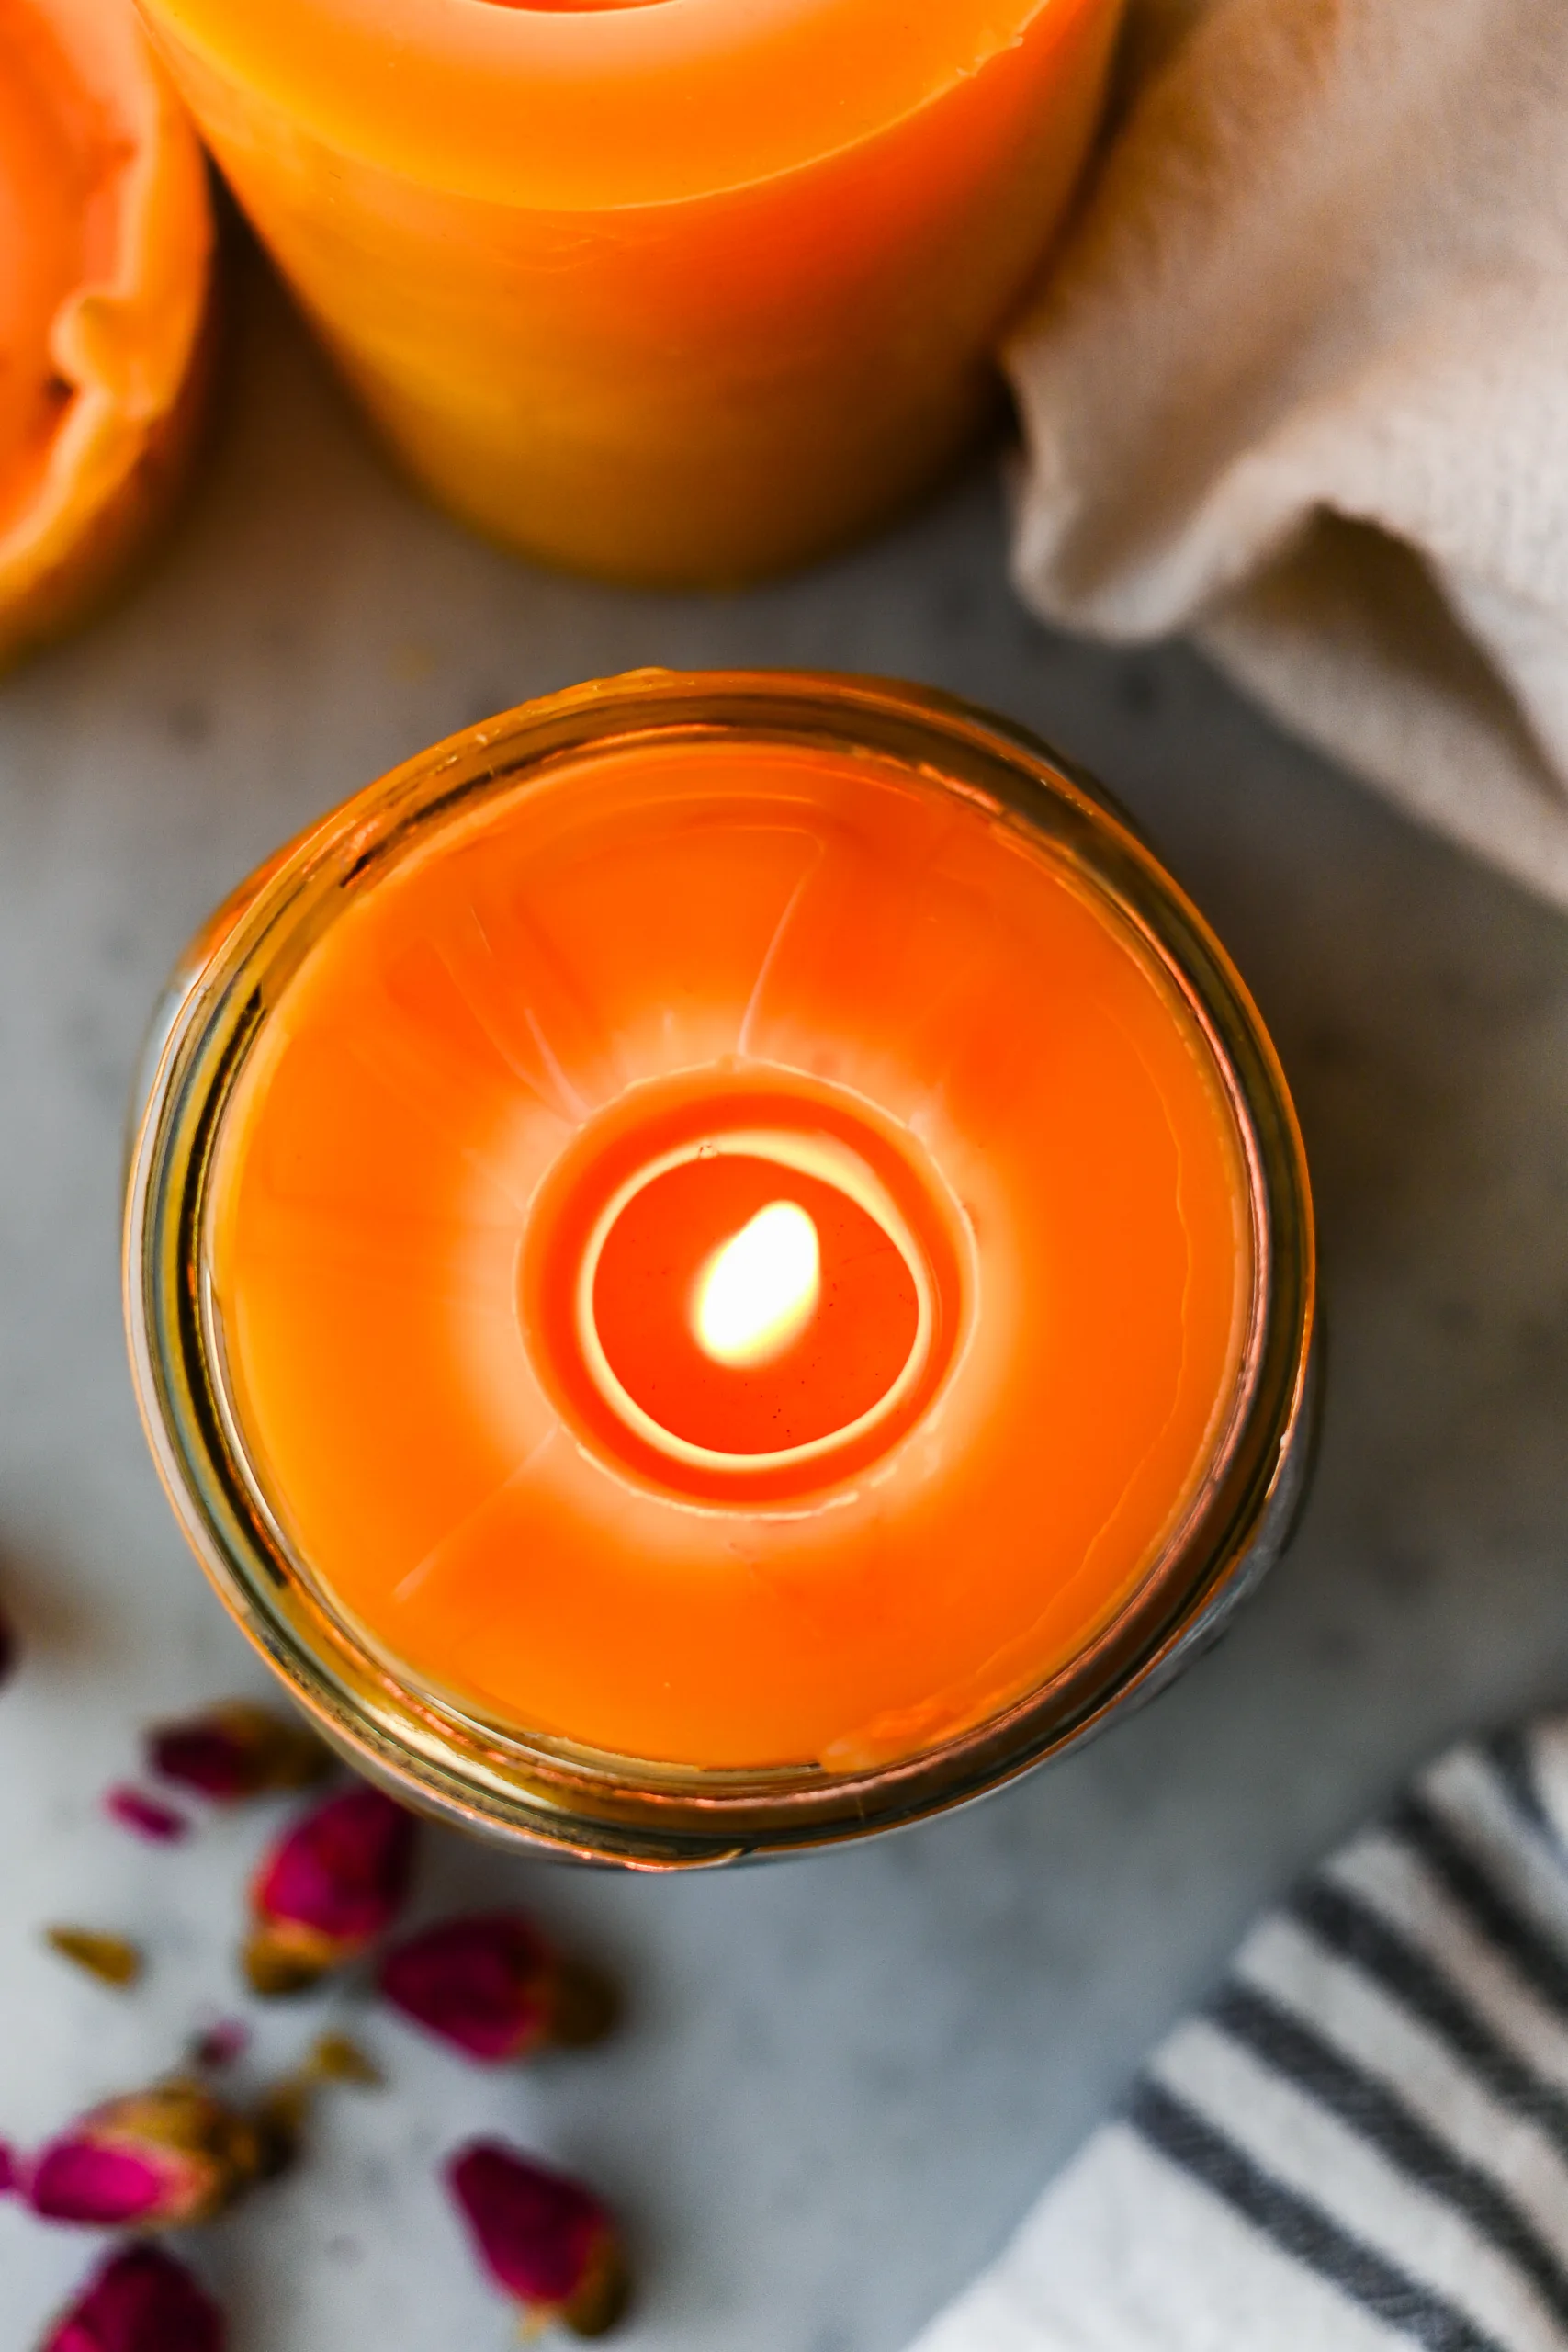
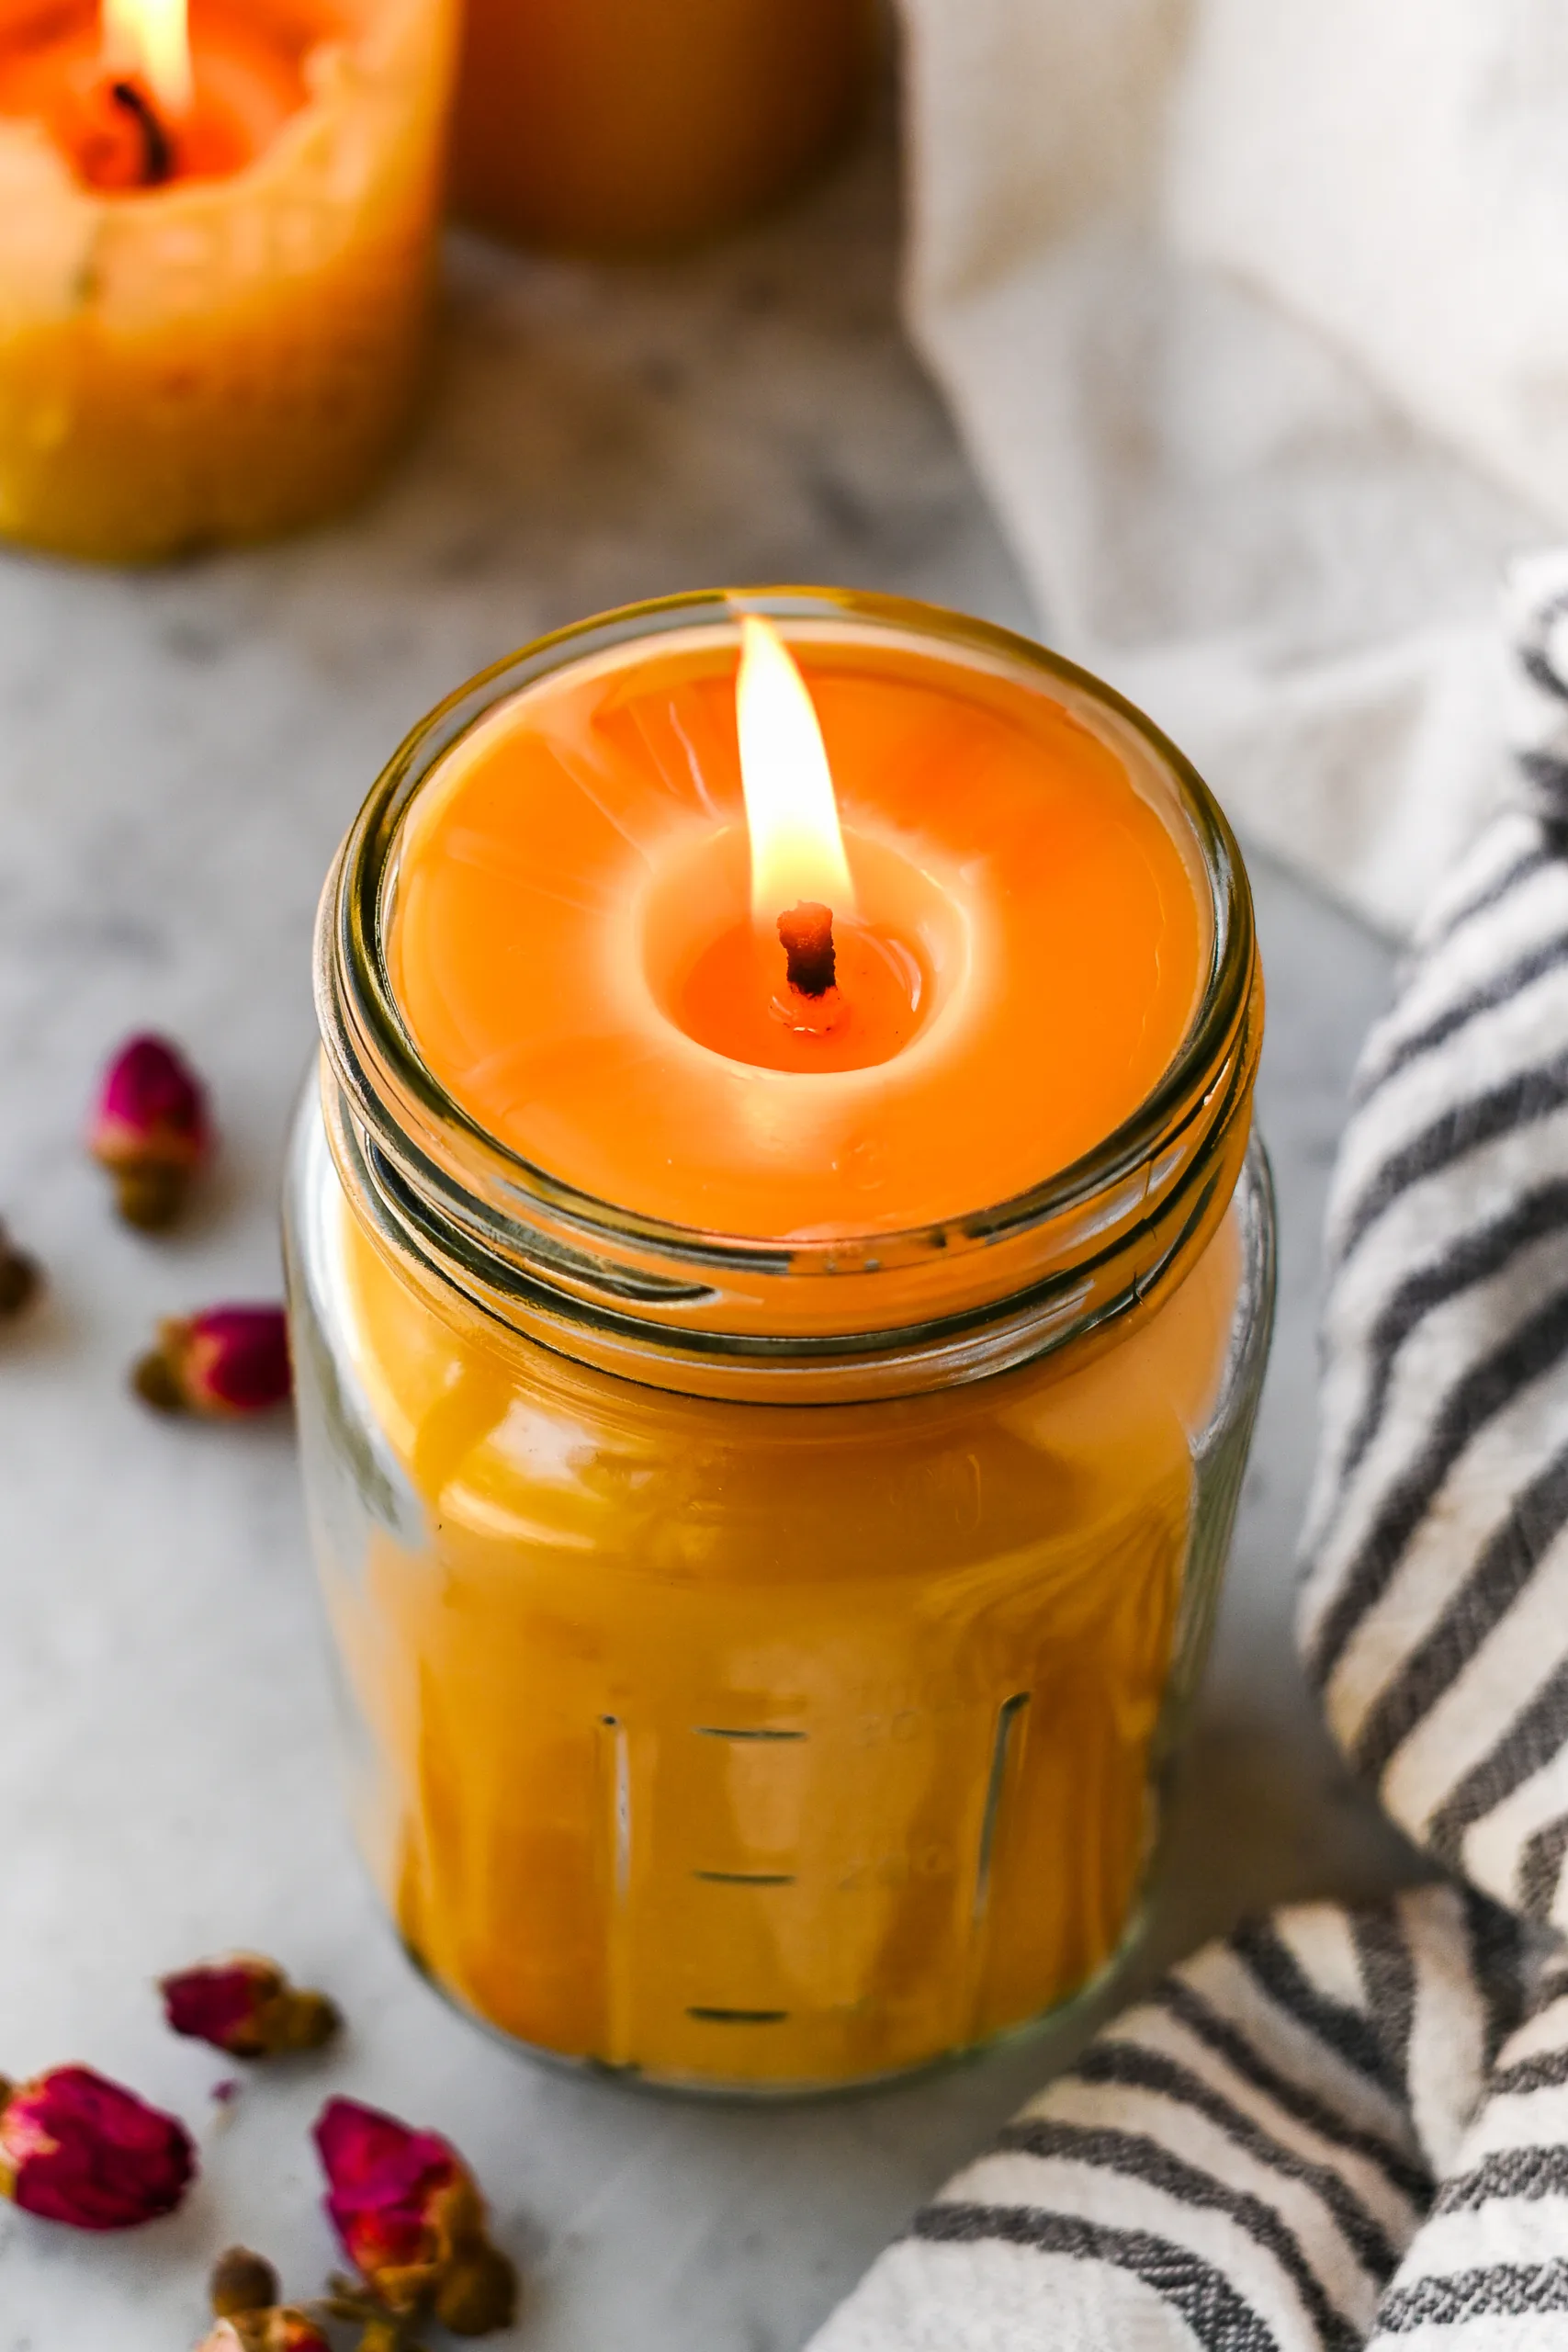
Step 4: Carefully pour the melted wax into the prepared mason jar, keeping the wick centered as you pour. Leave a little space at the top of the jar. Let the candle sit undisturbed while it cools. Beeswax may shrink slightly as it firms up. If a small dip forms around the wick, you can melt a little extra wax and pour a thin second layer over the top.
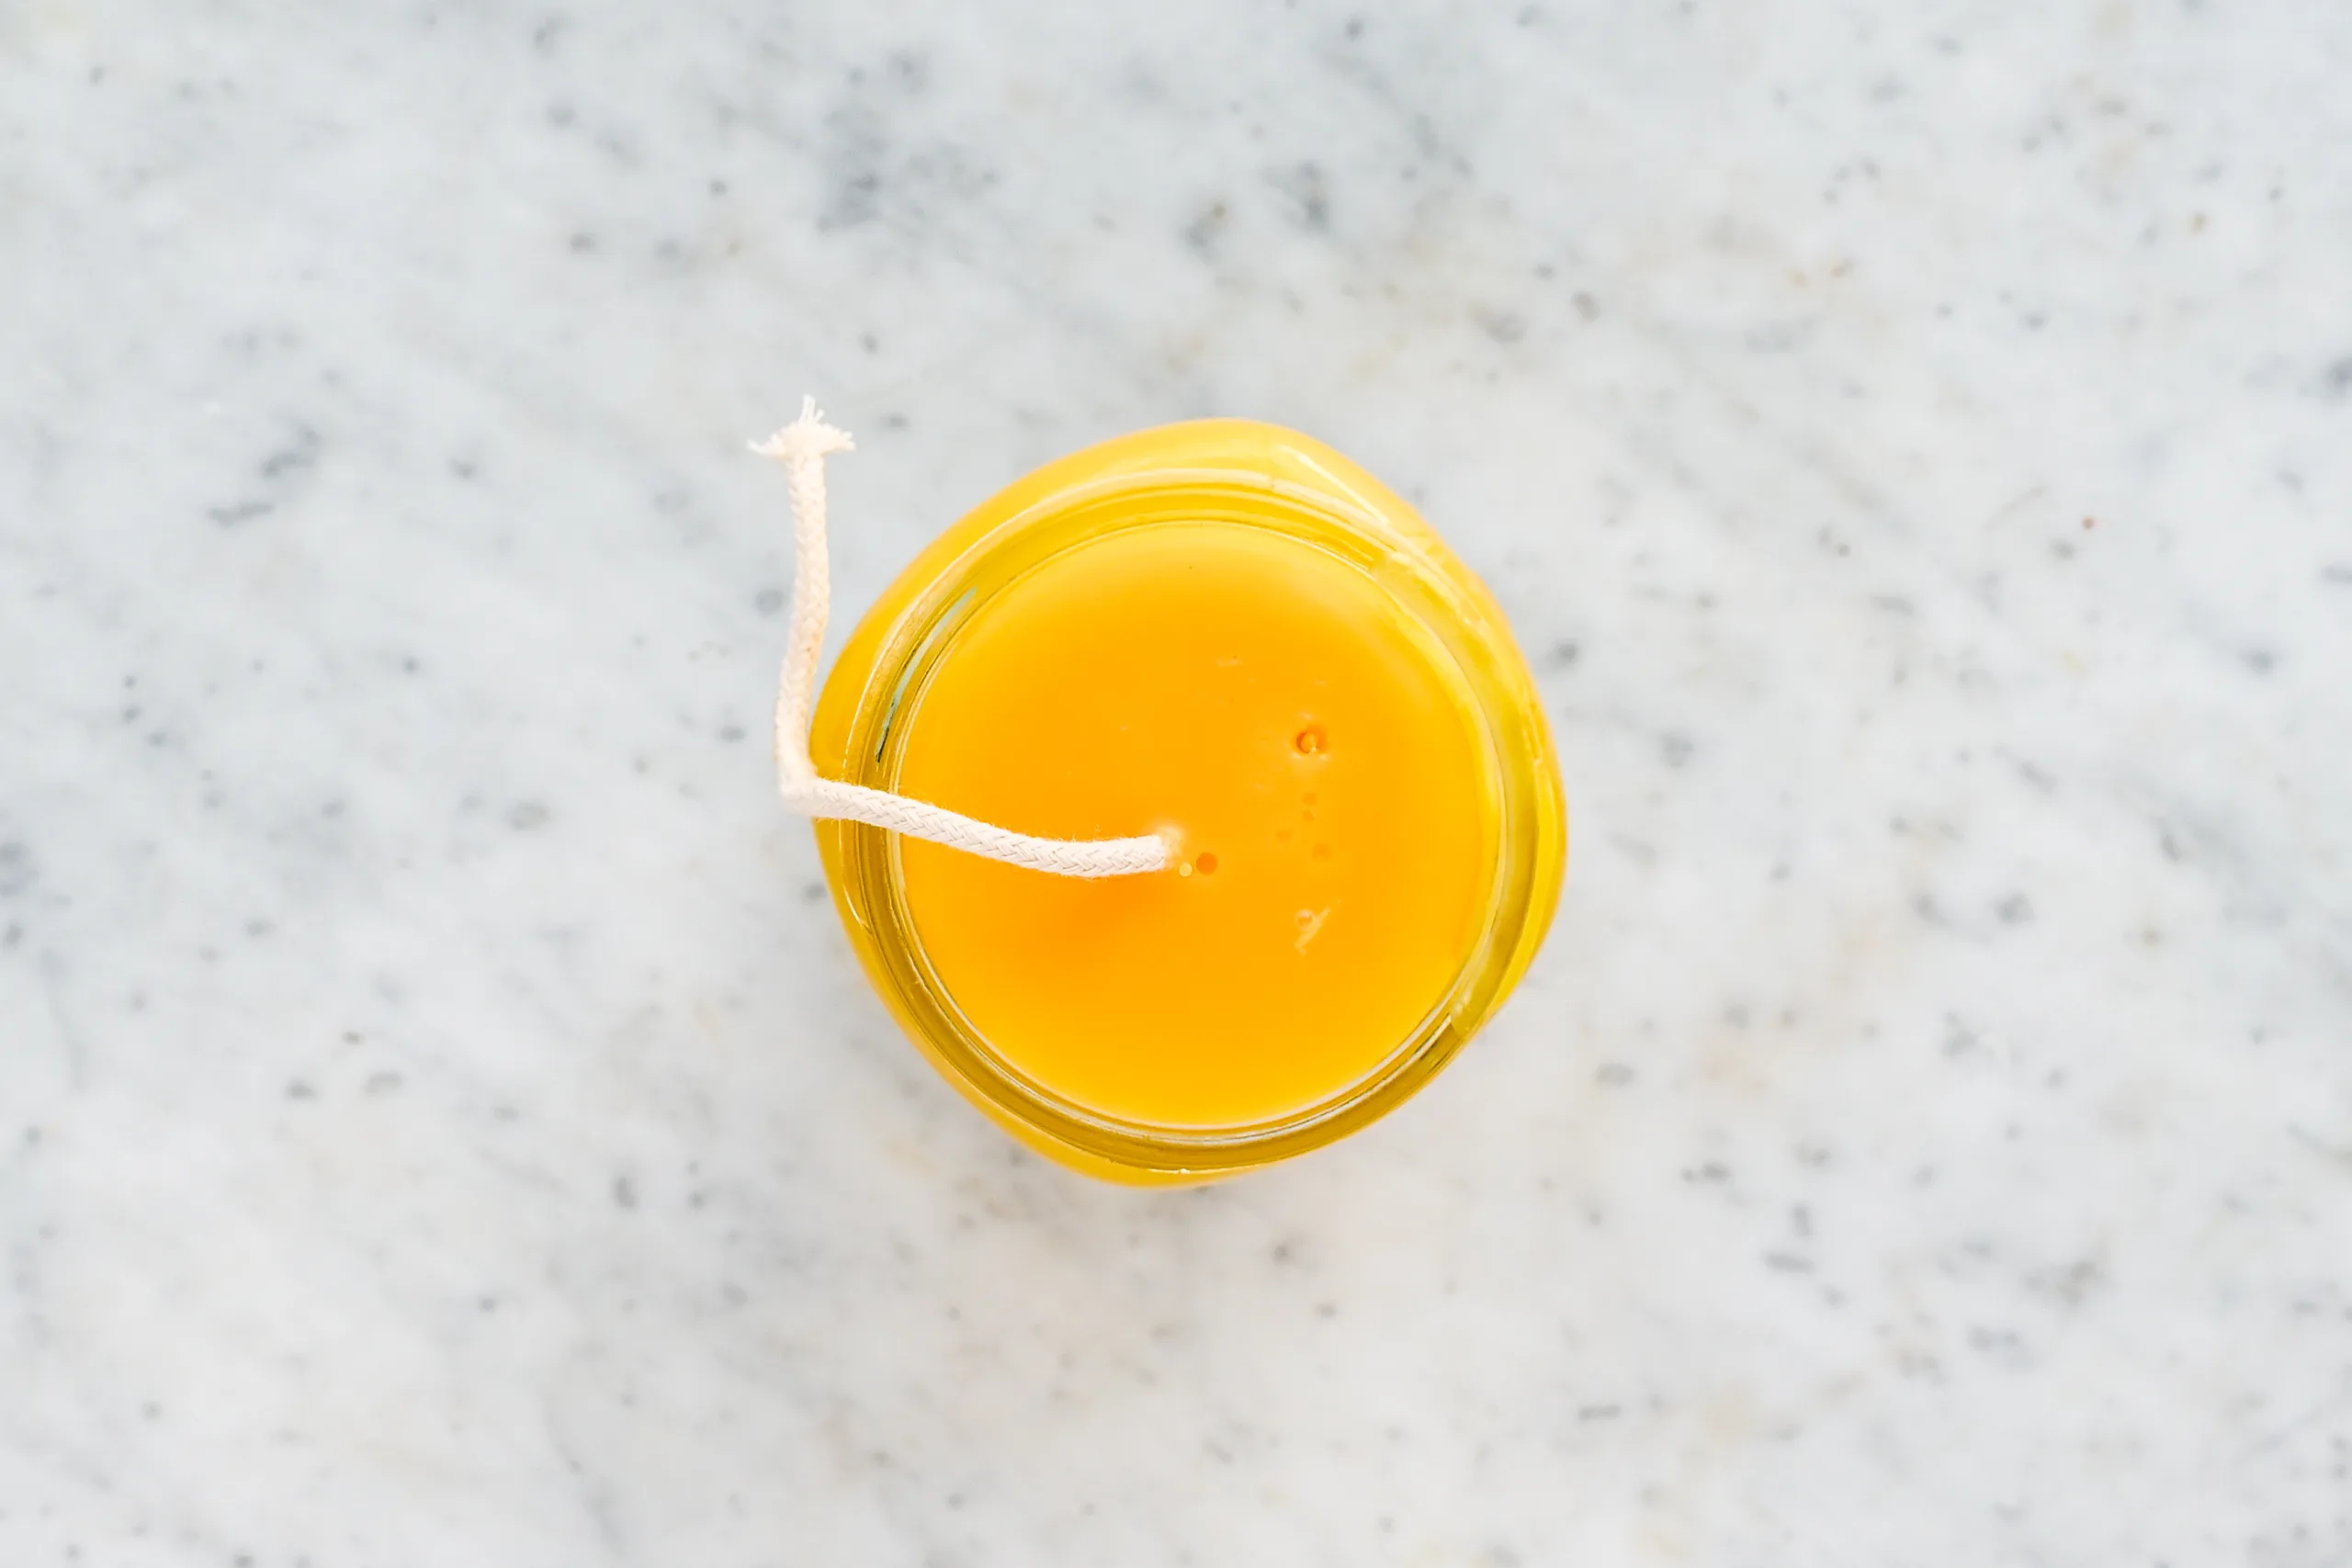
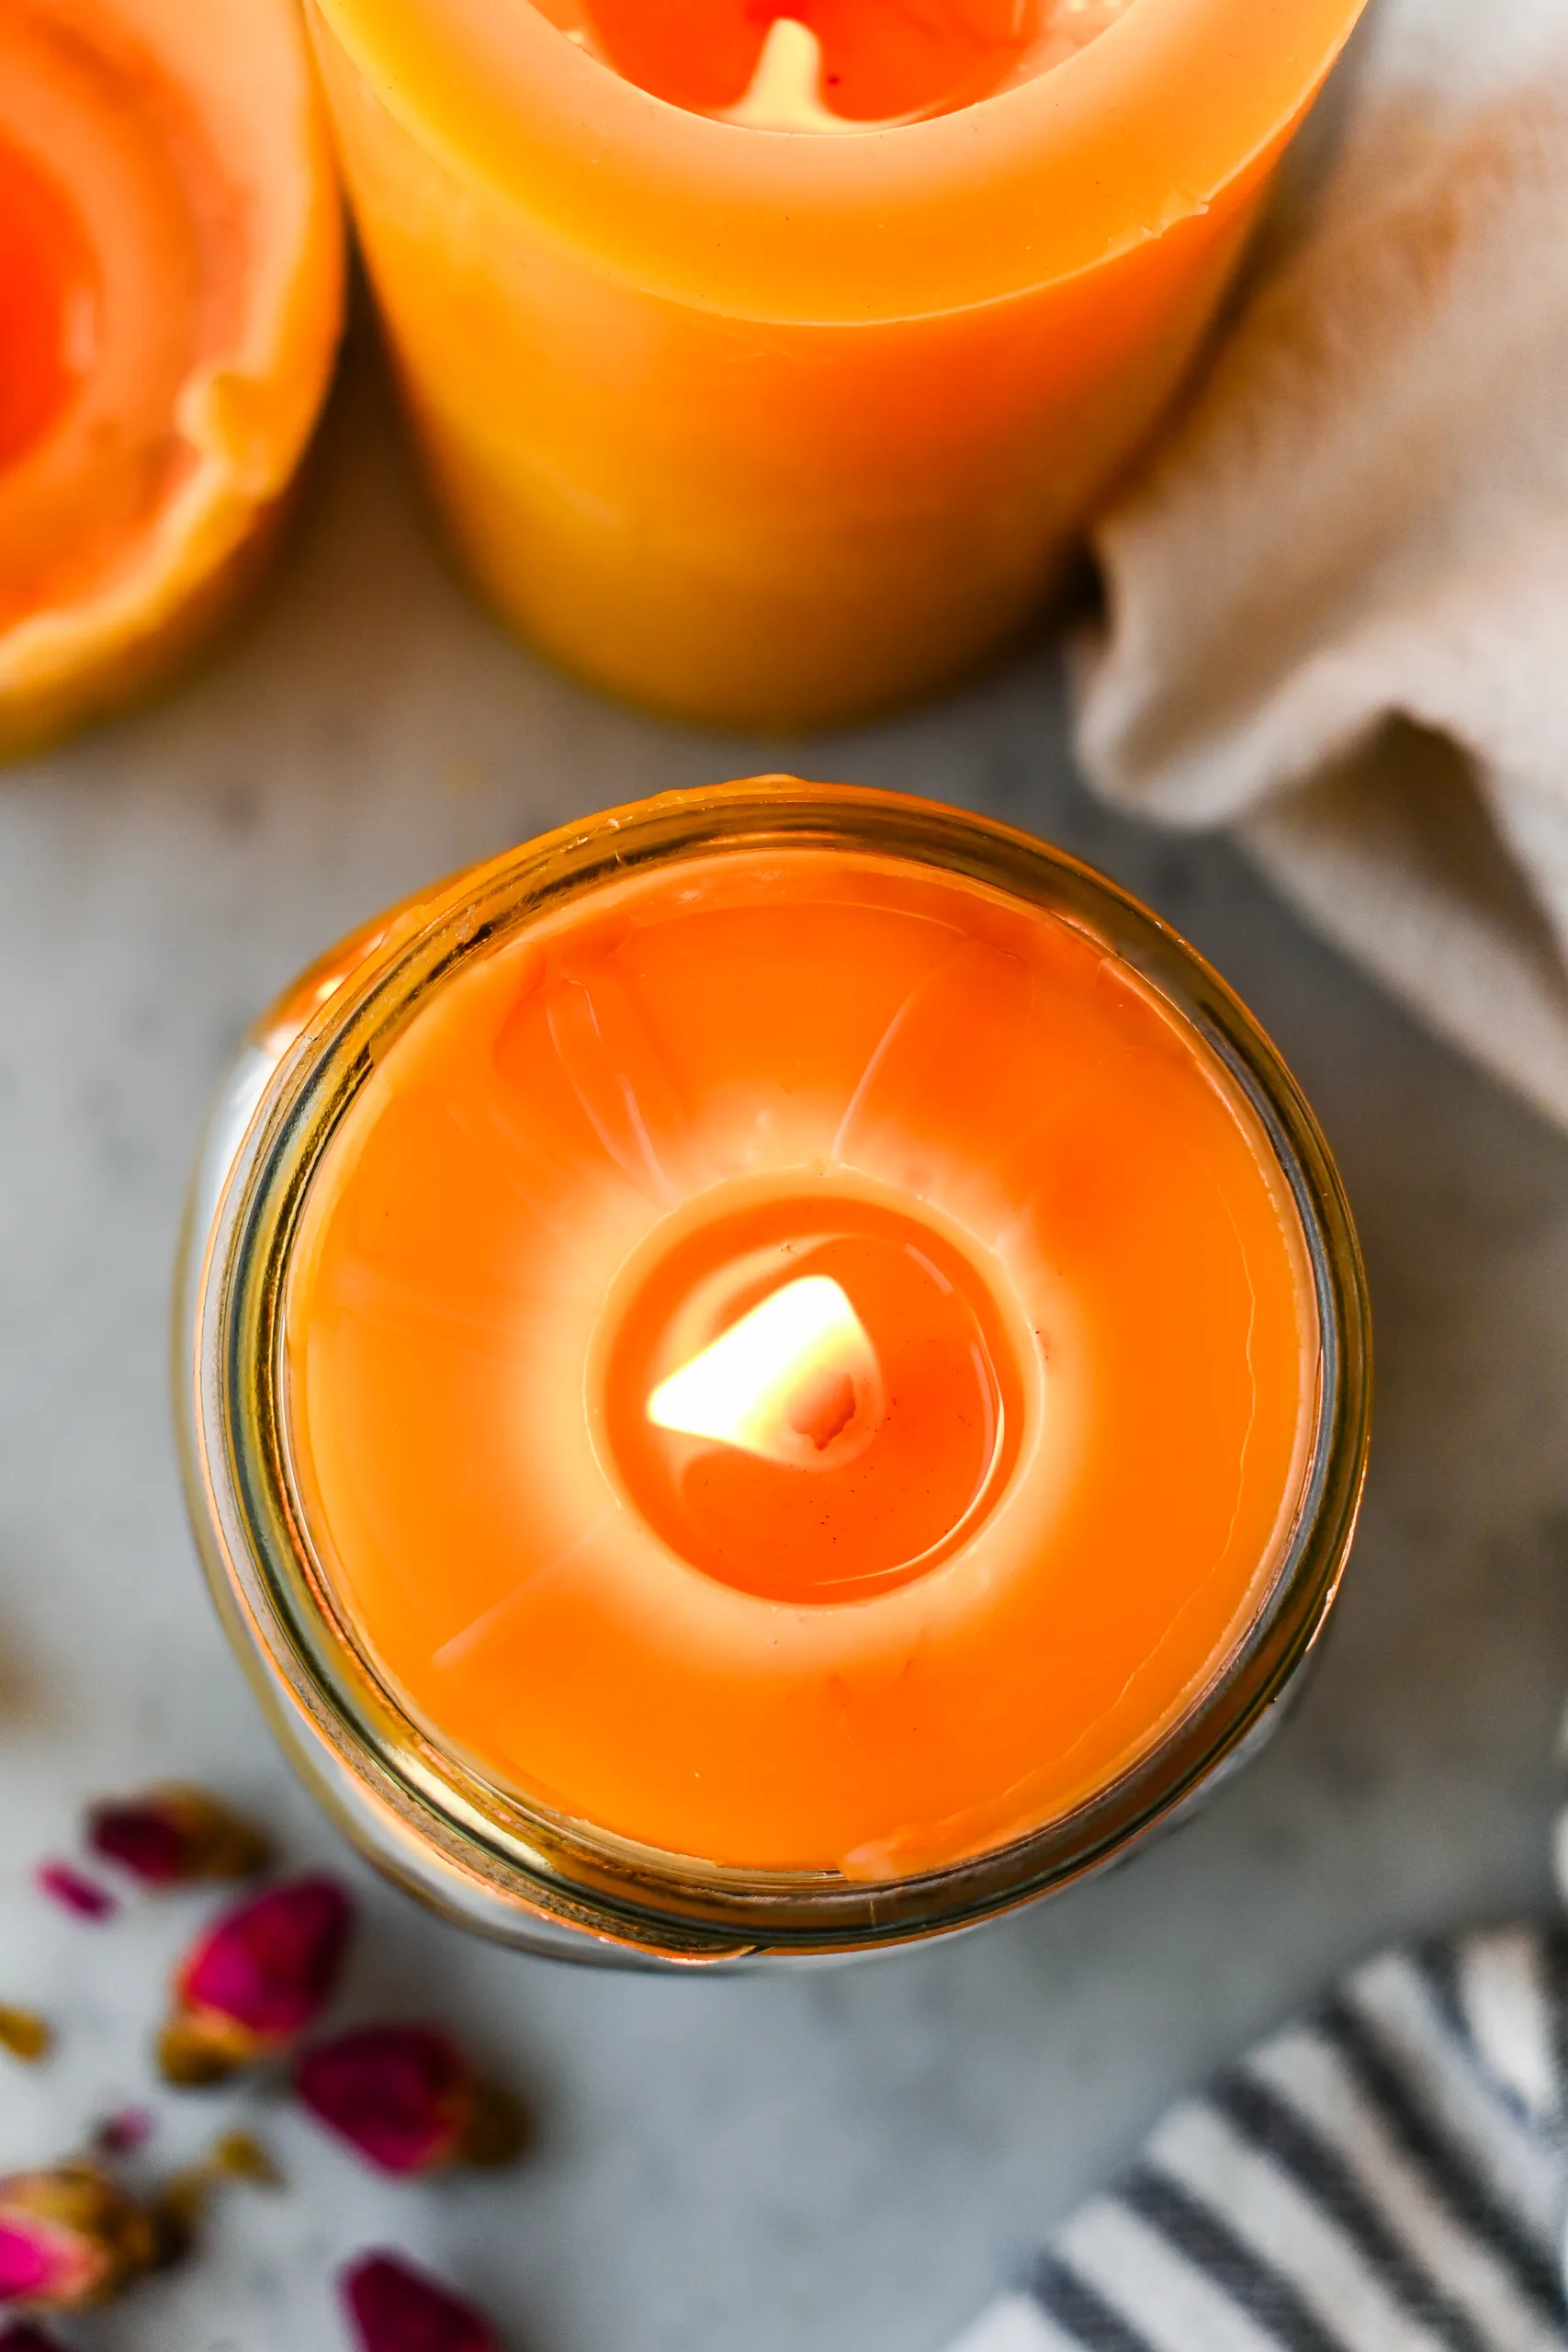
Step 5: Let the candle cool completely before trimming the wick. Once the wax is firm, trim the wick to about ¼ inch. The candle is ready to use once it has fully set.
Tips for Better Homemade Beeswax Candles
- Make sure the mason jar is completely clean and dry before pouring.
- Keep the wick centered while the wax cools.
- Use a wick size that matches the width of your jar.
- Melt beeswax slowly in a double boiler instead of direct heat.
- Do not overdo the fragrance. Beeswax has its own natural scent.
- Let the candle cool at room temperature for the smoothest finish.
- Trim the wick to about ¼ inch before lighting.
Choosing the Right Wick
The right wick depends on the size of your jar and the type of wax you are using. Beeswax is firm and needs a wick that can burn steadily through the wax. If the wick is too small, the candle may tunnel or struggle to stay lit. If the wick is too large, the flame may be too big and the candle may burn too hot.
For the best results, choose a cotton wick recommended for beeswax container candles and match it to the diameter of your mason jar. A small test burn is always helpful before making several candles using the same wick and jar size.
Common Problems When Making Beeswax Jar Candles
If the candle tunnels down the center, the wick may be too small for the jar. If the flame is large, smoky, or burning too quickly, the wick may be too large.
If the top of the candle sinks as it cools, that is normal with beeswax. You can fix it by pouring a small second layer of melted wax over the top.
If the candle surface looks rough, the wax may have cooled too quickly or been poured at the wrong temperature. It will still work, but letting the wax cool slowly at room temperature usually gives a smoother finish.
Frequently Asked Questions About How to Make Candles with Beeswax in a Mason Jar
Can you make candles with beeswax in mason jars?
Yes, beeswax works well for mason jar candles. The jar acts as the container, which makes this a simple beginner candle making project.
Is beeswax better than soy wax for homemade candles?
Beeswax and soy wax are both popular choices for homemade candles, but they behave differently. Beeswax is firmer and has a natural honey scent, while soy wax is softer and often used for scented candles because it holds fragrance well.
Can I add essential oils to beeswax candles?
You can add some essential oils to beeswax candles, but they do not always give a strong or lasting scent.
Do I need a double boiler to make candles?
A double boiler is the safest and easiest way to melt beeswax gently. It helps keep the wax from overheating and gives you more control while making candles.
Can I make this candle fragrance-free?
Yes. This beeswax candle can be made fragrance-free. Beeswax has a mild natural scent on its own, so added fragrance is optional.
Why did my beeswax candle sink in the middle?
Beeswax can shrink slightly as it cools, which may cause a dip around the wick. If that happens, melt a little more beeswax and pour a thin second layer over the top.
Can I use paraffin wax instead of beeswax?
This recipe is written for beeswax, so I would not swap in paraffin wax without adjusting the method. Different types of candle wax melt, pour, and burn differently.
Can I use this method for other jars?
Yes, you can use this method for other heat-safe jars or candle containers. Just make sure the container is clean, dry, and suitable for candle making, and choose a wick that matches the container size.

Tried this recipe?
I would love to see it! Tag me on Instagram @idiesfarm and #idiesfarm so I can share your beautiful creation!
How to Make Candles with Beeswax in a Mason Jar
Equipment
- double boiler or heat-safe melting pot set over simmering water
- clean mason jar
- cotton candle wick
- wick sticker, hot glue, or another way to secure the wick
- wick holder, pencil, or clothespin
- scissors
- heat-safe spoon or stirrer
- towel or heat-safe surface
Ingredients
- 12 to 14 ounces beeswax pellets chunks, or grated beeswax
- 1 pint-size mason jar
- cotton wick sized for a 2.75- to 3-inch beeswax container candle
- wick sticker or hot glue candle
- pencil
- essential oil optional
Instructions
- Start with a clean, dry mason jar. Make sure there is no moisture inside the jar before adding the wax. Any water left in the jar can affect how the candle sets. Secure the wick to the center bottom of the jar using a wick sticker or a small amount of hot glue.
- Then use a pencil, clothespin, or wick holder across the top of the jar to keep the wick centered.
- Place the beeswax in a double boiler or melting pot over gently simmering water. Heat the wax slowly until it is fully melted, stirring occasionally. Beeswax melts at a higher temperature than some other candle waxes, so gentle, steady heat works best. Avoid heating the wax directly on the stove, since beeswax can scorch if it gets too hot. If you are making a scented candle, let the melted wax cool slightly before adding essential oil. Stir gently so the fragrance blends evenly through the melted wax. If you prefer a more natural beeswax candle, you can skip the oils completely. A plain beeswax candle still has a soft natural scent and a beautiful glow.
- Carefully pour the melted wax into the prepared mason jar, keeping the wick centered as you pour. Leave a little space at the top of the jar. Let the candle sit undisturbed while it cools. Beeswax may shrink slightly as it firms up. If a small dip forms around the wick, you can melt a little extra wax and pour a thin second layer over the top.
- Let the candle cool completely before trimming the wick. Once the wax is firm, trim the wick to about ¼ inch. The candle is ready to use once it has fully set.
Notes

Welcome!
Hi! I’m Stephanie, also known as Idie. Follow me as I tap into the methods of the past and learn how to make my world a little smaller.

Tammy Bowser says
Totally love 💕 everything that i am reading 📚 and looking at so far. Look forward to learning alot from you. Thank you kindly 🙏
Tammy Bowser
Stephanie says
Thank you so much, Tammy! That means a lot. I’m so glad you’re enjoying what you’re finding here, and I’m happy to have you following along.