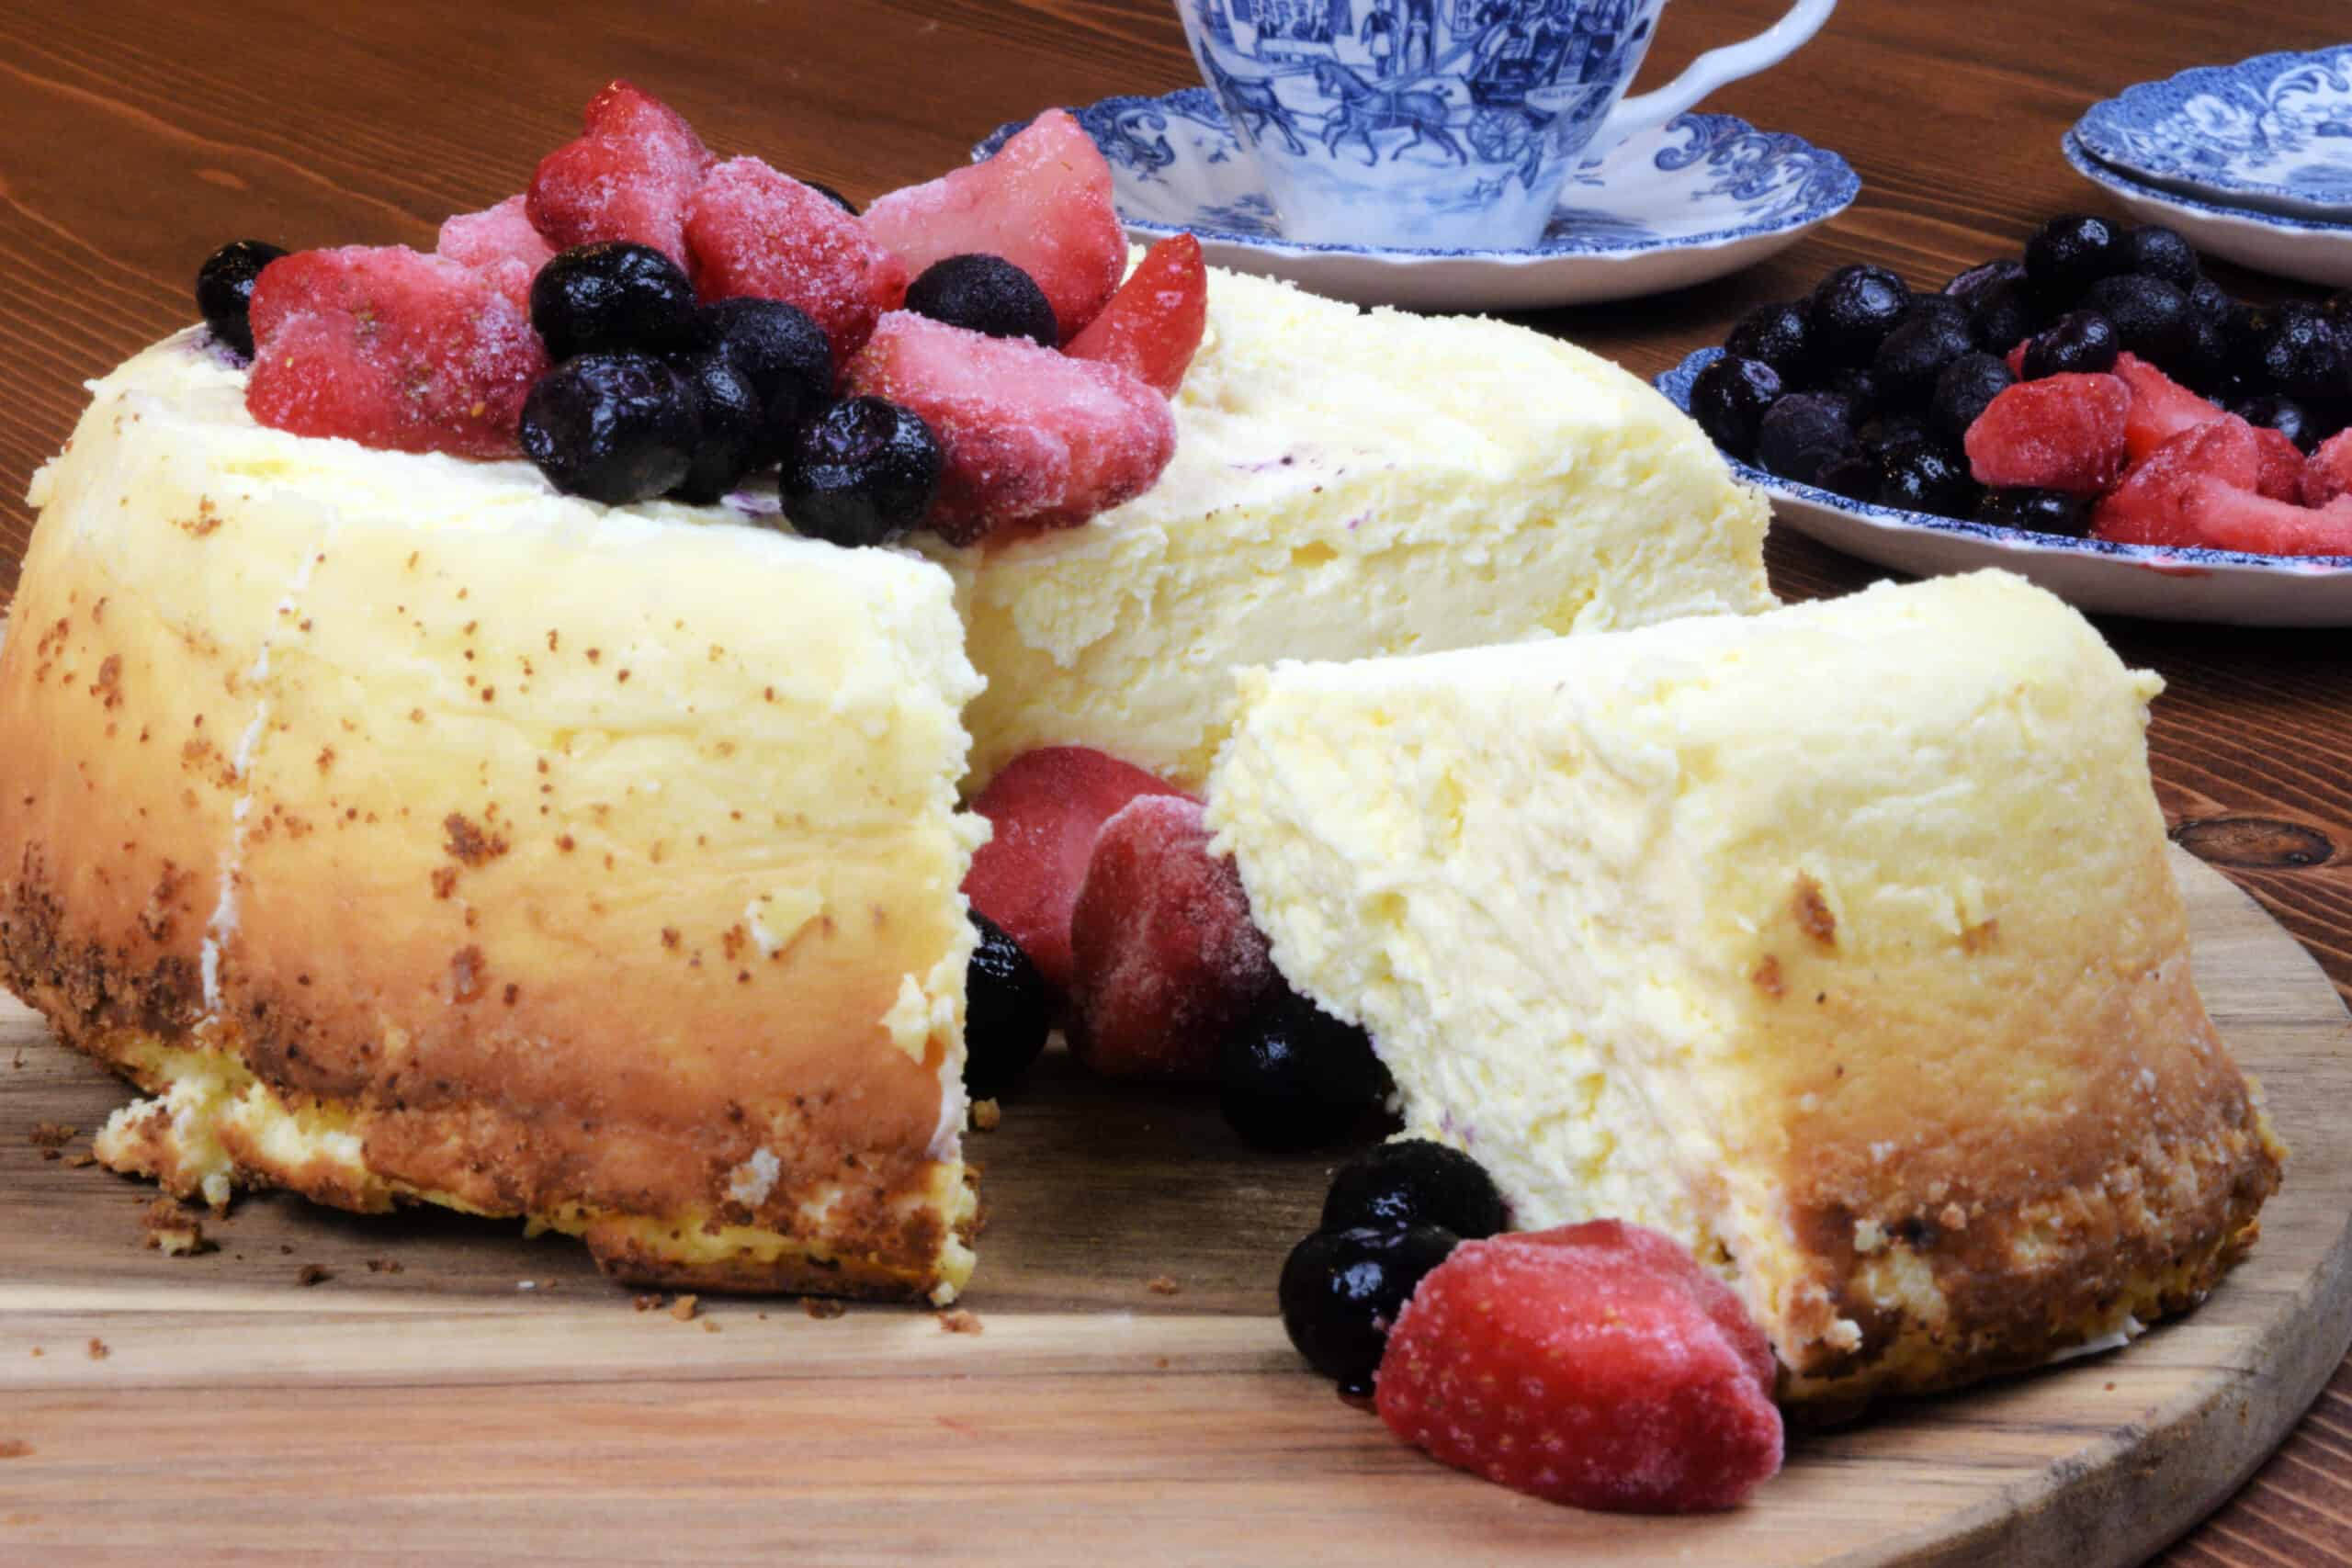
This New York Style Cheesecake Recipe (No Springform Pan) is so amazingly delicious with its creamy texture and a hint of tanginess from the lemon. It will have you coming back for more! I can't hardly stop at one!

Ahh, the New York style cheesecake, my ultimate comfort food! And I’m pretty sure I’m not alone. That is why you are reading this post, right? What is it that draws you in? Its dense creamy texture? The fact that you can put any topping on it to make it absolutely even more fabulous? Literally, anything goes with it! Sadly though, they can be difficult to make and very time consuming, which halts my enthusiasm for them. It’s a tough one. I've been through countless recipes that have left it eggy, dry, and flat. So disappointing when you are looking forward to your favorite desert and it’s a complete failure. But don't fret! This simple New York Cheesecake recipe is so easy it’ll have you making it time and time again and possibly buying another pair of jeans!

What Makes A New York Cheesecake Different?
The New York style cheesecake is heavier on the cream cheese side causing it to be more dense. It doesn’t require as much sugar as a traditional cheesecake, but hits enough of the sweet note to satisfy ones palate. It could definitely meet the qualifications of a perfect cheesecake filling for a special occasion cake if the eggs are eliminated and some milk is added. Regular cheesecake tends to be lighter and airier requiring more ingredients such as: sour cream, heavy cream, and sugar, thus making it more difficult in finding the perfect recipe for the perfect texture.
This post contains affiliate links, which means I make a small commission at no extra cost to you. See my full disclosure here.

What Constitutes This As The Best Cheesecake Recipe?
Well my friend, there are only a few ingredients! And chances are, you have them all in your fridge and cupboard! Cream cheese, eggs, sugar, vanilla, lemon zest or juice, and salt is all it takes to make this recipe a decadent creamy texture! You can omit the lemon juice if you so choose, but I believe it does give a cheesecake that extra depth of tanginess it deserves. Well, what about a crust? No place for it here! Therefore, if you have an intolerance to gluten, or are just watching your carb intake, this recipe can be tailored to your needs. Just simply butter the dish and then dust the pan with almond flour or coconut flour instead of regular flour or graham cracker crumbs.

Make this a keto cheesecake or a low carb cheesecake!
This recipe is so versatile, that yes, even the sugar can be substituted successfully! I've done it with a variety of them. The ones I've tried that have worked well for me are: monk fruit, allulose, erythritol, and Swerve. I will say that monk fruit and Swerve worked the best. I was able to swap them out cup for cup. As far as Allulose and Erythritol, I found that I had to use a bit more of both to equal to the sweetness of sugar.
I have heard and experienced that when you cook with erythritol, you tend to need to add a little bit extra because some of the sweetness gets baked off when heated. So in this case I used about 2 tablespoons more and that seemed to give just the right sweetness. The other negative thing about erythritol is it tends to get a bit crystally when cooked. Because of this reason, and the fact that it tends to have a bit of a cooling sensation when eaten, it is my least favorite to bake with.
I have found that blending the sugar before using it tends to help with the crystallization, but sometimes it's a hit or miss and as far as the cooling sensation, I don't think there's any way around that.

How To Change It Up For The Seasons
This can literally be your all season recipe. It’s great to use as a base and then to add a flavor based on the season you are in. One of my favorite ways to dress this creamy cheesecake up is by adding a bit more lemon juice to the batter, and when ready to serve, I love topping it with fresh blueberries and strawberries for a perfect springtime indulgence. Sometimes I’ll make a blueberry sauce with apricots to drizzle on it too. The combination goes so well together. On a cozy fall day, I omit the lemon and add a teaspoon of pumpkin spice to it or a teaspoon of cinnamon, and will serve it with an espresso on the side–delicious! The possibilities are endless with this perfect cheesecake!

How To Store This Cheesecake:
Do I think you will need to store this cake, nah, but let's say hypothetically. You can always cover it with plastic wrap, foil, or place it into an airtight container in your fridge for up to 4 days. I have also found that it freezes beautifully! I just put it in an airtight container to keep it from getting freezer burn, and when I'm ready to indulge, then I will pull it out and put it on my counter for a couple of hours to defrost. I have also cut it into portions and placed freezer sheets between each slice so I could pull a slice out as the cravings hit, this helps a lot with portion control! This is also a handy fallback you can have on hand in case a guest stops to visit. A slice of this and a cup of coffee would be the perfect afternoon snack! Check out my post on Why French Press Coffee Does Taste Better (Recipe)!

Ingredients:
4 8-ounce packages of softened cream cheese
1 cup sugar or sugar substitute
4 large eggs (room temperature)
1 tablespoon lemon juice (optional)
1 teaspoon vanilla
1 tablespoon softened butter
¼ cup all purpose flour, almond flour, or coconut flour (to coat the dish)
A pinch of salt
Equipment:
Stand mixer with a paddle attachment, a large bowl with a hand mixer, a food processor, or a high speed blender (which I prefer)
An 8 in. circular glass dish such as a Pyrex dish
Parchment paper
A large pan with deep sides for a water bath. Sometimes I use a larger rectangular pyrex dish

Instructions:
Heat oven temperature to 350 degrees.
Prepare your hot water bath. Place, in your oven on the middle shelf, a baking sheet (with high sides) filled with water a little less than half way, to ensure that it doesn’t overflow when placing your prepared cheesecake dish in it to bake.
Place softened cream cheese in a stand mixer with a paddle attachment, or in a large bowl if using a electric mixer. (If using a high speed blender such as a Vitamix, place all ingredients together and blend at high speed for about a minute, pausing to scrape down the sides and to ensure everything is well incorporated.)
Turn the mixer on medium low speed, working up to medium speed, add sugar until well combined. Occasionally scraping down the sides of the bowl.
Add 1 egg at a time.
Add a pinch of salt
Add Vanilla
Add lemon (if using), or any seasoning you choose
Prepare the 8 in. circular glass dish by lining the bottom of the pan with parchment paper and/ or you can butter the bottom and the sides of the pan thoroughly and dust with the type of flour you desire.
Pour cheesecake batter into the prepared glass dish.
Place in the center of the water bath.
Close the oven door and bake for 1 hour.
Once cooking time is up, turn the oven off, and leave the cheesecake in the oven for an additional hour, making sure not to open the oven door.
Place in the refrigerator for several hours until the cheesecake cools, then serve by itself or with a delicious topping!
Cover it with plastic wrap or aluminum foil to store in your refrigerator for up to 4 days.

New York Style Cheesecake Recipe (No Springform Pan)
Ingredients
- 4 8- ounce packages of softened cream cheese
- 1 cup sugar or sugar substitute
- 4 large eggs
- 1 tablespoon lemon juice optional
- 1 teaspoon vanilla
- 1 tablespoon softened butter
- ¼ cup all purpose flour almond flour, or coconut flour
- A pinch of salt
Instructions
- Heat oven temperature to 350 degrees.
- Prepare your hot water bath. Place, in your oven on the middle shelf, a baking sheet (with high sides) filled with water a little less than half way, to ensure that it doesn’t overflow when placing your prepared cheesecake dish in it to bake.
- Place softened cream cheese in a stand mixer with a paddle attachment, or in a large bowl if using a electric mixer. (If using a high speed blender such as a Vitamix, place all ingredients together and blend at high speed for about a minute, pausing to scrape down the sides and to ensure everything is well incorporated.)
- Turn the mixer on medium low speed, working up to medium speed, add sugar until well combined. Occasionally scraping down the sides of the bowl.
- Add 1 egg at a time.
- Add a pinch of salt
- Add Vanilla
- Add lemon (if using), or any seasoning you choose
- Prepare the 8 in. circular glass dish by lining the bottom of the pan with parchment paper and/ or you can butter the bottom and the sides of the pan thoroughly and dust with the type of flour you desire.
- Pour cheesecake batter into the prepared glass dish.
- Place in the center of the water bath.
- Close the oven door and bake for 1 hour.
- Once cooking time is up, turn the oven off, and leave it for an additional hour, making sure not to open the oven door.
- Place in the refrigerator for several hours until the cheesecake cools, then serve by itself or with a delicious topping!
- Cover it with plastic wrap or aluminum foil to store in your refrigerator for up to 4 days.
Obsessed with cheese as I am? Try making my Homemade Farmer's Cheese!
Or Read my post on Why We Love Raw Milk And Why It's Good For Us and find out where you can source raw milk in your community.


[…] Looking for more recipes for the keto diet? Check out my crustless Simple New York Style Cheesecake recipe! […]