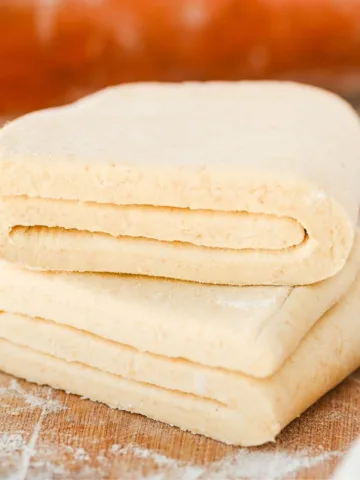
This beloved Pennsylvania Dutch dessert comes straight out of my 1958 edition of The New Pennsylvania Dutch Cook Book by Ruth Hutchison — one of my favorite vintage finds. The original recipe calls for shortening, but I use homemade butter for a richer flavor and homemade sourdough pie crust, or for a healthier version my sourdough milled wheat pie crust.
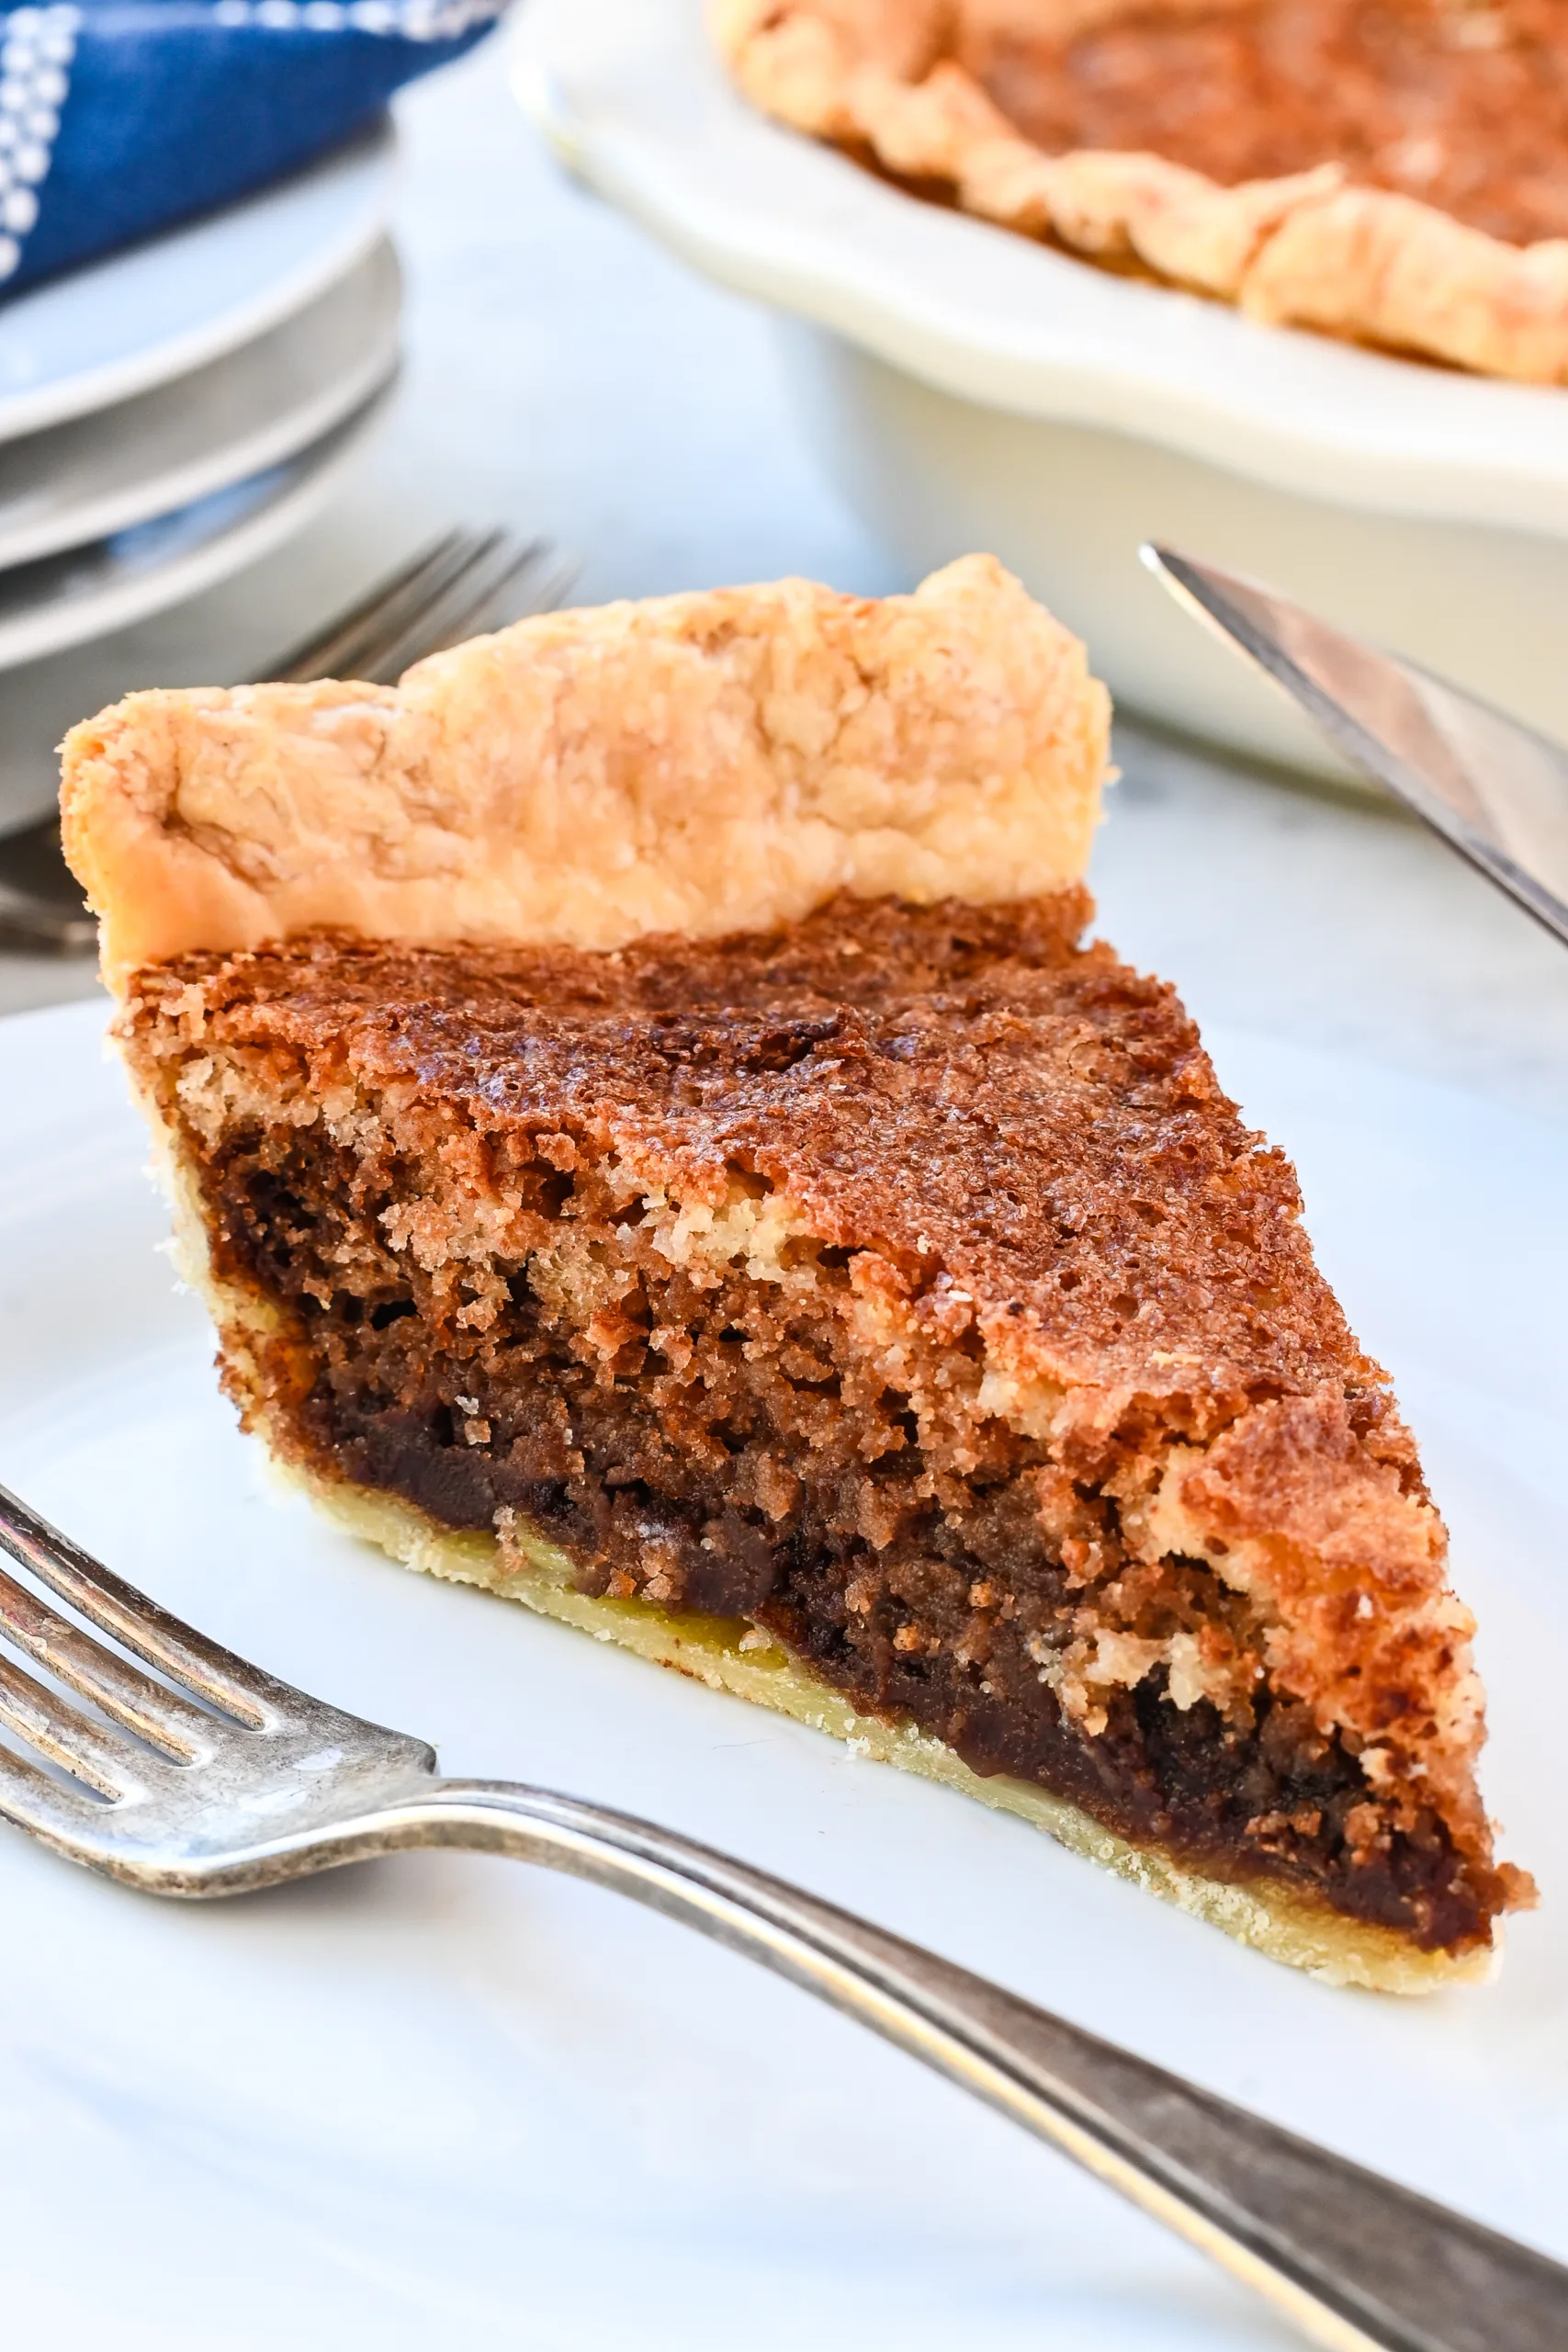
Table of Contents
This post contains affiliate links, which means I make a small commission at no extra cost to you. See my full disclosure here.
Why It’s Called “Funny Cake”
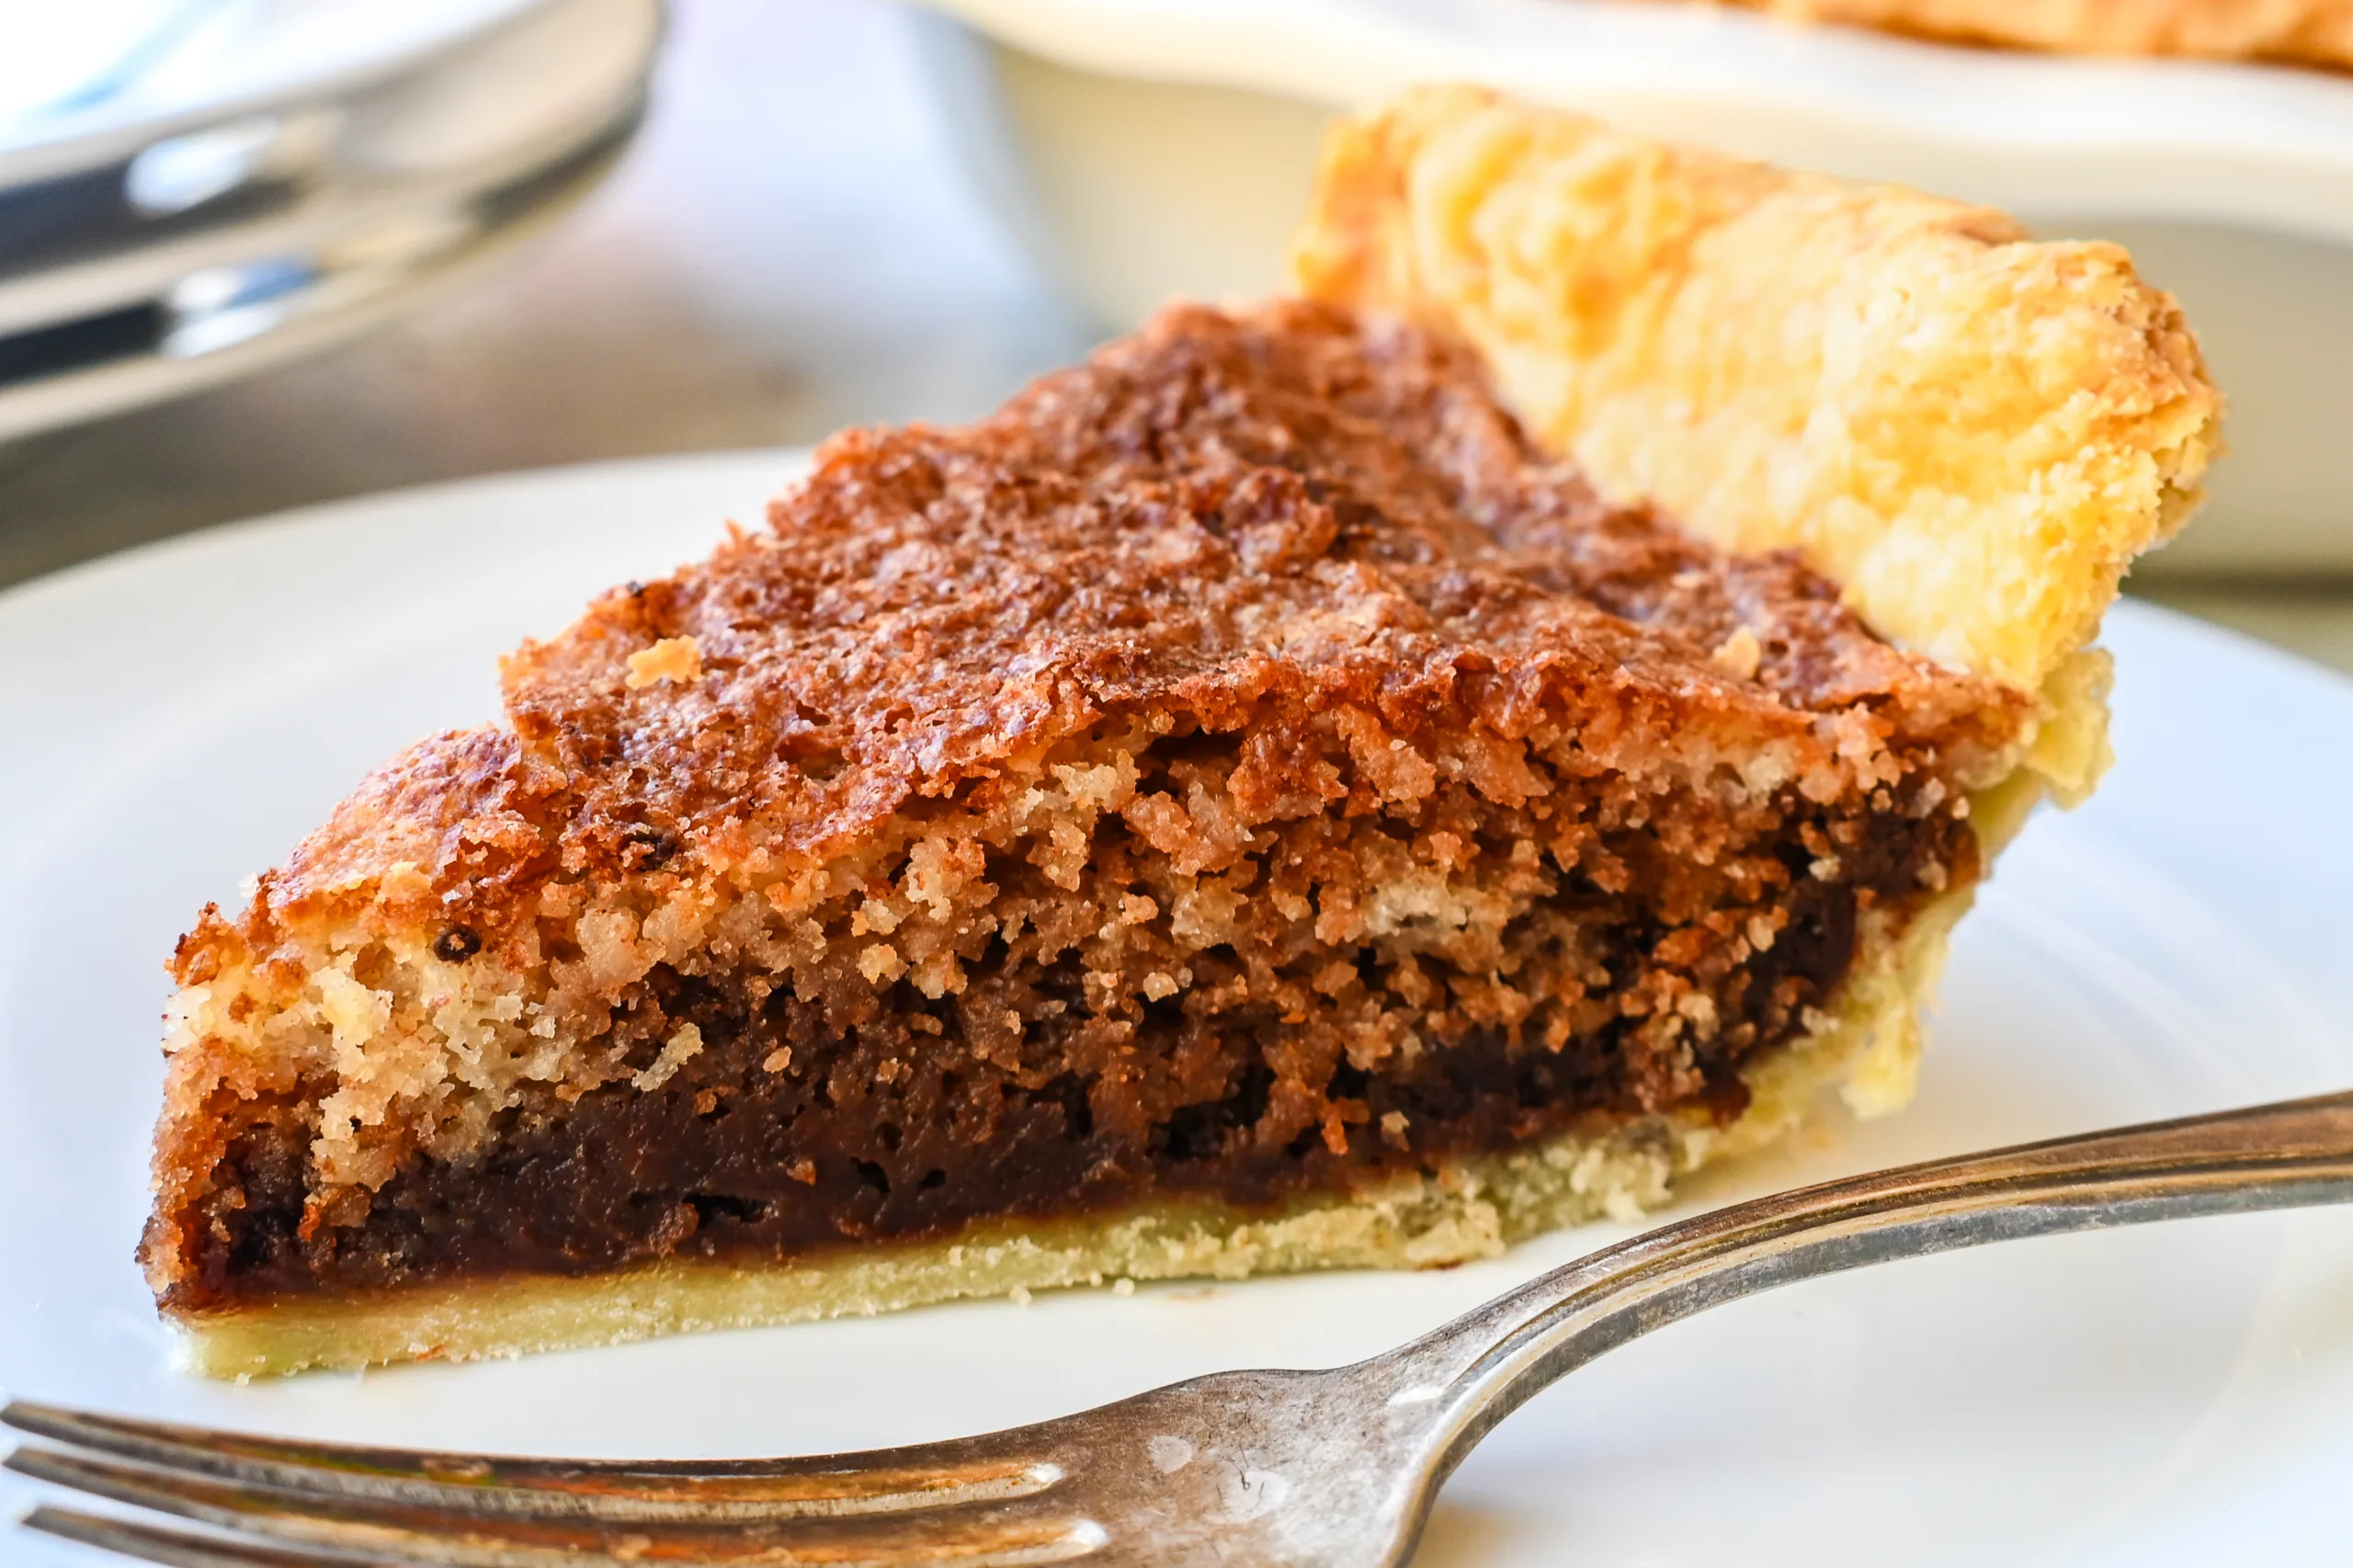
Funny Cake is one of those recipes that makes you pause and ask, “Wait—what goes where?” In this old-fashioned recipe, the directions say to pour the chocolate layer into the unbaked pie crust first, then spoon the cake batter over the top. But after a little investigating (and plenty of taste testing), it turns out that most funny cake recipes are done the opposite way: the cake batter goes first, and the chocolate sauce is poured on top—which then sinks to the bottom as it bakes.
So, which is right? Who knows—and who cares! Both are delicious. We’ll stick with the typical method here, with cake batter first and chocolate second, but if you ever get a wild hair, feel free to swap them just to see what happens. Either way, you end up with a flaky pie crust, a light vanilla cake layer, and a chocolatey surprise waiting at the bottom of each slice.
Another interesting mishap from this vintage recipe—apparently, it was supposed to make just one Funny Cake! But I can tell you from experience, that was wishful thinking! My first one escaped the pie plate, and that’s when I learned this recipe actually makes two perfect 9-inch pies.
Ingredients You’ll Need
This recipe makes two 9-inch Funny Cakes. Divide the batter and chocolate mixture evenly between the two pie shells before baking.
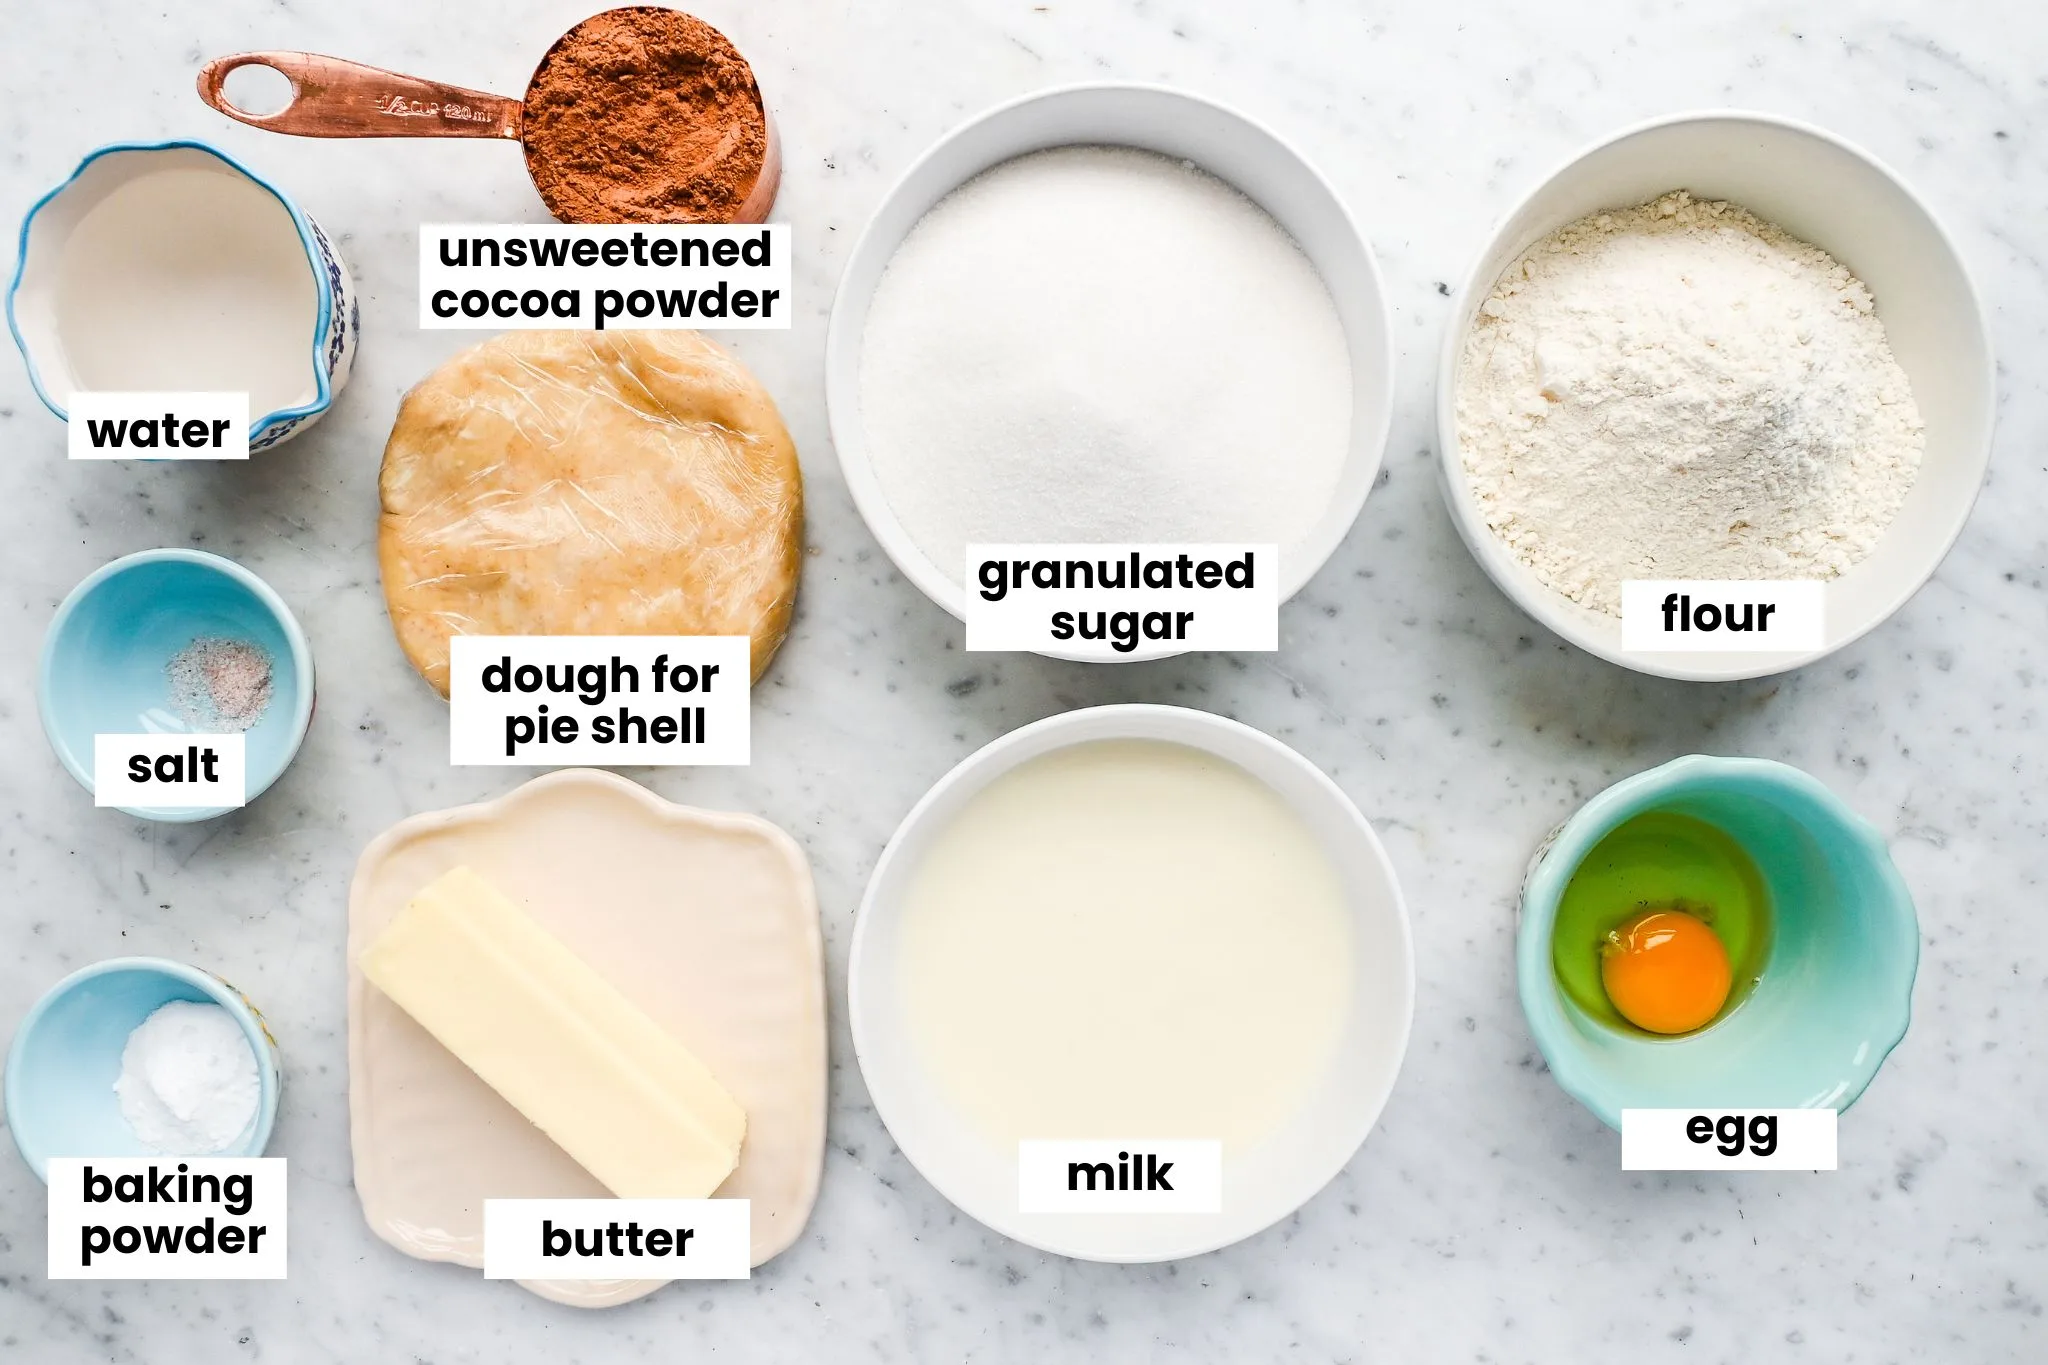
For the Base (Cake Layer)
2 unbaked pie shells (or use your own homemade sourdough pie crust)
½ cup (113 g) butter (instead of shortening) – room temperature
2 cups (400 g) sugar
1 egg
1 cup (240 g) milk
2 cups (240 g) flour
2 teaspoons baking powder
¼ teaspoon salt
For the Top (Chocolate Layer)
- 1 cup (100g) granulated sugar
- ½ cup (40g) unsweetened cocoa powder
- ½ cup (120 g) boiling water
Step-by-Step Instructions
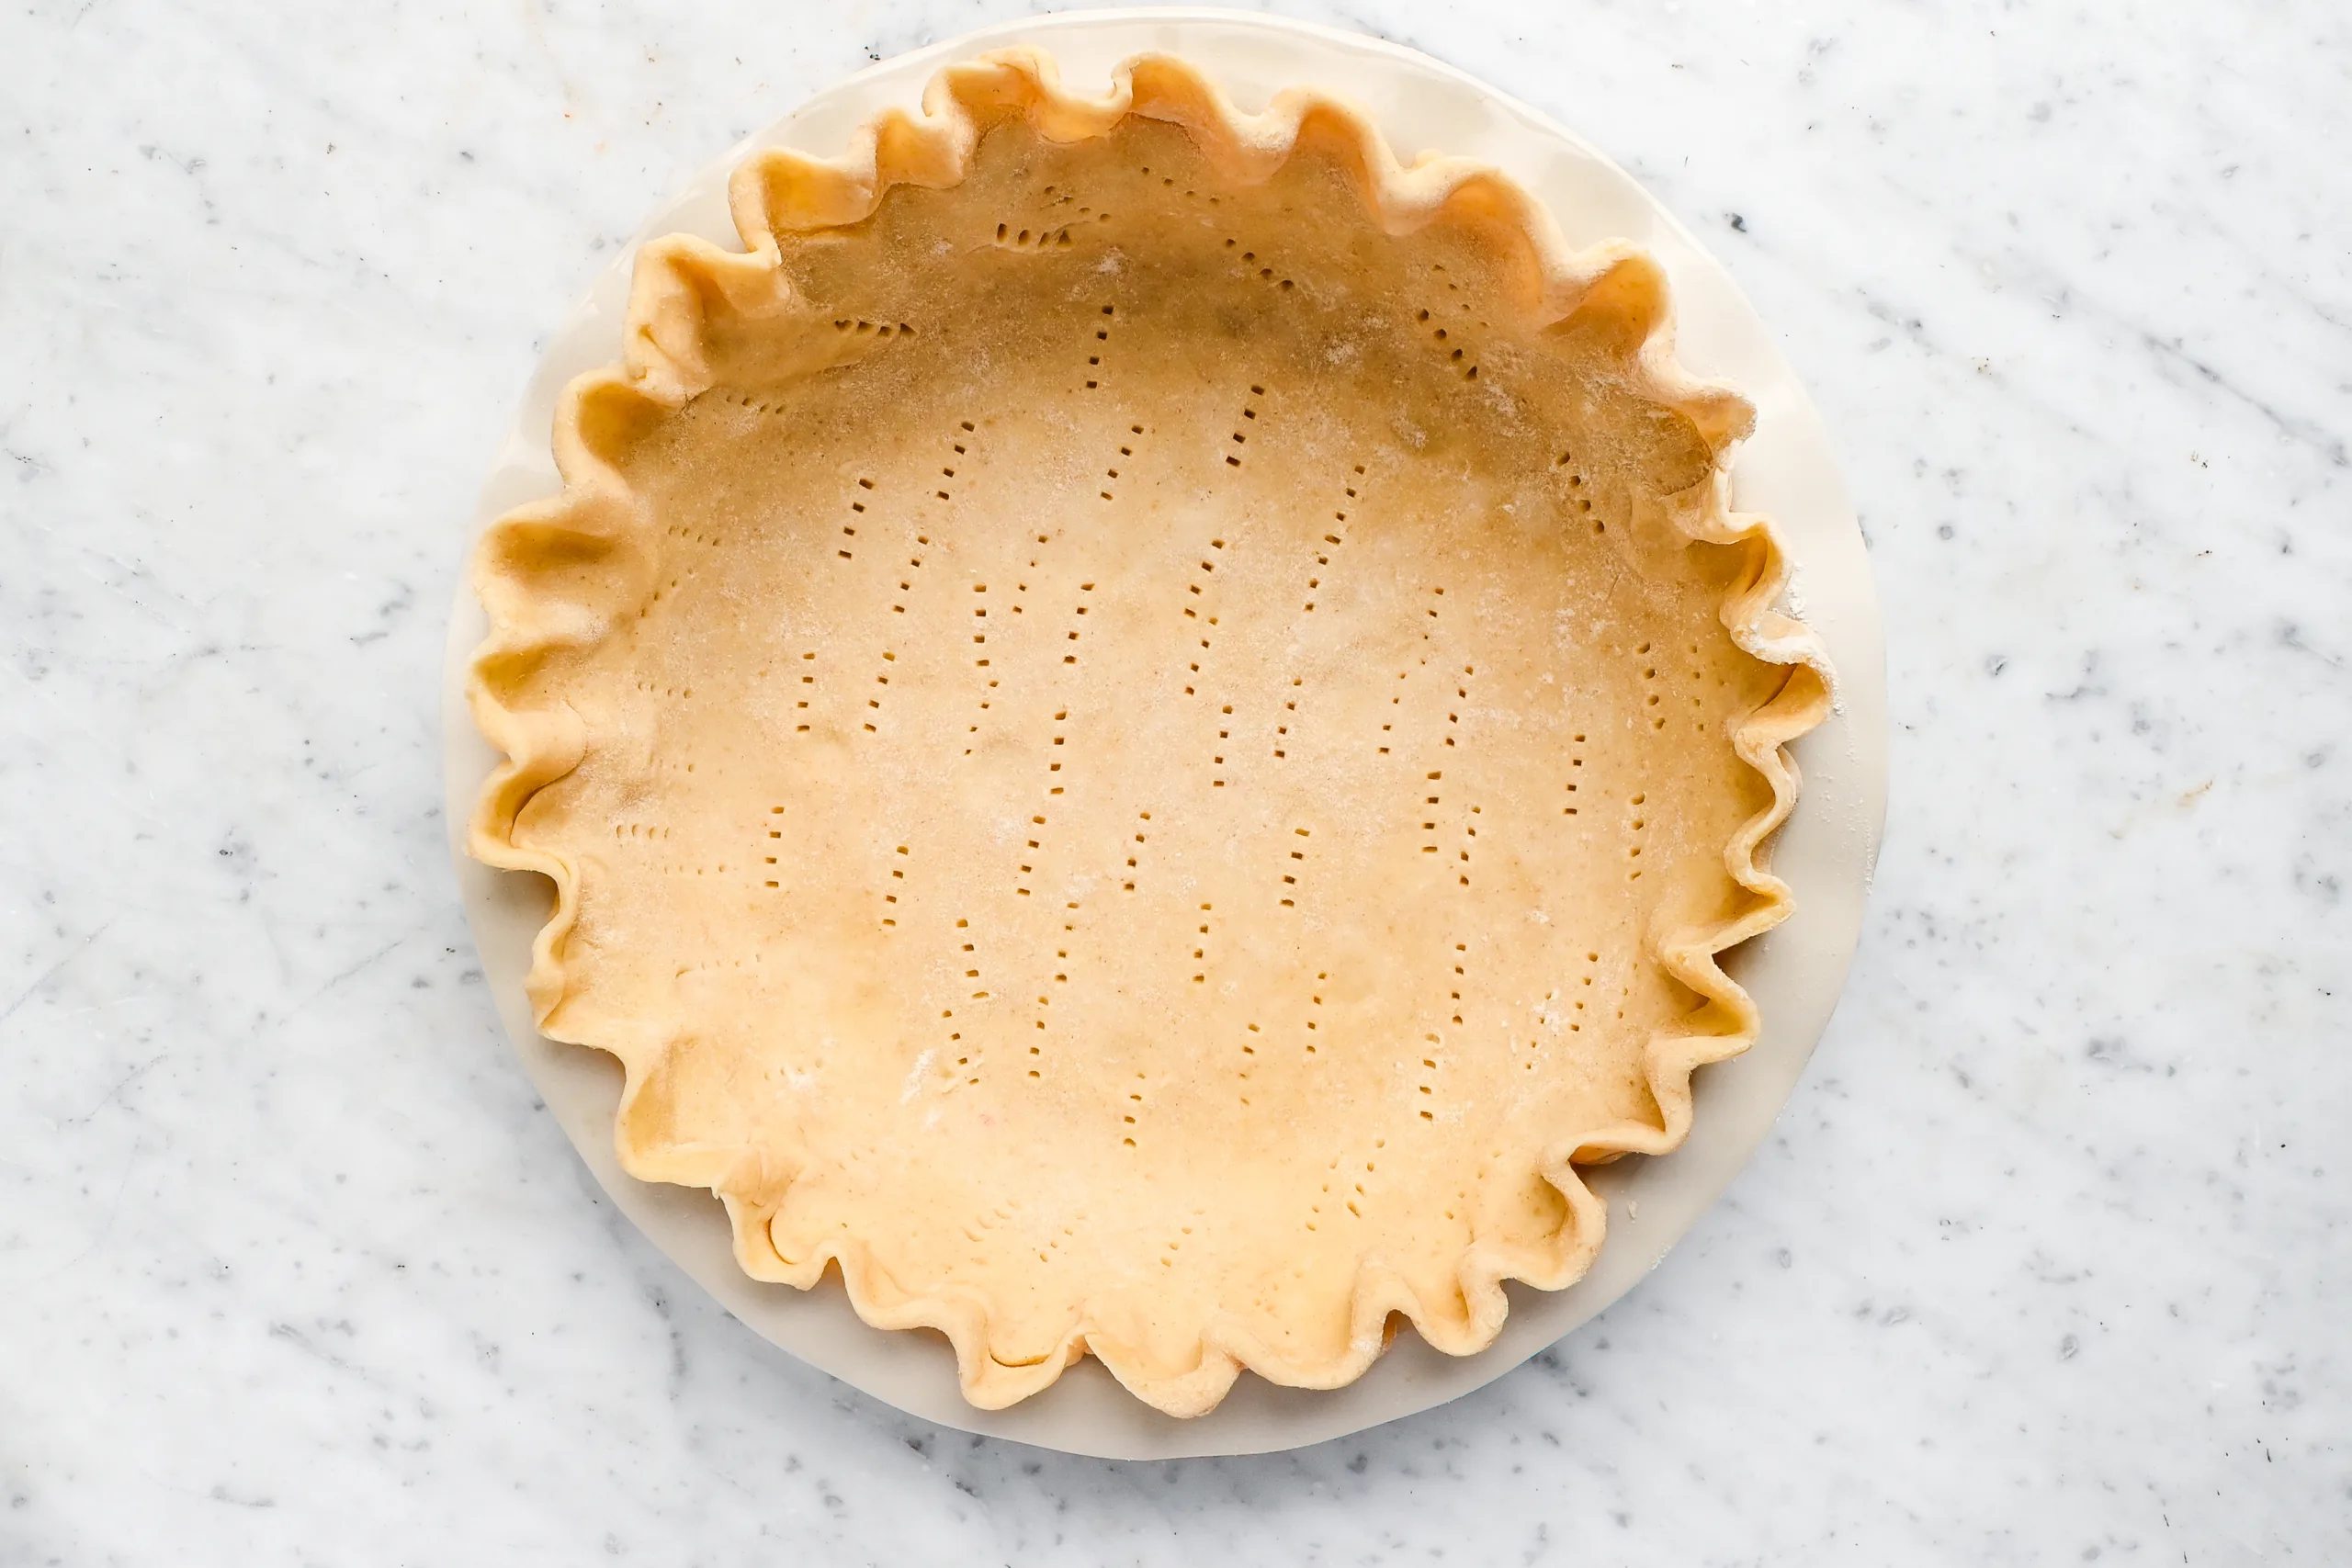
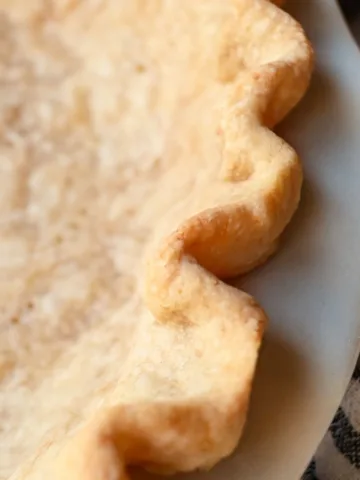
Preheat oven to 350 degrees. Roll out your pie dough and place it into your pie plate. Trim and flute the outer edge, then chill under plastic wrap while you prepare the fillings.
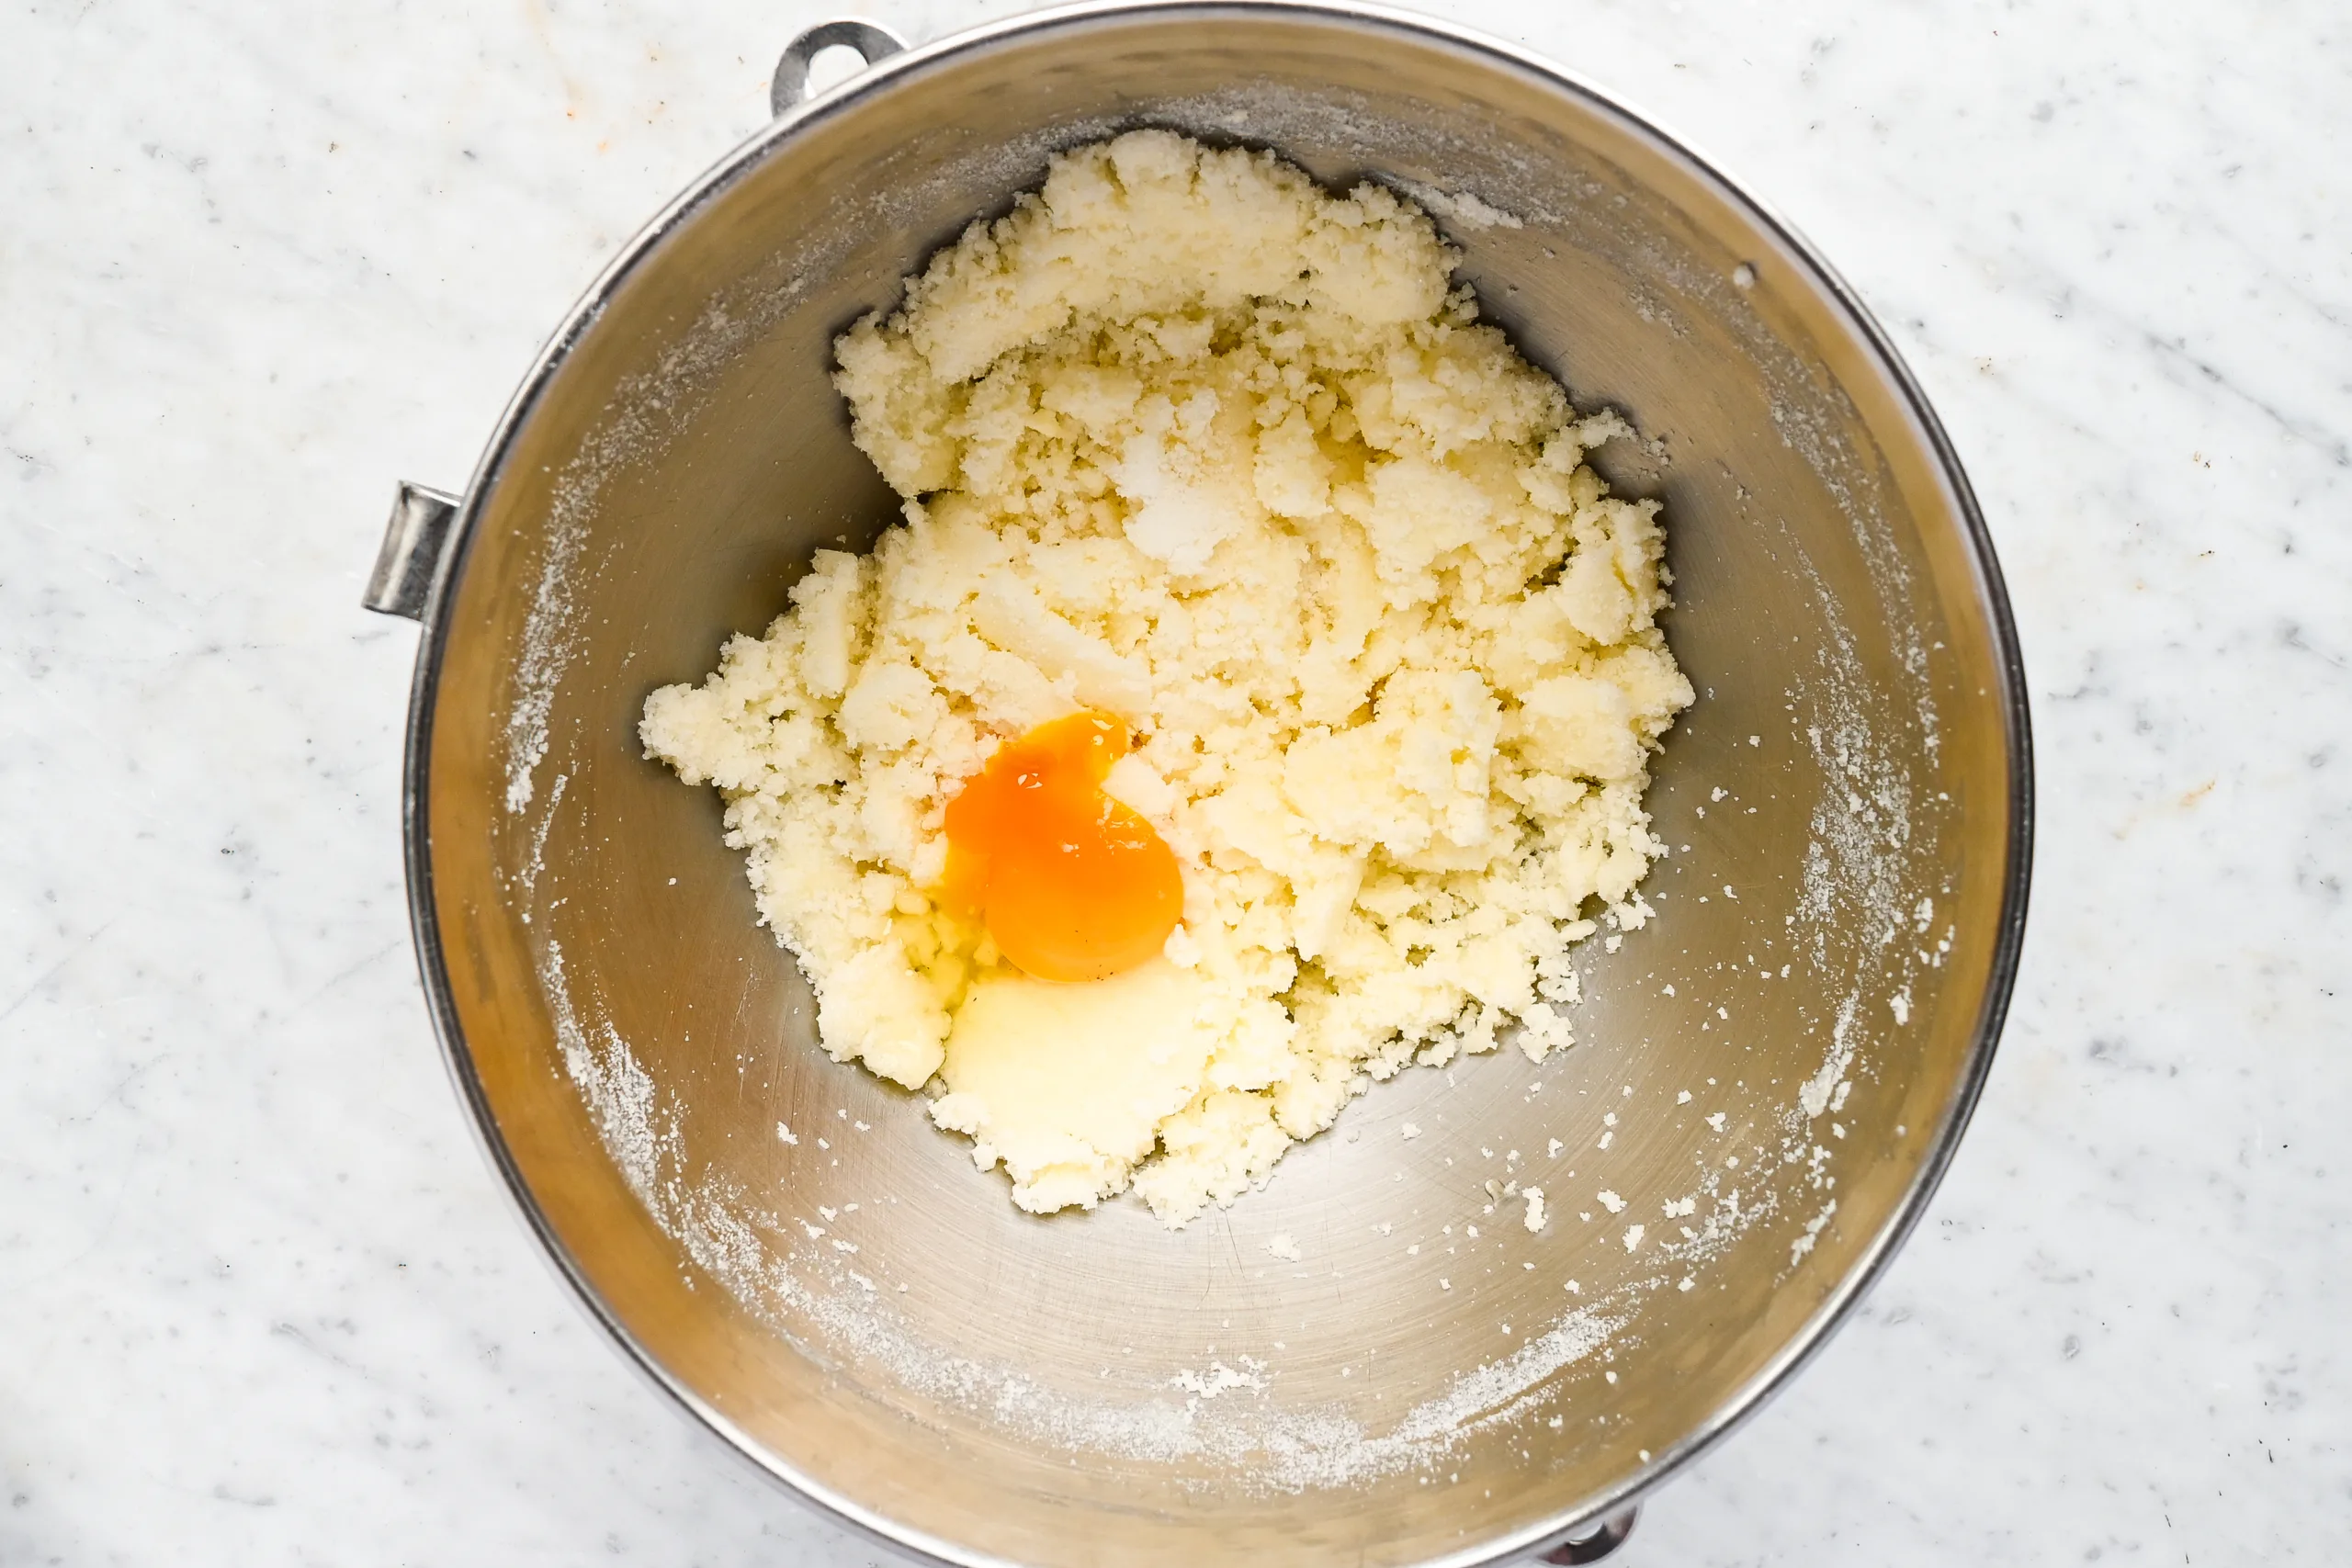
In a large bowl, place butter and sugar. Beat until creamy and light. Add the egg and mix until combined. Then mix in the milk.
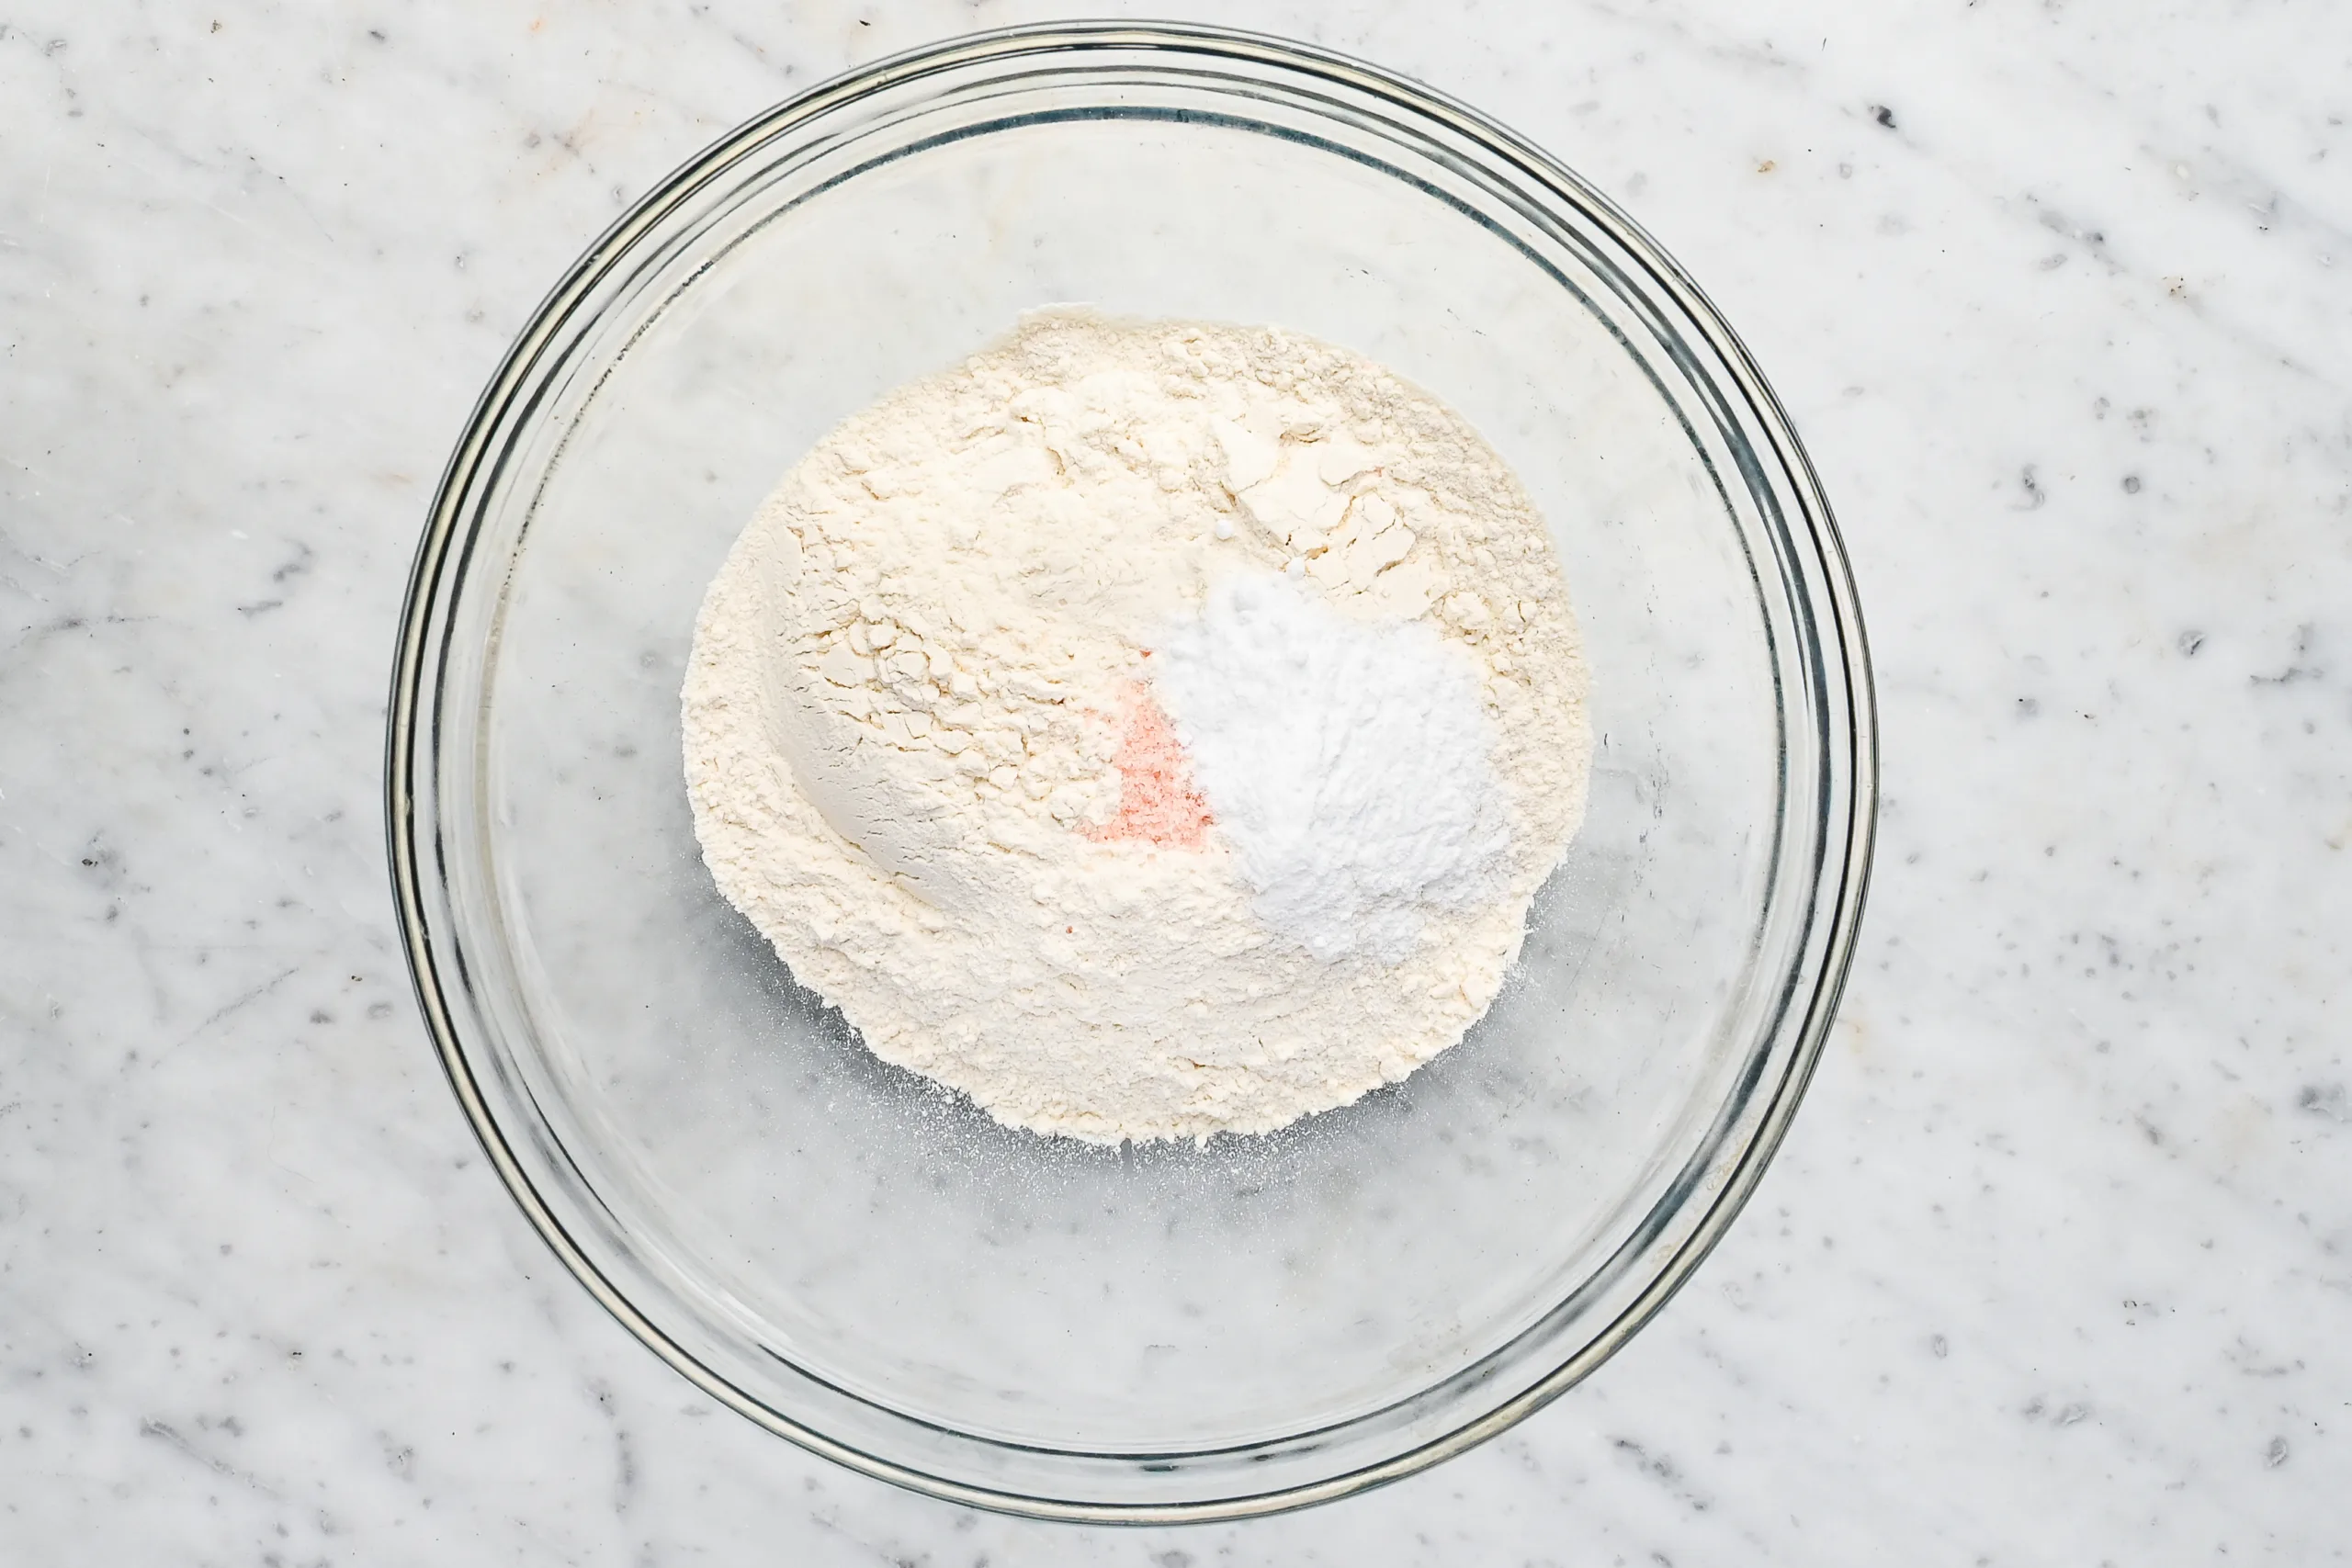
In a separate bowl, combine flour, baking powder, and salt.
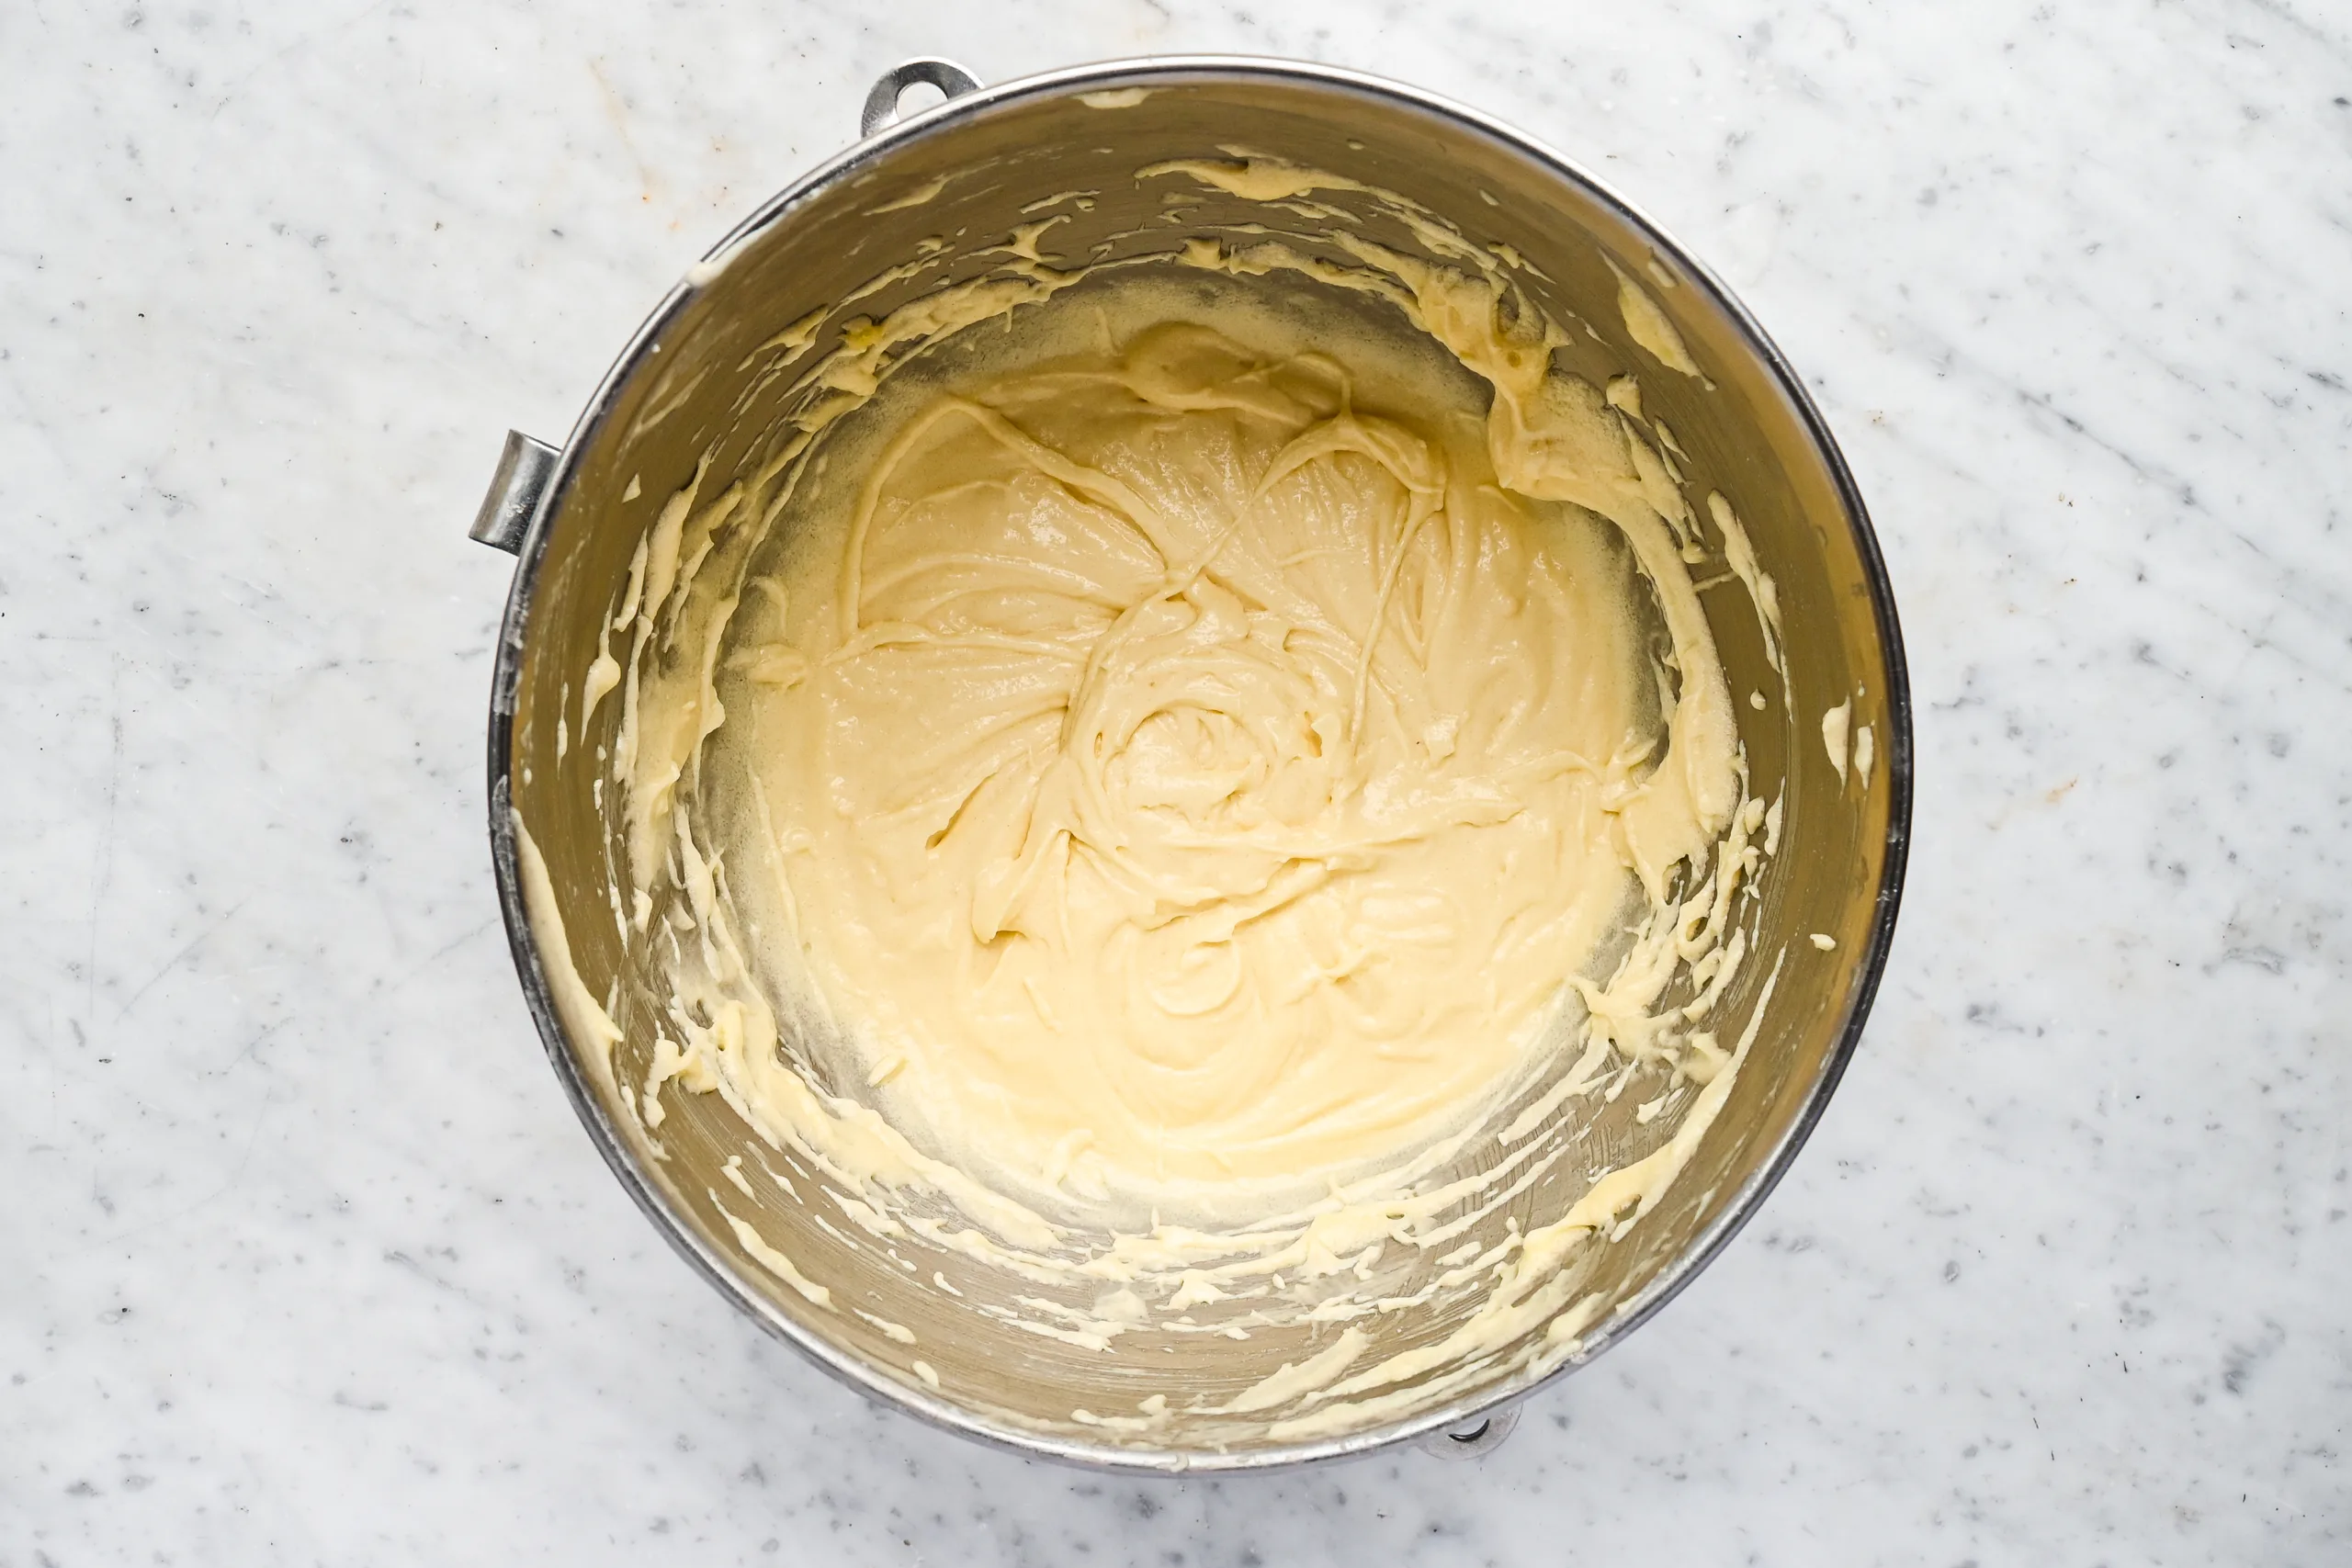
Next, add the dry ingredients to the wet, mixing just until smooth. Avoid over mixing so your cake stays tender.
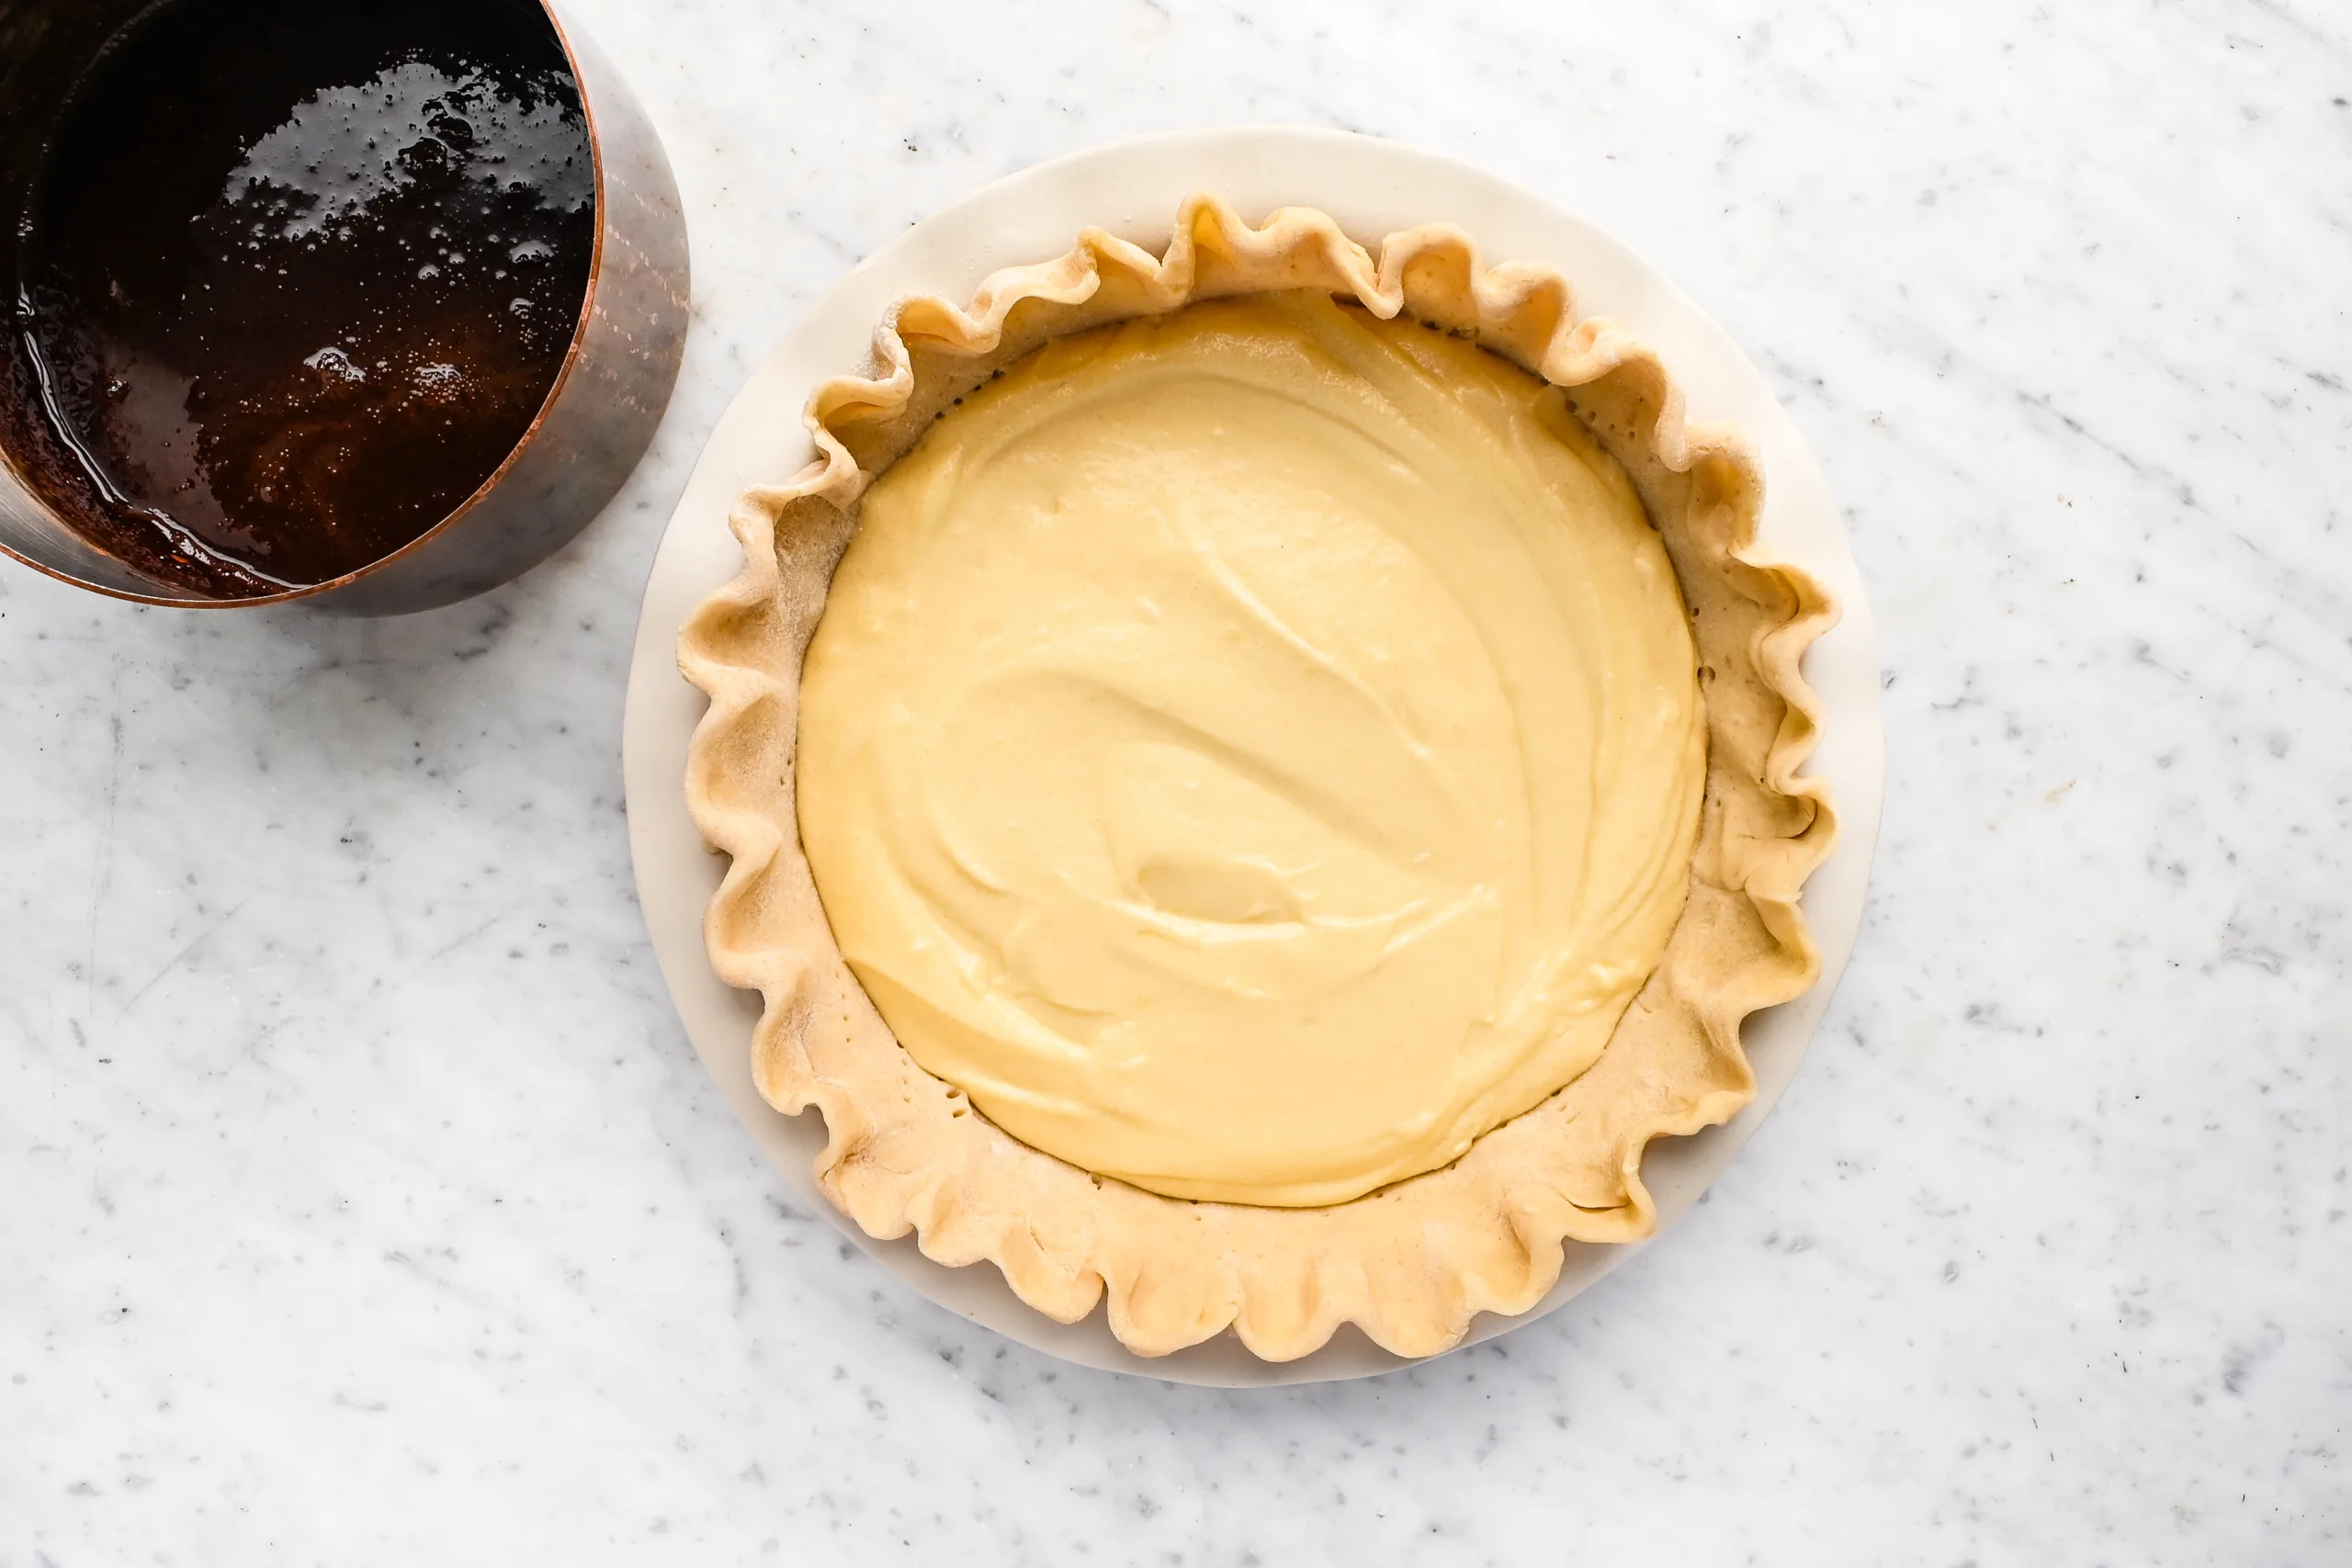
Spread half of the cake batter evenly into the unbaked pie crust.

In a small saucepan, whisk together cocoa powder, sugar, and boiling water until smooth. The mixture will be thin — that’s exactly right.
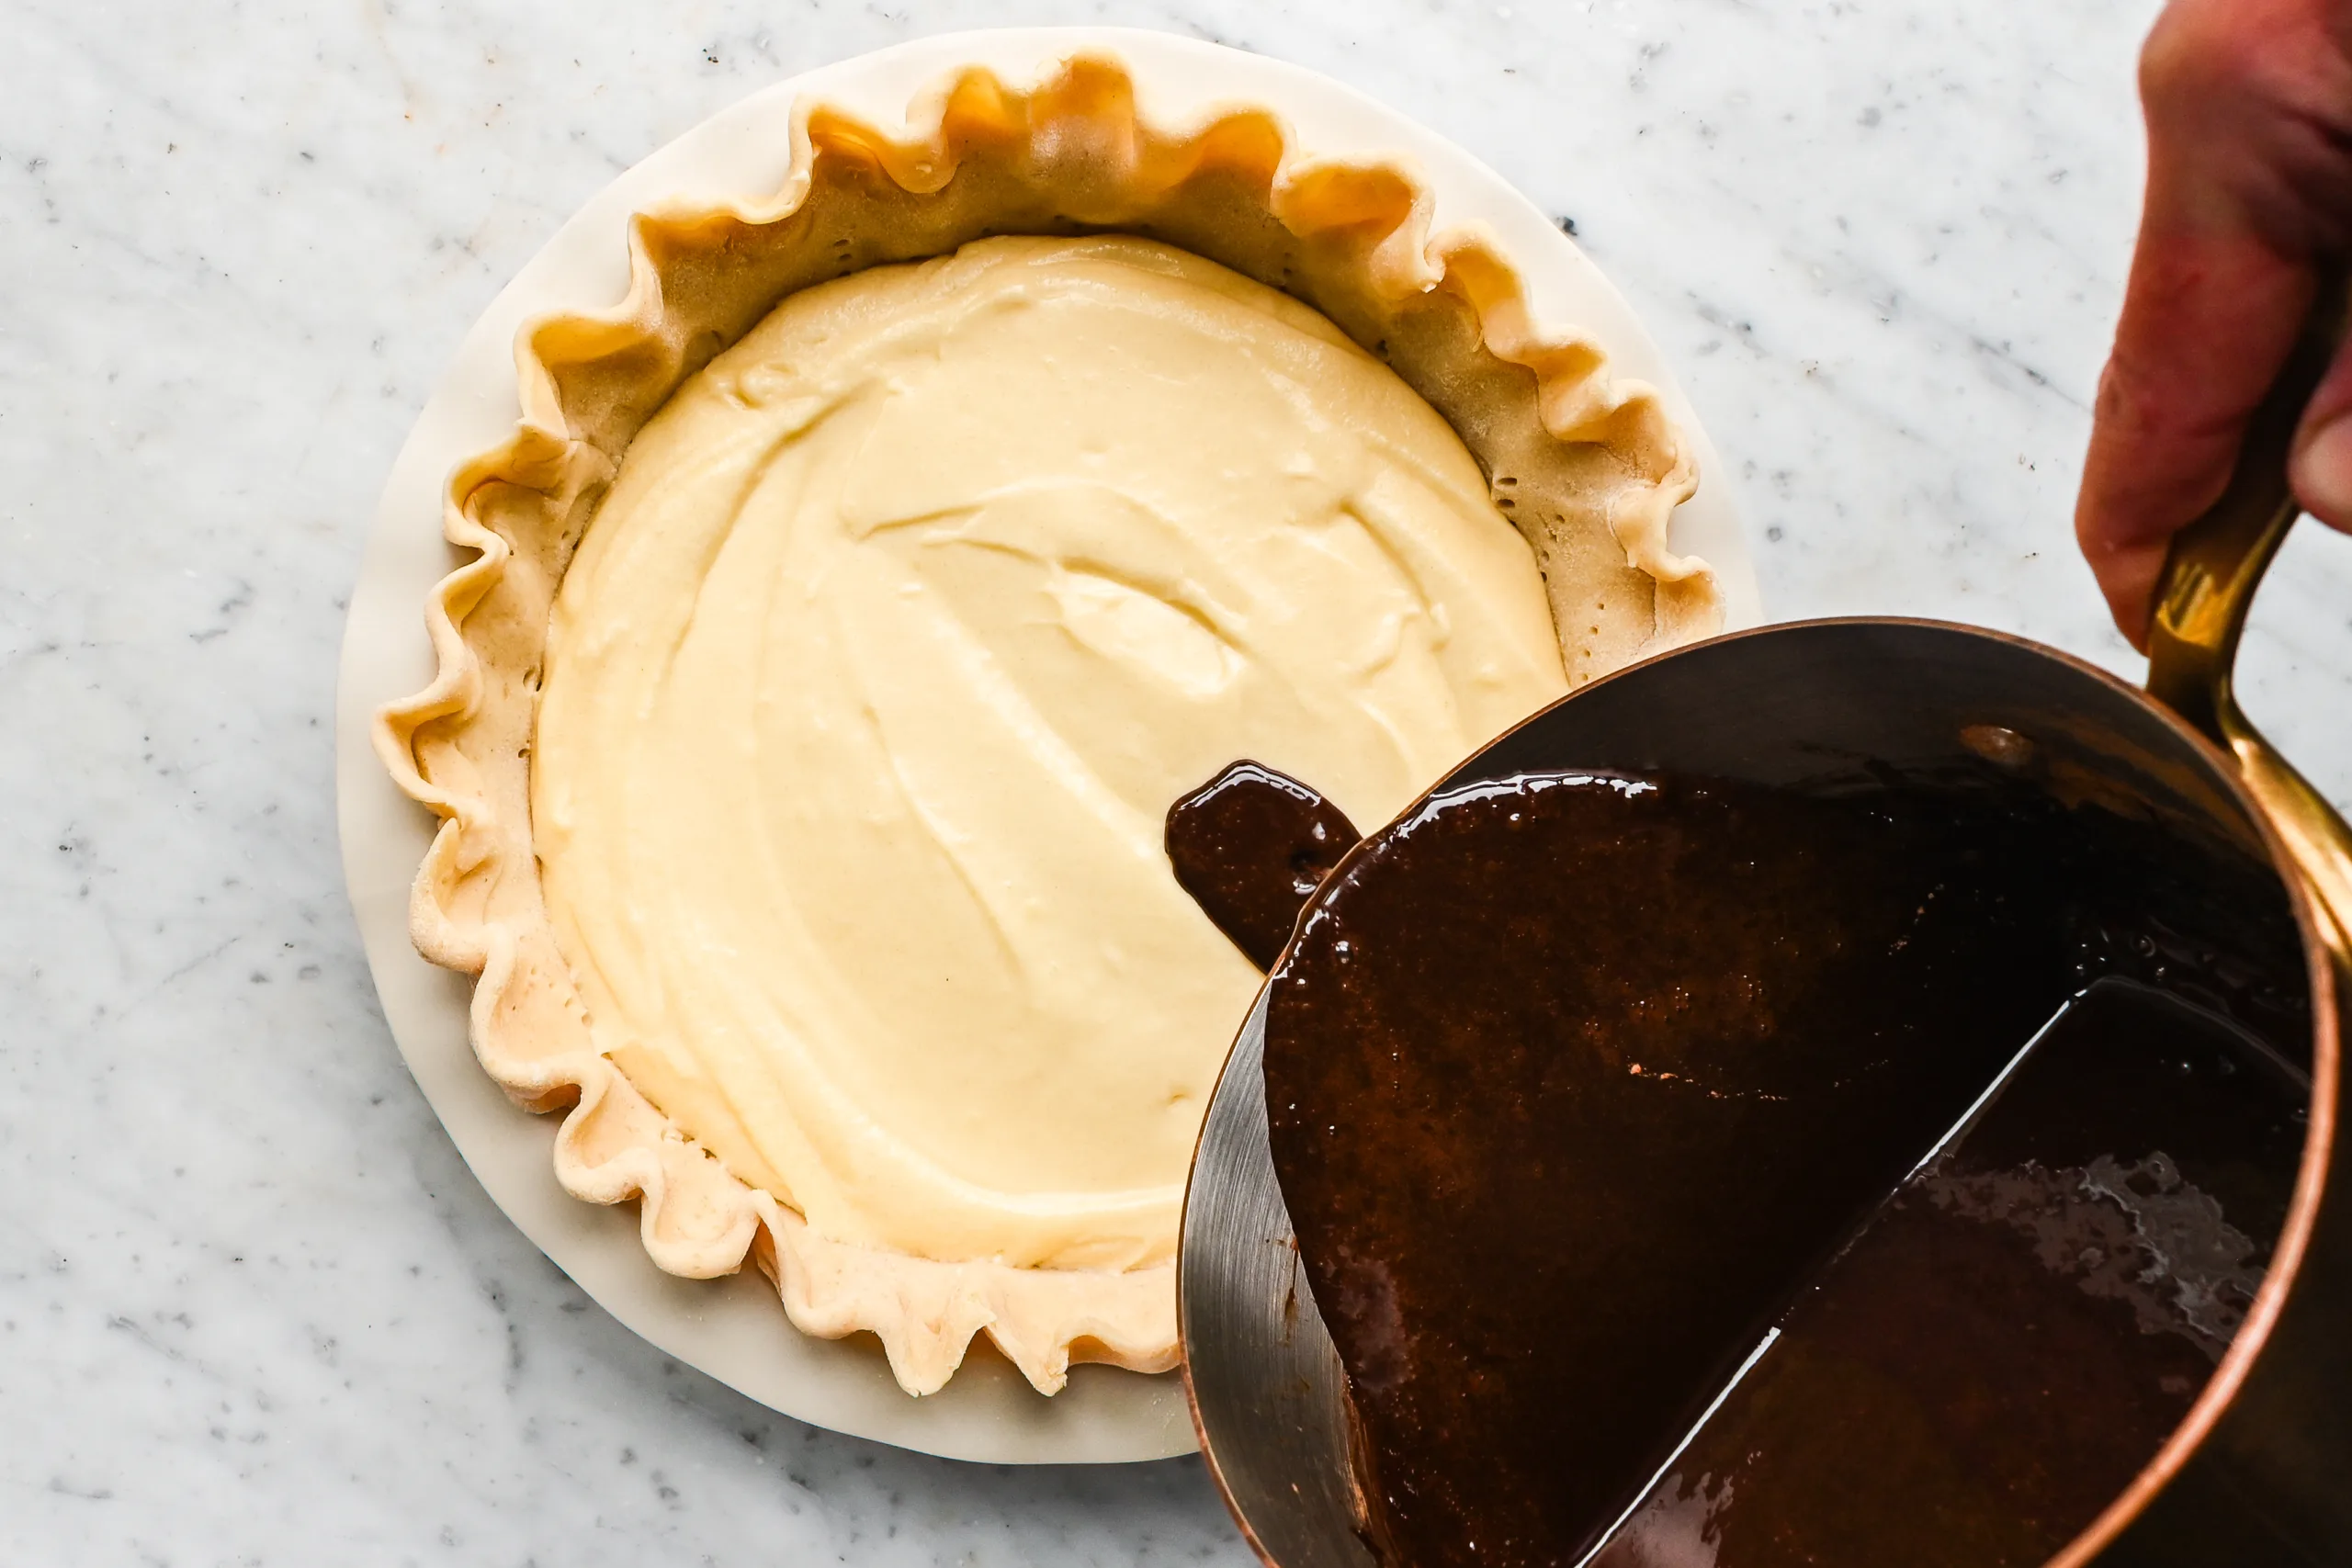
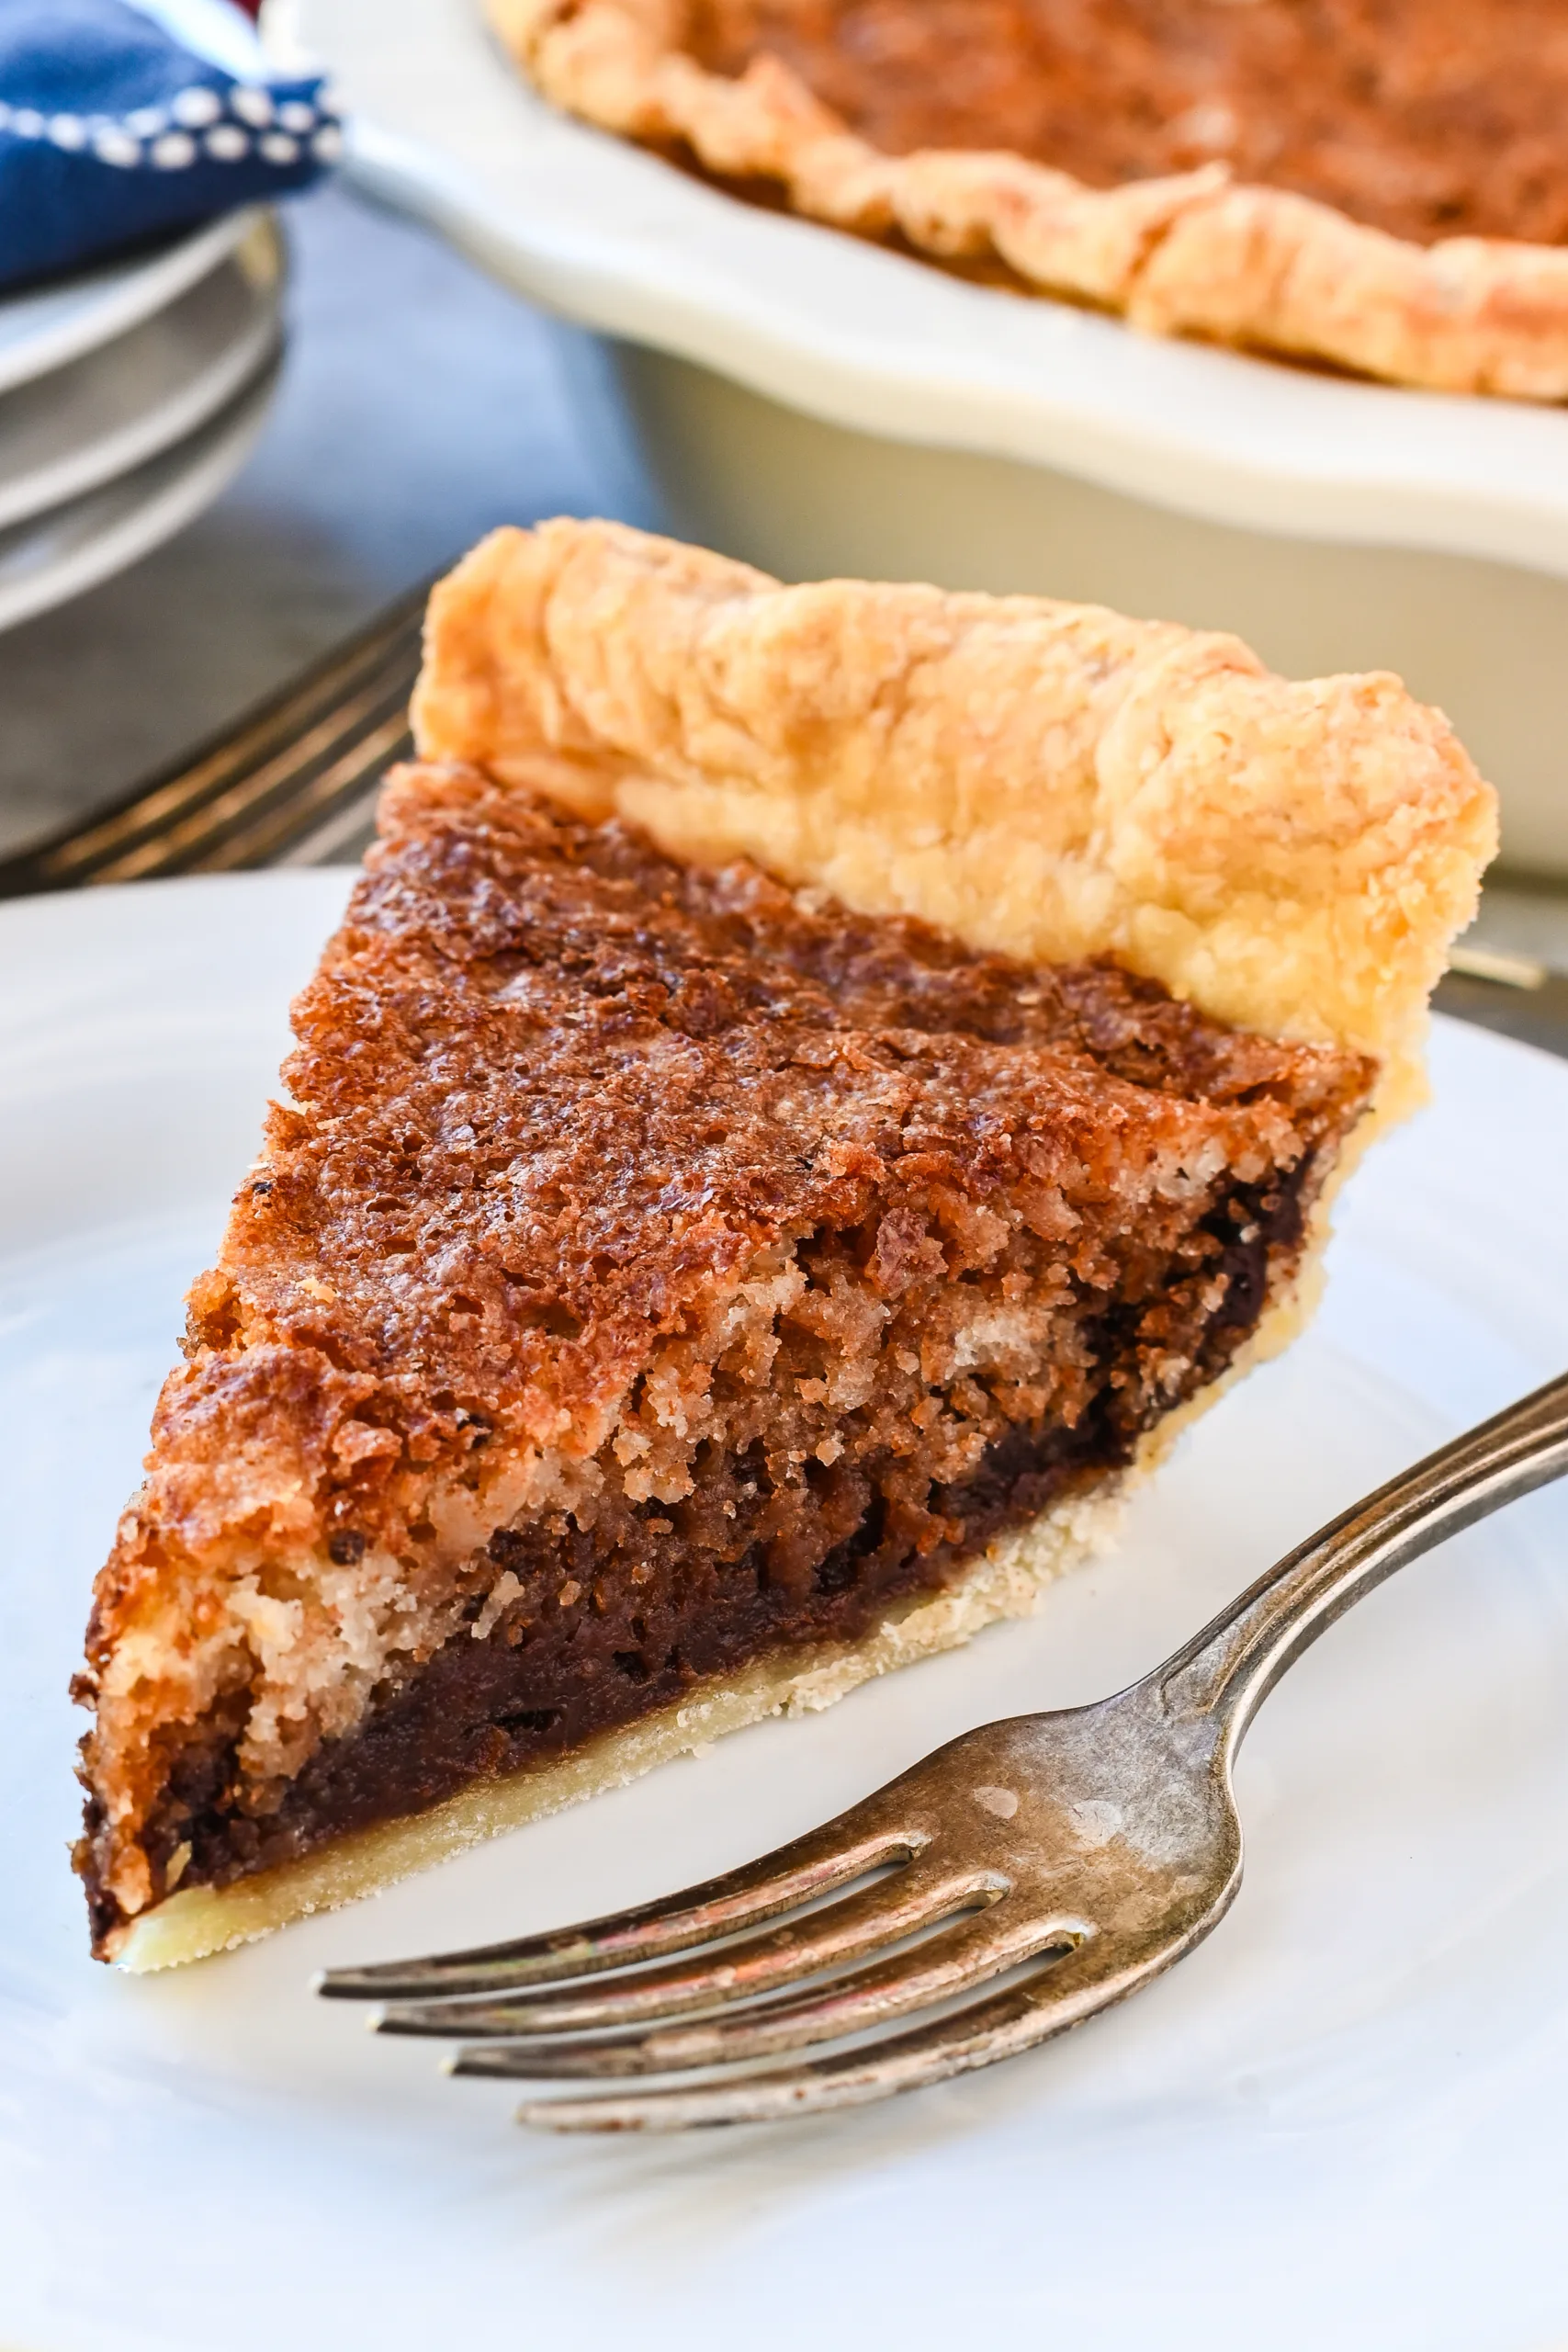
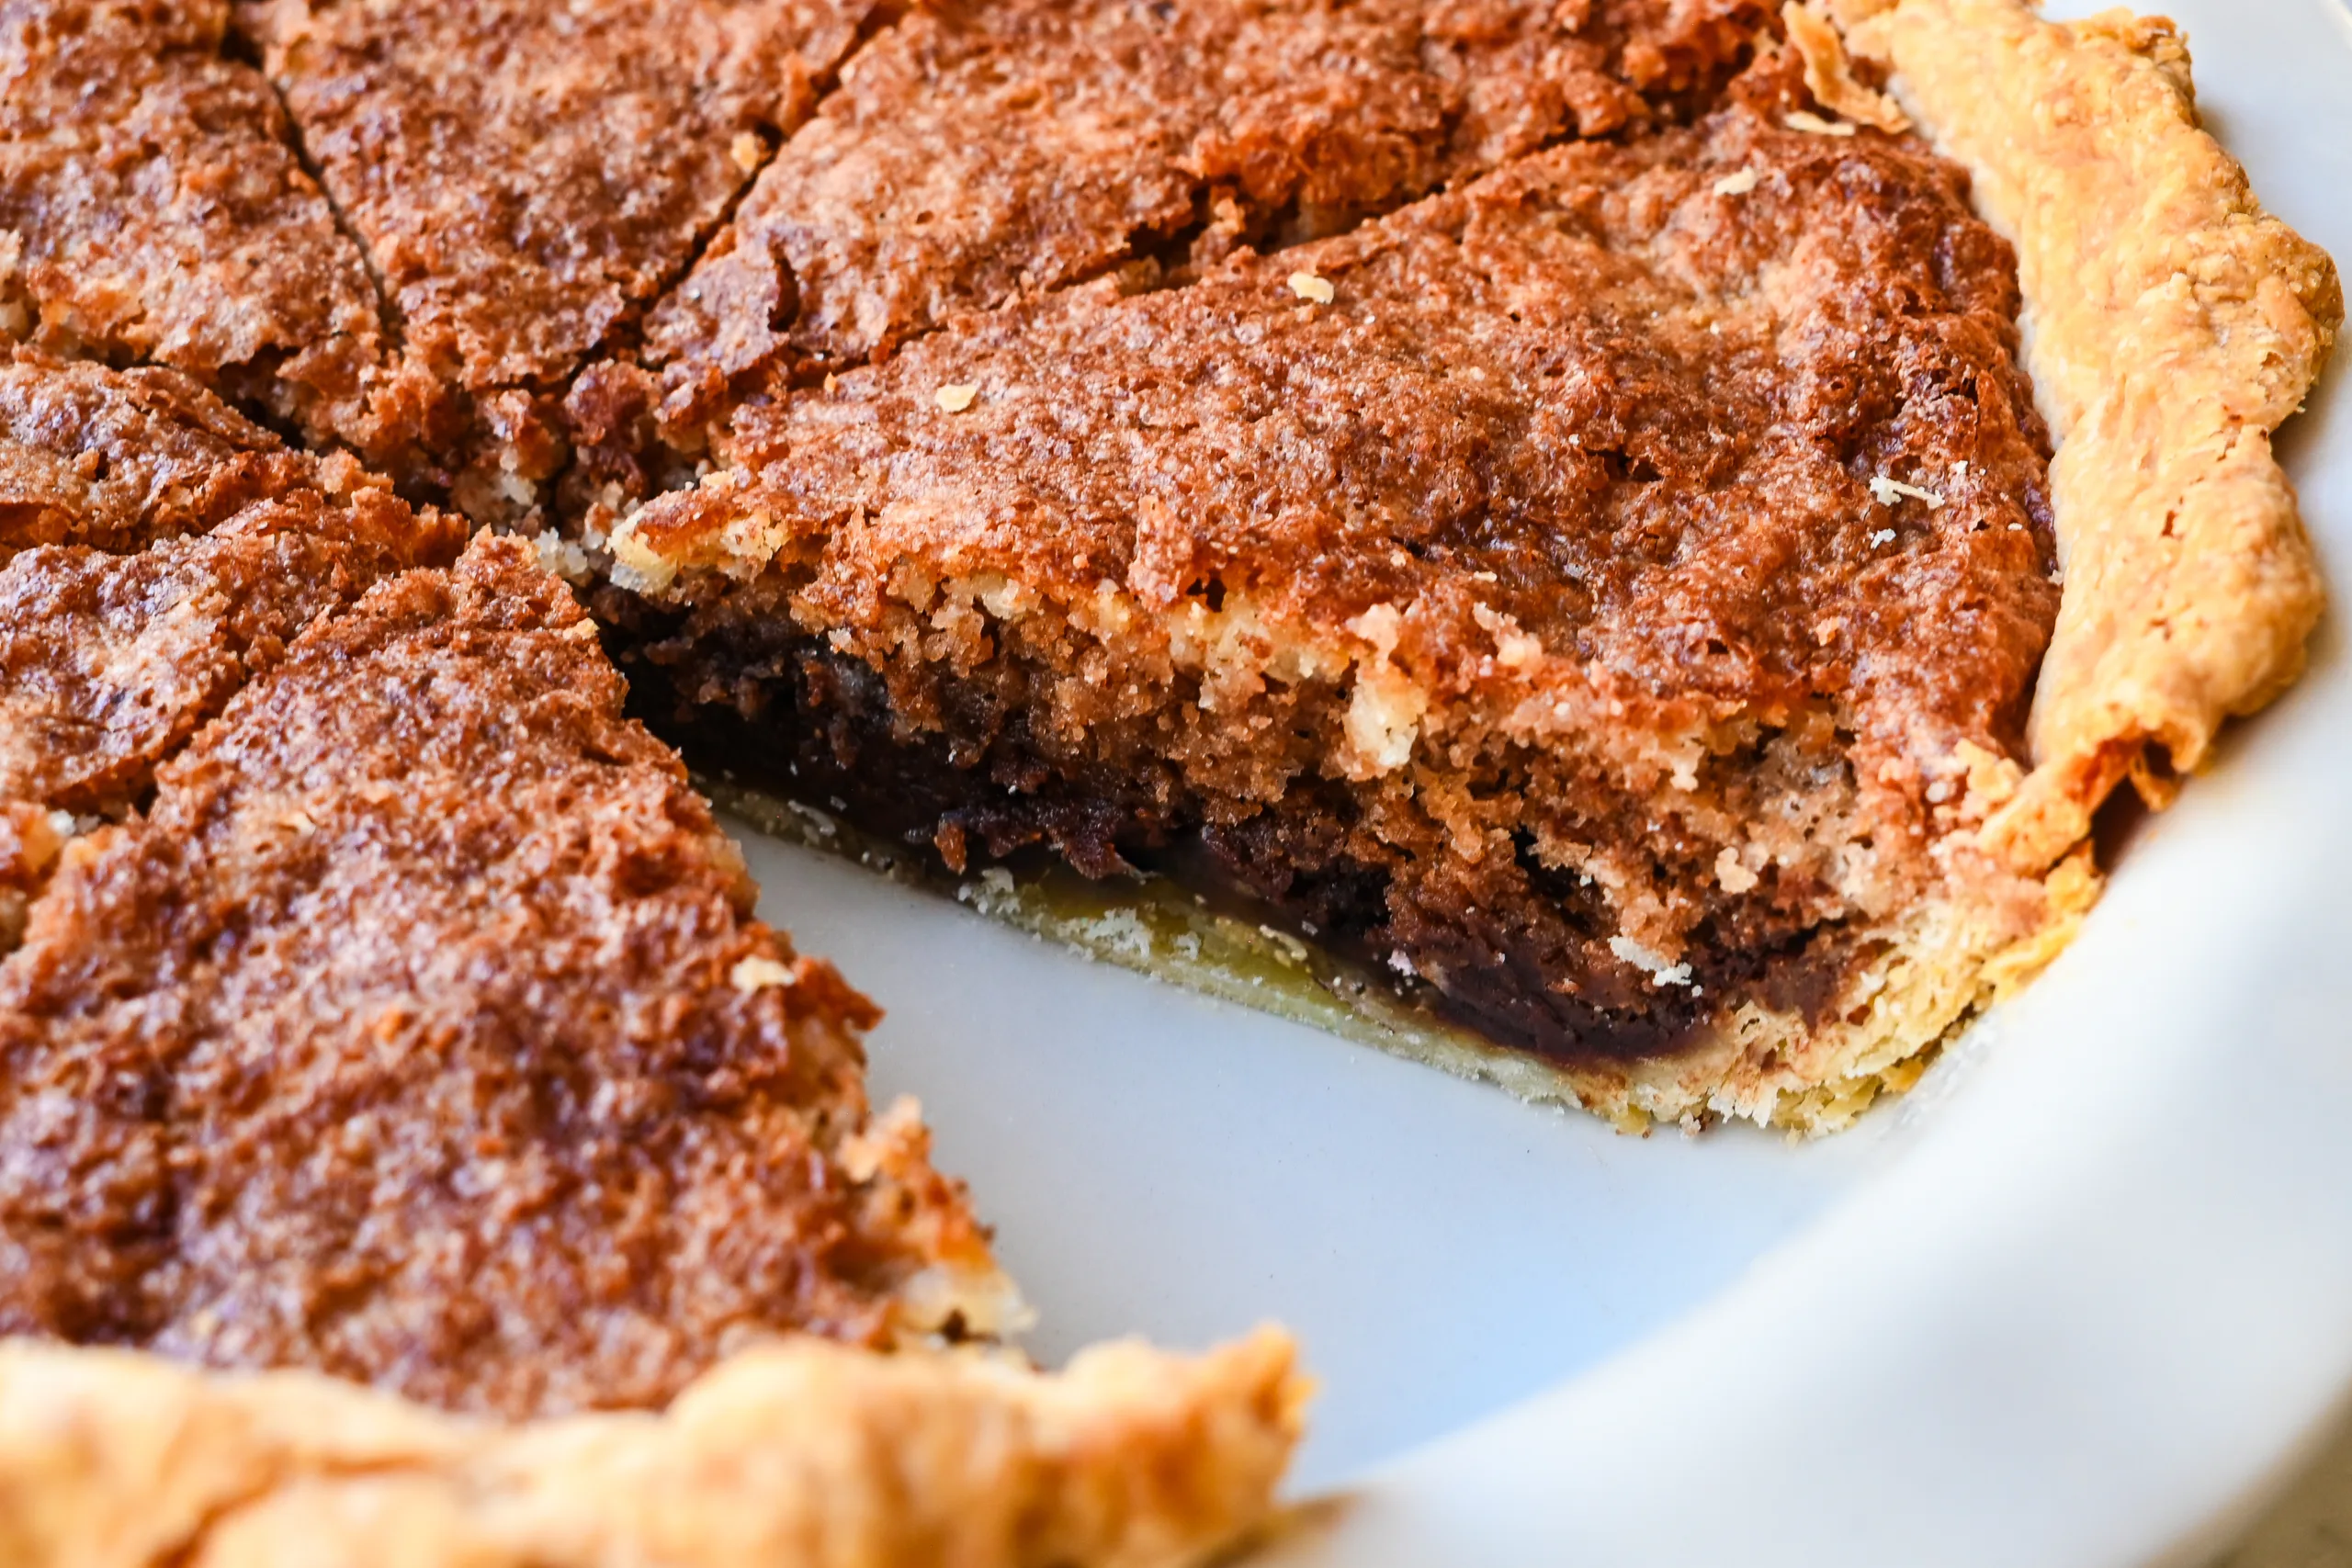
Gently spoon or pour half of the chocolate mixture over the top of the batter. Don’t stir it in; just let it sit on the surface. During baking, the chocolate layer sinks to the bottom of the pie, forming that signature fudgy base — the reason it’s called Funny Cake. (Follow the same process with the second pie.)
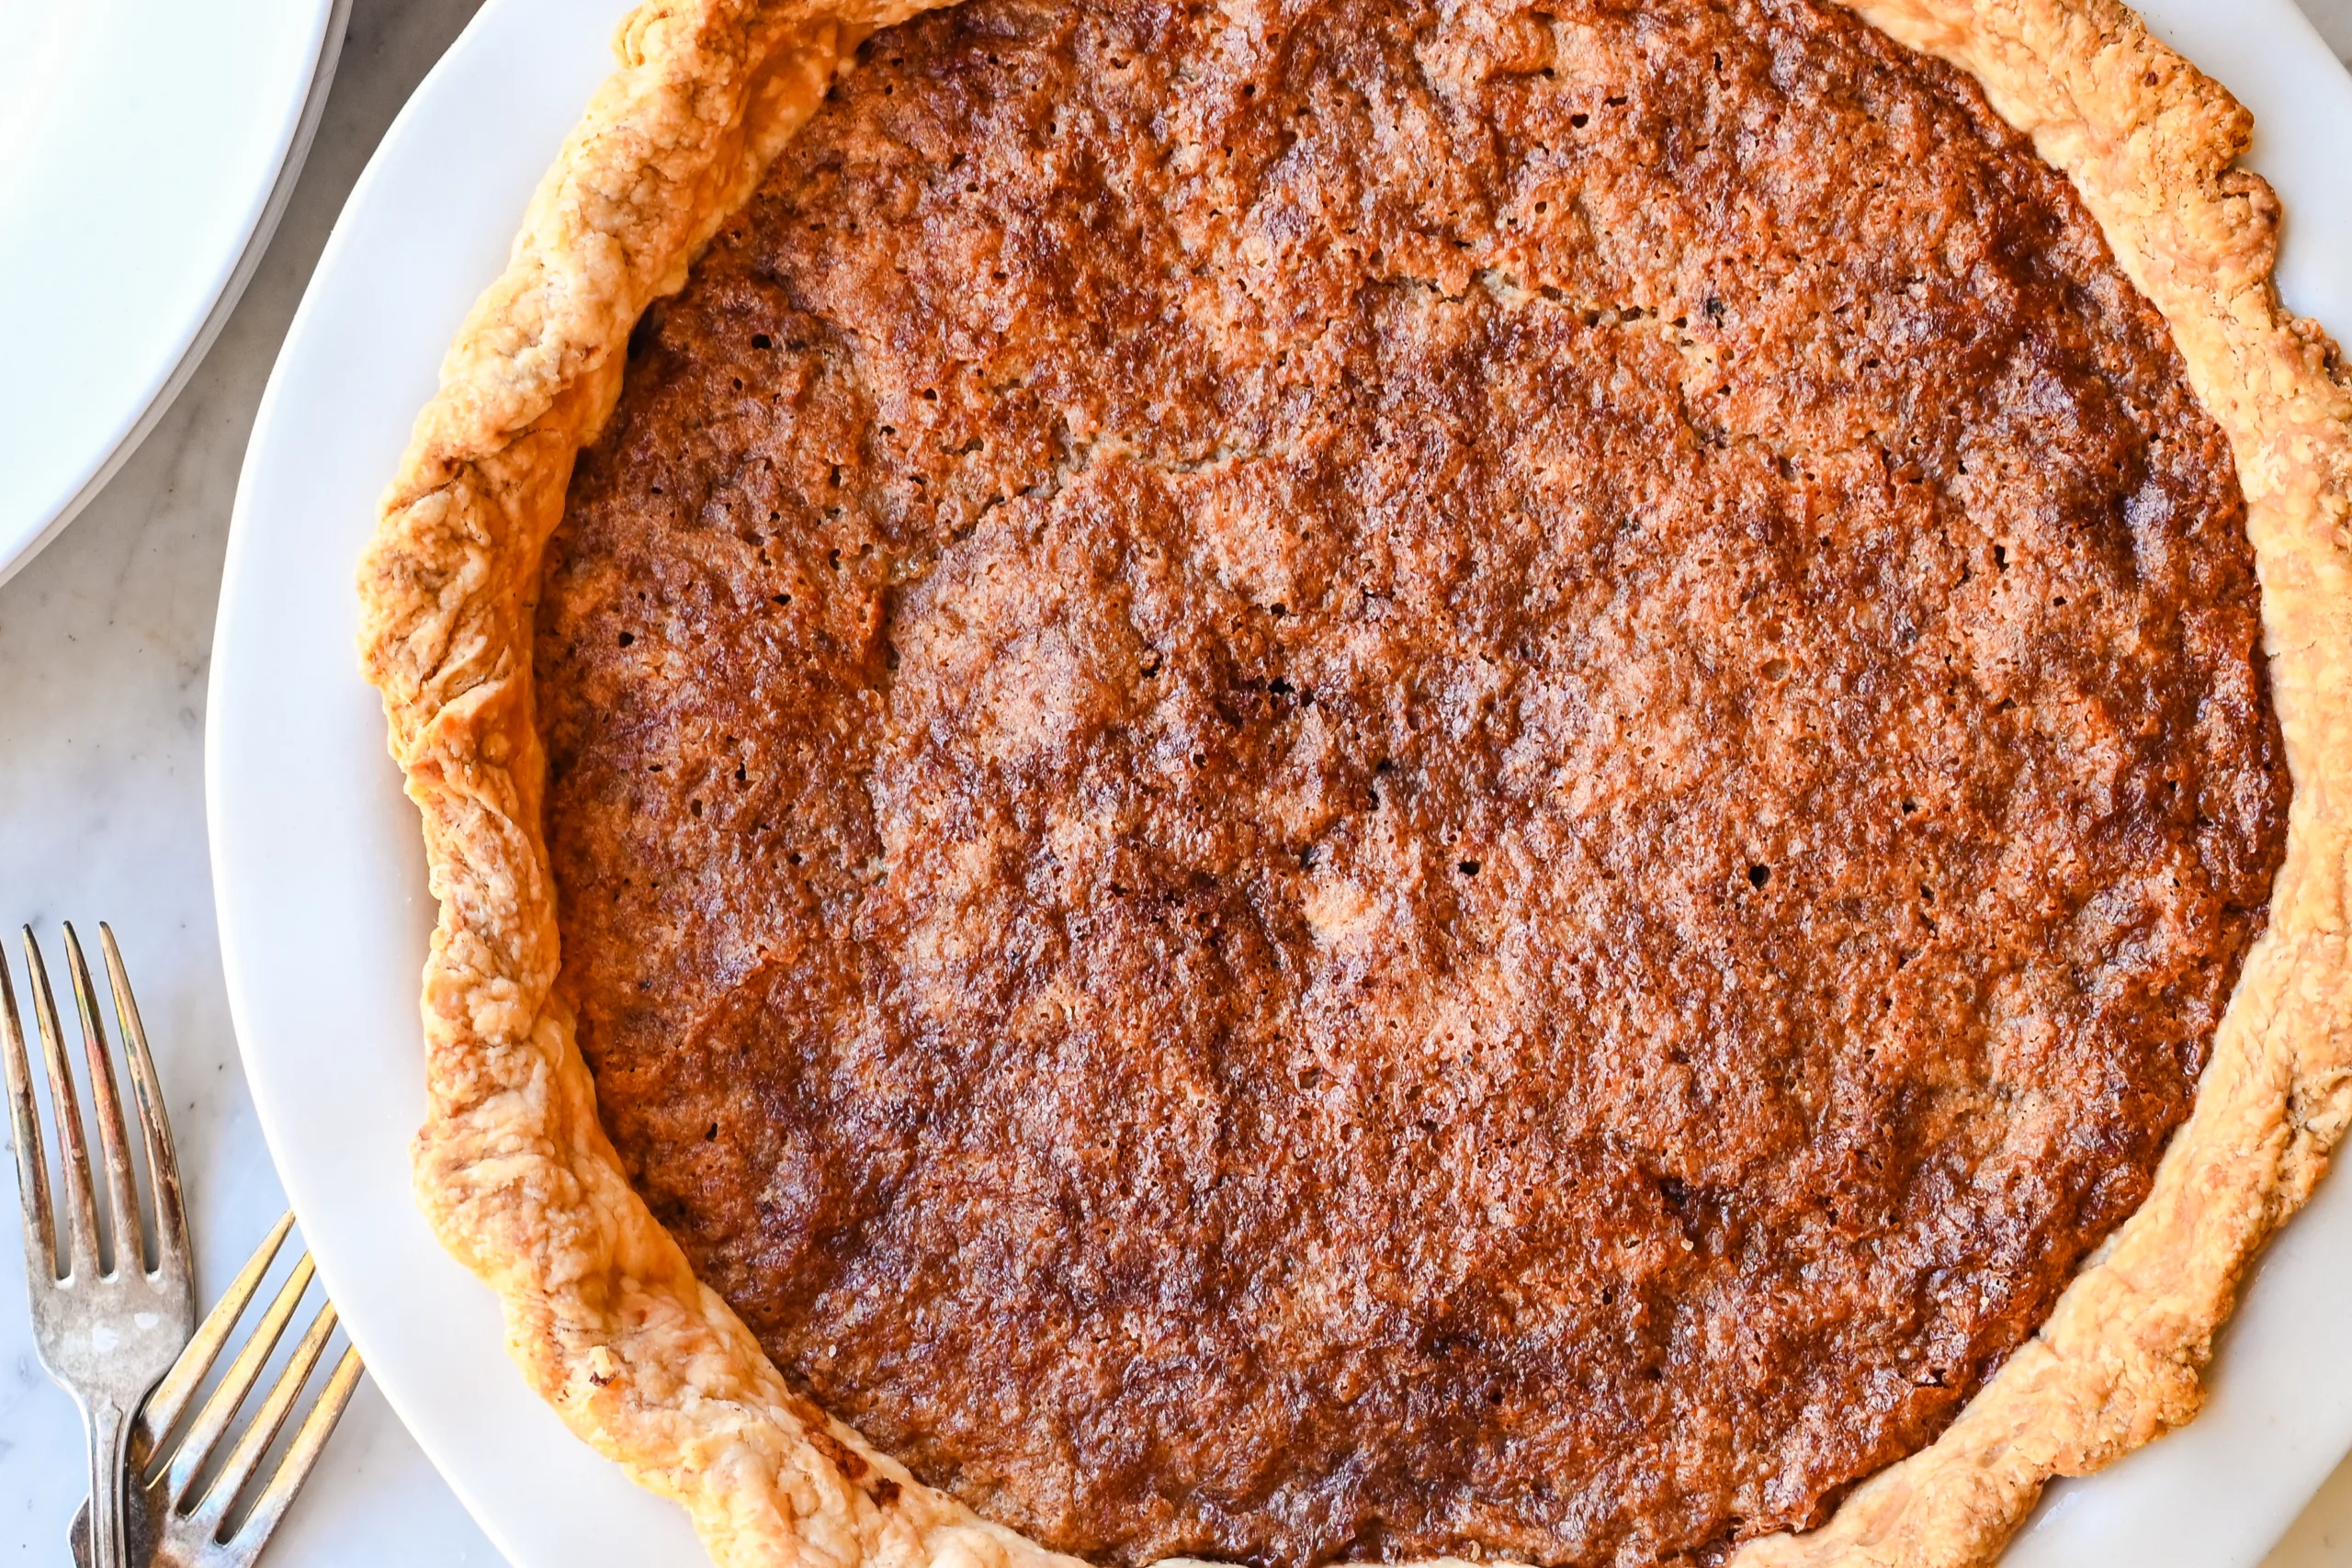
Place the pie on a baking sheet and bake for 35-40 minutes until the top of the cake is golden and set. A toothpick inserted near the center (not through the chocolate layer) should come out clean.
Allow the pie to cool on a wire rack. Serve slightly warm or at room temperature.
Tips for Perfect Funny Cake
- For a flaky pie crust, keep your butter and dough cold.
- Don’t worry if the chocolate layer sinks unevenly — that’s part of the fun!
- Use real butter for the richest flavor and color.
- You can make two smaller pies if you prefer — or even bake in a jelly roll pan for a larger batch.
- Cover leftovers with plastic wrap once cooled, and store at room temperature for up to 2 days.
- This recipe makes two 9-inch Funny Cakes, perfect for sharing or freezing! Once baked and fully cooled, wrap one pie tightly in plastic wrap and then foil. Freeze for up to 2 months. To serve later, thaw overnight in the fridge and warm slices gently in a 300°F oven for that fresh-baked taste.
Serving Ideas
This Pennsylvania Dutch Funny Cake is as perfect for a happy birthday as it is for a cozy Sunday treat. It’s a great cake to serve with whipped cream, a drizzle of homemade soft caramel sauce, or a scoop of homemade vanilla bean ice cream. Whether you call it a funny cake pie or a breakfast cake, one thing’s certain — everyone will ask for seconds.
Frequently Asked Questions
Why does the chocolate sink to the bottom of Funny Cake?
That’s the funny part! The thin chocolate mixture is heavier than the cake batter, so as it bakes, it naturally settles to the bottom of the pie. The cake layer rises to the top, leaving that signature chocolatey layer underneath — all wrapped in a flaky pie crust.
Can I use store-bought pie crust?
Yes! If you’re short on time, you can use an unbaked pie shell from the grocery store. But if you want that extra flaky, homemade touch, try my homemade pie crust recipe — it makes all the difference in flavor and texture.
Why is it called “Funny Cake”?
It’s called Funny Cake because the layers bake in reverse! You pour the chocolate on top, but it ends up on the bottom — a baking trick that surprises everyone at the first slice. Some say it’s a cousin to Shoo-Fly Pie, another old-fashioned Pennsylvania Dutch dessert with a similar texture and rich sweetness.
Can I make Funny Cake ahead of time?
Yes, this cake keeps beautifully. You can bake it a day in advance and store it covered at room temperature with plastic wrap. The flavors actually deepen overnight, and it’s delicious served chilled or lightly warmed the next morning with coffee.
What’s the best way to serve Pennsylvania Dutch Funny Cake?
Funny Cake is wonderful plain, but you can dress it up for a birthday with whipped cream or a drizzle of homemade soft caramel sauce. It’s also great slightly warm with a scoop of homemade vanilla bean ice cream — a simple, comforting dessert that never disappoints.
What if my chocolate layer bubbles up or mixes in?
No worries — it’s still delicious! The beauty of this funny cake recipe is that even small variations turn out tasty. Try pouring the chocolate slowly over the top of the batter next time to help it settle evenly. Remember: it’s called Funny Cake for a reason!

Tried this recipe?
I would love to see it! Tag me on Instagram @idiesfarm and #idiesfarm so I can share your beautiful creation!

Pennsylvania Dutch Funny Cake (A Vintage Recipe!)
Ingredients
For the Base (Cake Layer)
- 2 unbaked pie shells or use your own homemade sourdough pie crust
- ½ cup butter 113 g (room temperature)
- 2 cups sugar 400 g
- 1 egg
- 1 cup milk 240 g
- 2 cups flour 240 g
- 2 teaspoons baking powder
- ¼ teaspoon salt
For the Top (Chocolate Layer)
- 1 cup granulated sugar 100 g
- ½ cup unsweetened cocoa powder 40 g
- ½ cup boiling water 120 g
Instructions
- Preheat oven to 350 degrees. Roll out your pie dough and place it into your pie plate. Trim and flute the outer edge, then chill under plastic wrap while you prepare the fillings.
- In a large bowl, place butter and sugar. Beat until creamy and light. Add the egg and mix until combined. Then mix in the milk.
- In a separate bowl, combine flour, baking powder, and salt.
- Next, add the dry ingredients to the wet, mixing just until smooth. Avoid over mixing so your cake stays tender.
- Spread half of the cake batter evenly into the unbaked pie crust.
- In a small saucepan, whisk together cocoa powder, sugar, and boiling water until smooth. The mixture will be thin — that’s exactly right.
- Gently spoon or pour half of the chocolate mixture over the top of the batter. Don’t stir it in; just let it sit on the surface. During baking, the chocolate layer sinks to the bottom of the pie, forming that signature fudgy base — the reason it’s called Funny Cake. (Follow the same process with the second pie.)
- Place the pie on a baking sheet and bake for 35-40 minutes until the top of the cake is golden and set. A toothpick inserted near the center (not through the chocolate layer) should come out clean.
- Allow the pie to cool on a wire rack. Serve slightly warm or at room temperature.
Notes
- For a flaky pie crust, keep your butter and dough cold.
- Don’t worry if the chocolate layer sinks unevenly — that’s part of the fun!
- Use real butter for the richest flavor and color.
- You can make two smaller pies if you prefer — or even bake in a jelly roll pan for a larger batch.
- Cover leftovers with plastic wrap once cooled, and store at room temperature for up to 2 days.

Welcome!
Hi! I’m Stephanie, also known as Idie. Follow me as I tap into the methods of the past and learn how to make my world a little smaller.