If you’ve ever wanted to make your own soap from scratch, this easy cold process Bastille soap recipe is the perfect place to start. It’s made from two simple oils—olive oil and coconut oil—and scented naturally with refreshing sweet orange essential oil.
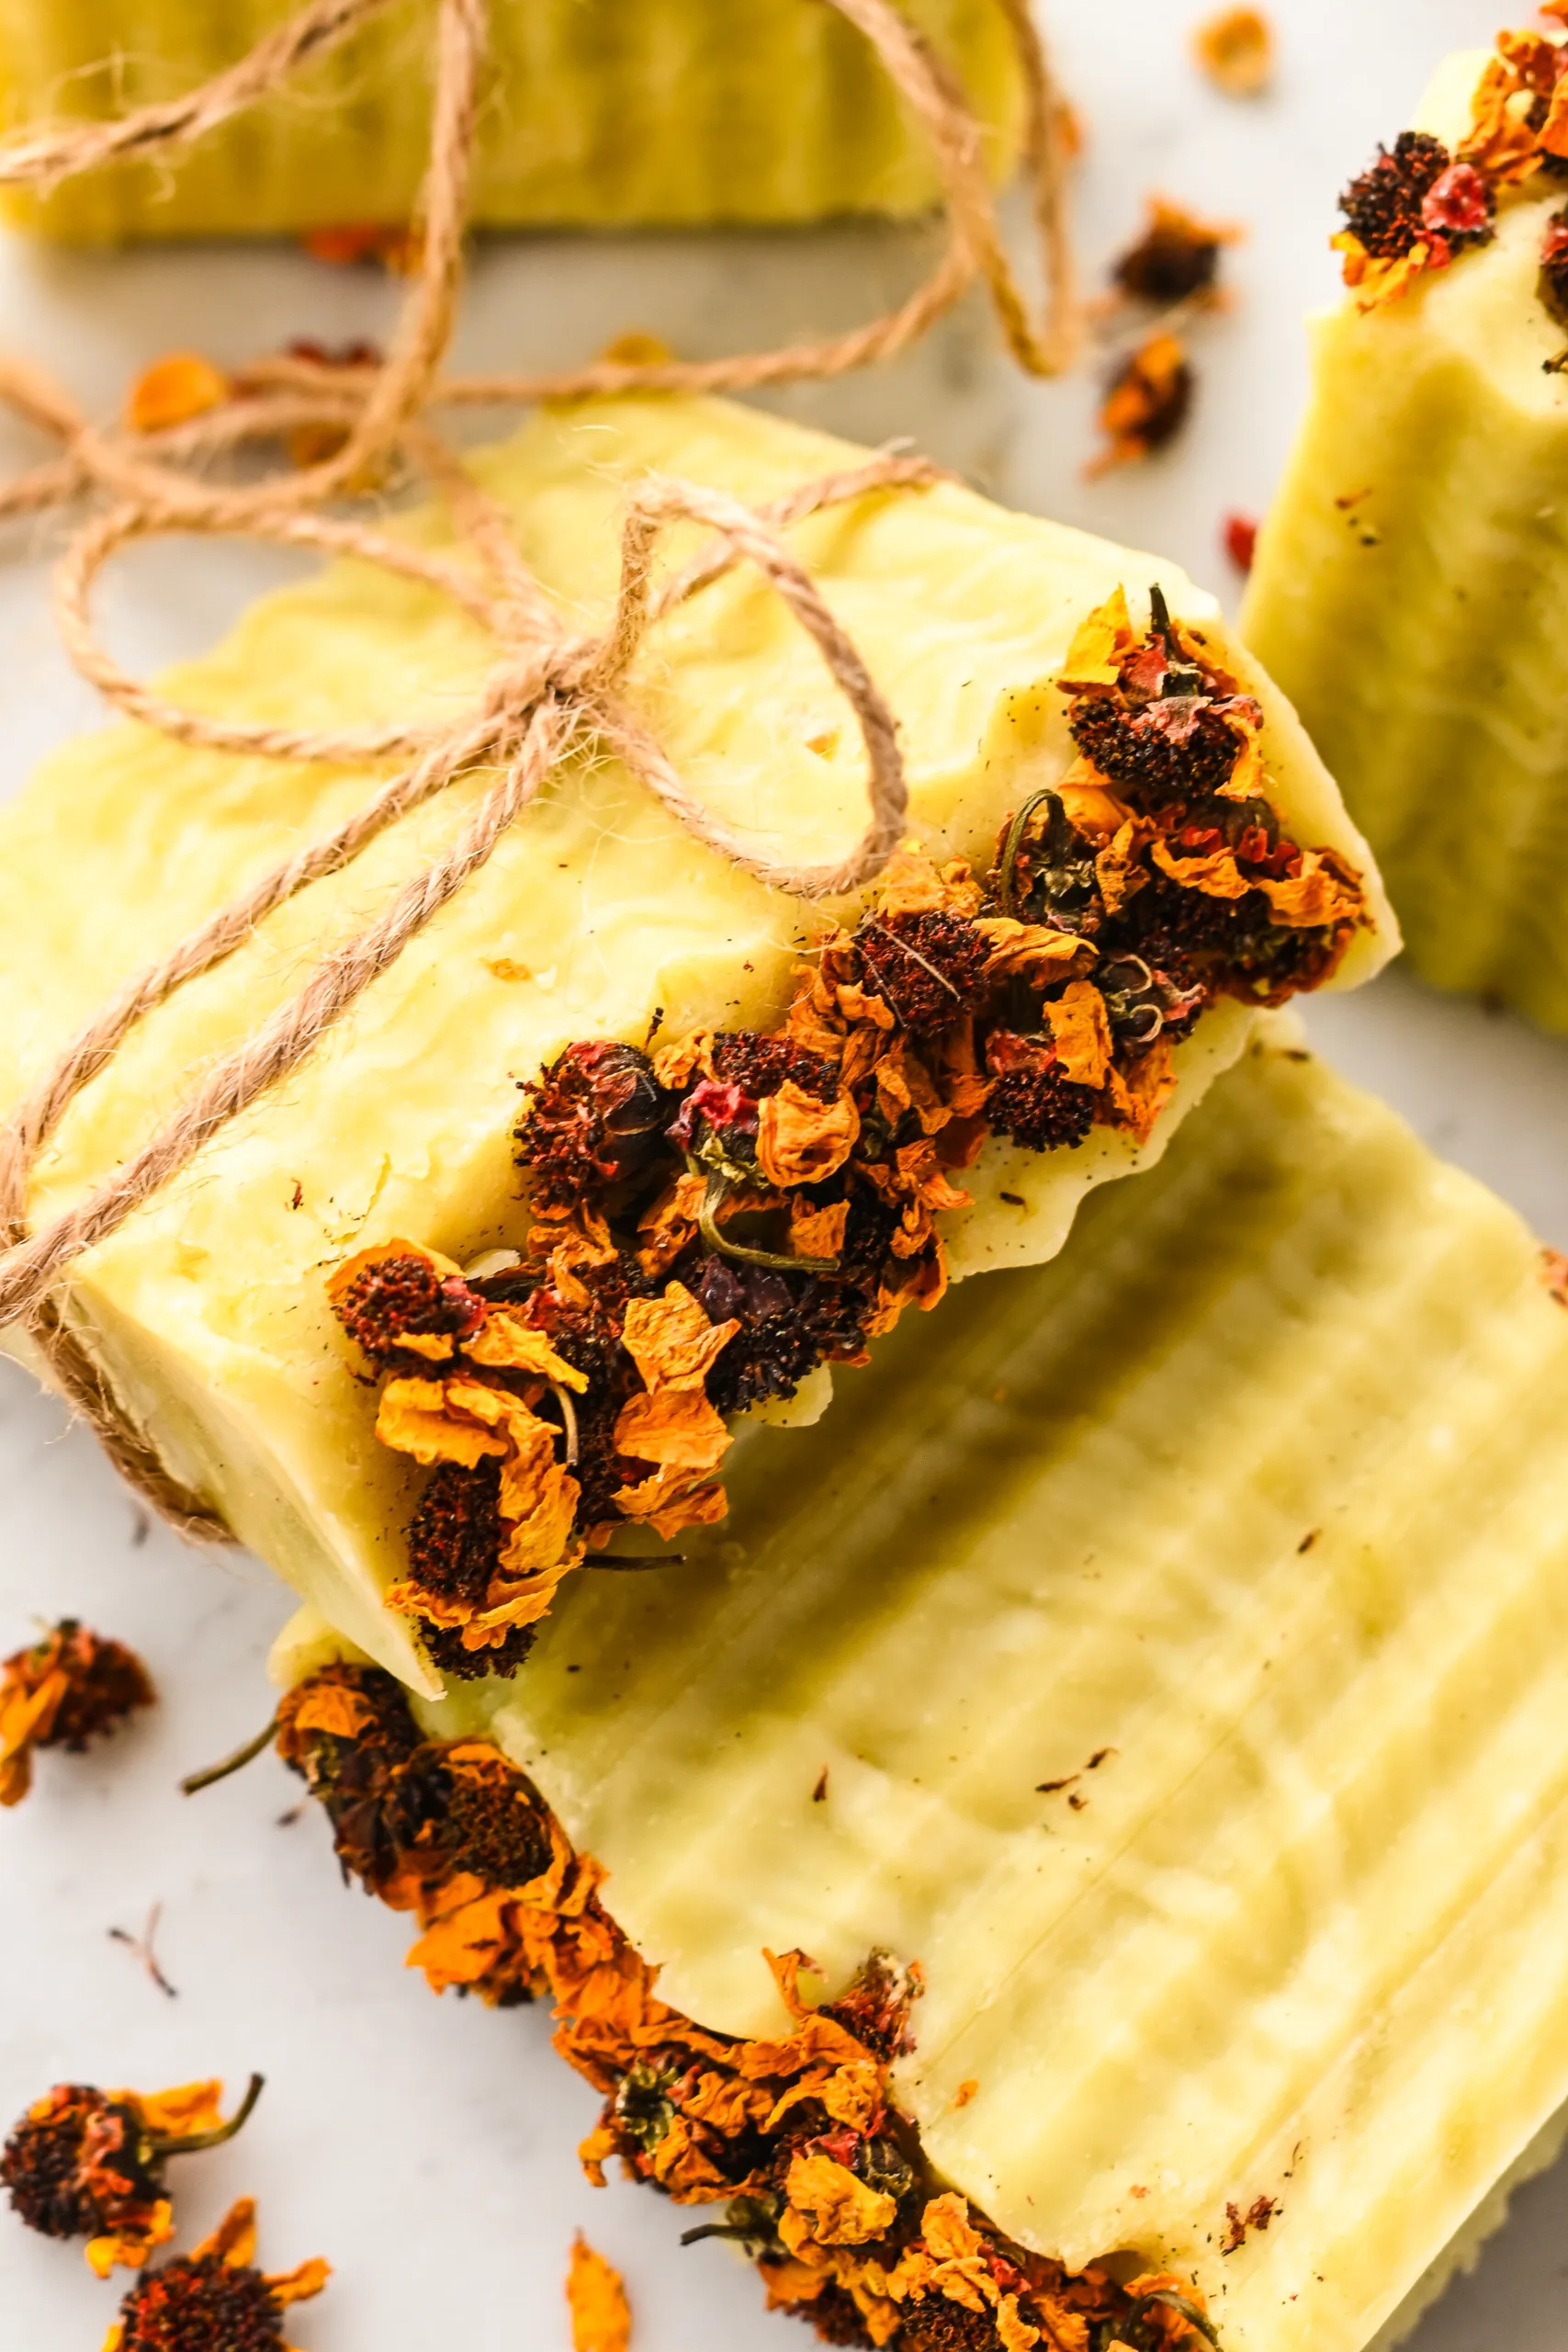
Table of Contents
Once you try making homemade soap, you’ll understand how satisfying the saponification process is: it’s the beautiful chemical reaction between sodium hydroxide (lye) and oils that transforms liquid ingredients into a solid, gentle bar soap.
Here at Idie’s Farm, I love these kinds of back-to-basics projects that reconnects us with old-fashioned ways of living. Whether you’ve made my Homemade Whipped Tallow Balm (DIY Recipe), Tallow Lip Balm, or Natural Tallow Candles, this beginner-friendly soap is the next step in learning how natural ingredients can create beautiful, useful things for your home.
Quick Look at This Soap Recipe
- Type: Cold process
- Skill level: Beginner
- Batch size: Small batch (28 oz oils)
- Superfat: 5%
- Cure time: 4–6 weeks
- Scent: Sweet Orange (pure essential oil)
- Colorants: None—naturally creamy
Equipment You’ll Need
Before you begin, gather your safety gear and supplies. Soap making is easy once you get set up, but use caution—sodium hydroxide (lye, also called caustic soda) is a caustic substance until it reacts fully with oils.
| Tool | Purpose |
|---|---|
| Digital kitchen scale | Precise measurements for good results |
| Chemical Resistant Container | To mix your lye with water |
| Infrared Thermometer Gun | To check your lye mixture temperature |
| Stainless steel pot | Safe for melting oils (avoid aluminum) |
| Immersion blender (stick blender) | Brings soap batter to trace (the proper thickness) quickly |
| Rubber gloves, long sleeves, safety goggles | Essential safety gear |
| Old towel | Keeps the soap warm during gel phase |
| Soap molds | Shape your finished bars |
| Parchment paper or silicone liner | Prevents sticking |
| Soap cutter | Cuts even bars once cured |
| Open window or vented work area | Keeps air clear of fumes |

Ingredients (by weight)
| Ingredient | Ounces | Grams | Role |
|---|---|---|---|
| Olive oil | 22 oz | 624 g | Adds mildness and conditioning fatty acids |
| Coconut oil | 6 oz | 170 g | Creates a firmer bar and creamy lather |
| Distilled water | 8 oz | 227 g | Used to dissolve lye for the lye solution |
| Sodium hydroxide (Lye) | 3.9 oz | 110 g | Reacts with oils to create soap |
| Orange essential oil | 1 oz | 28 g | Bright natural scent |
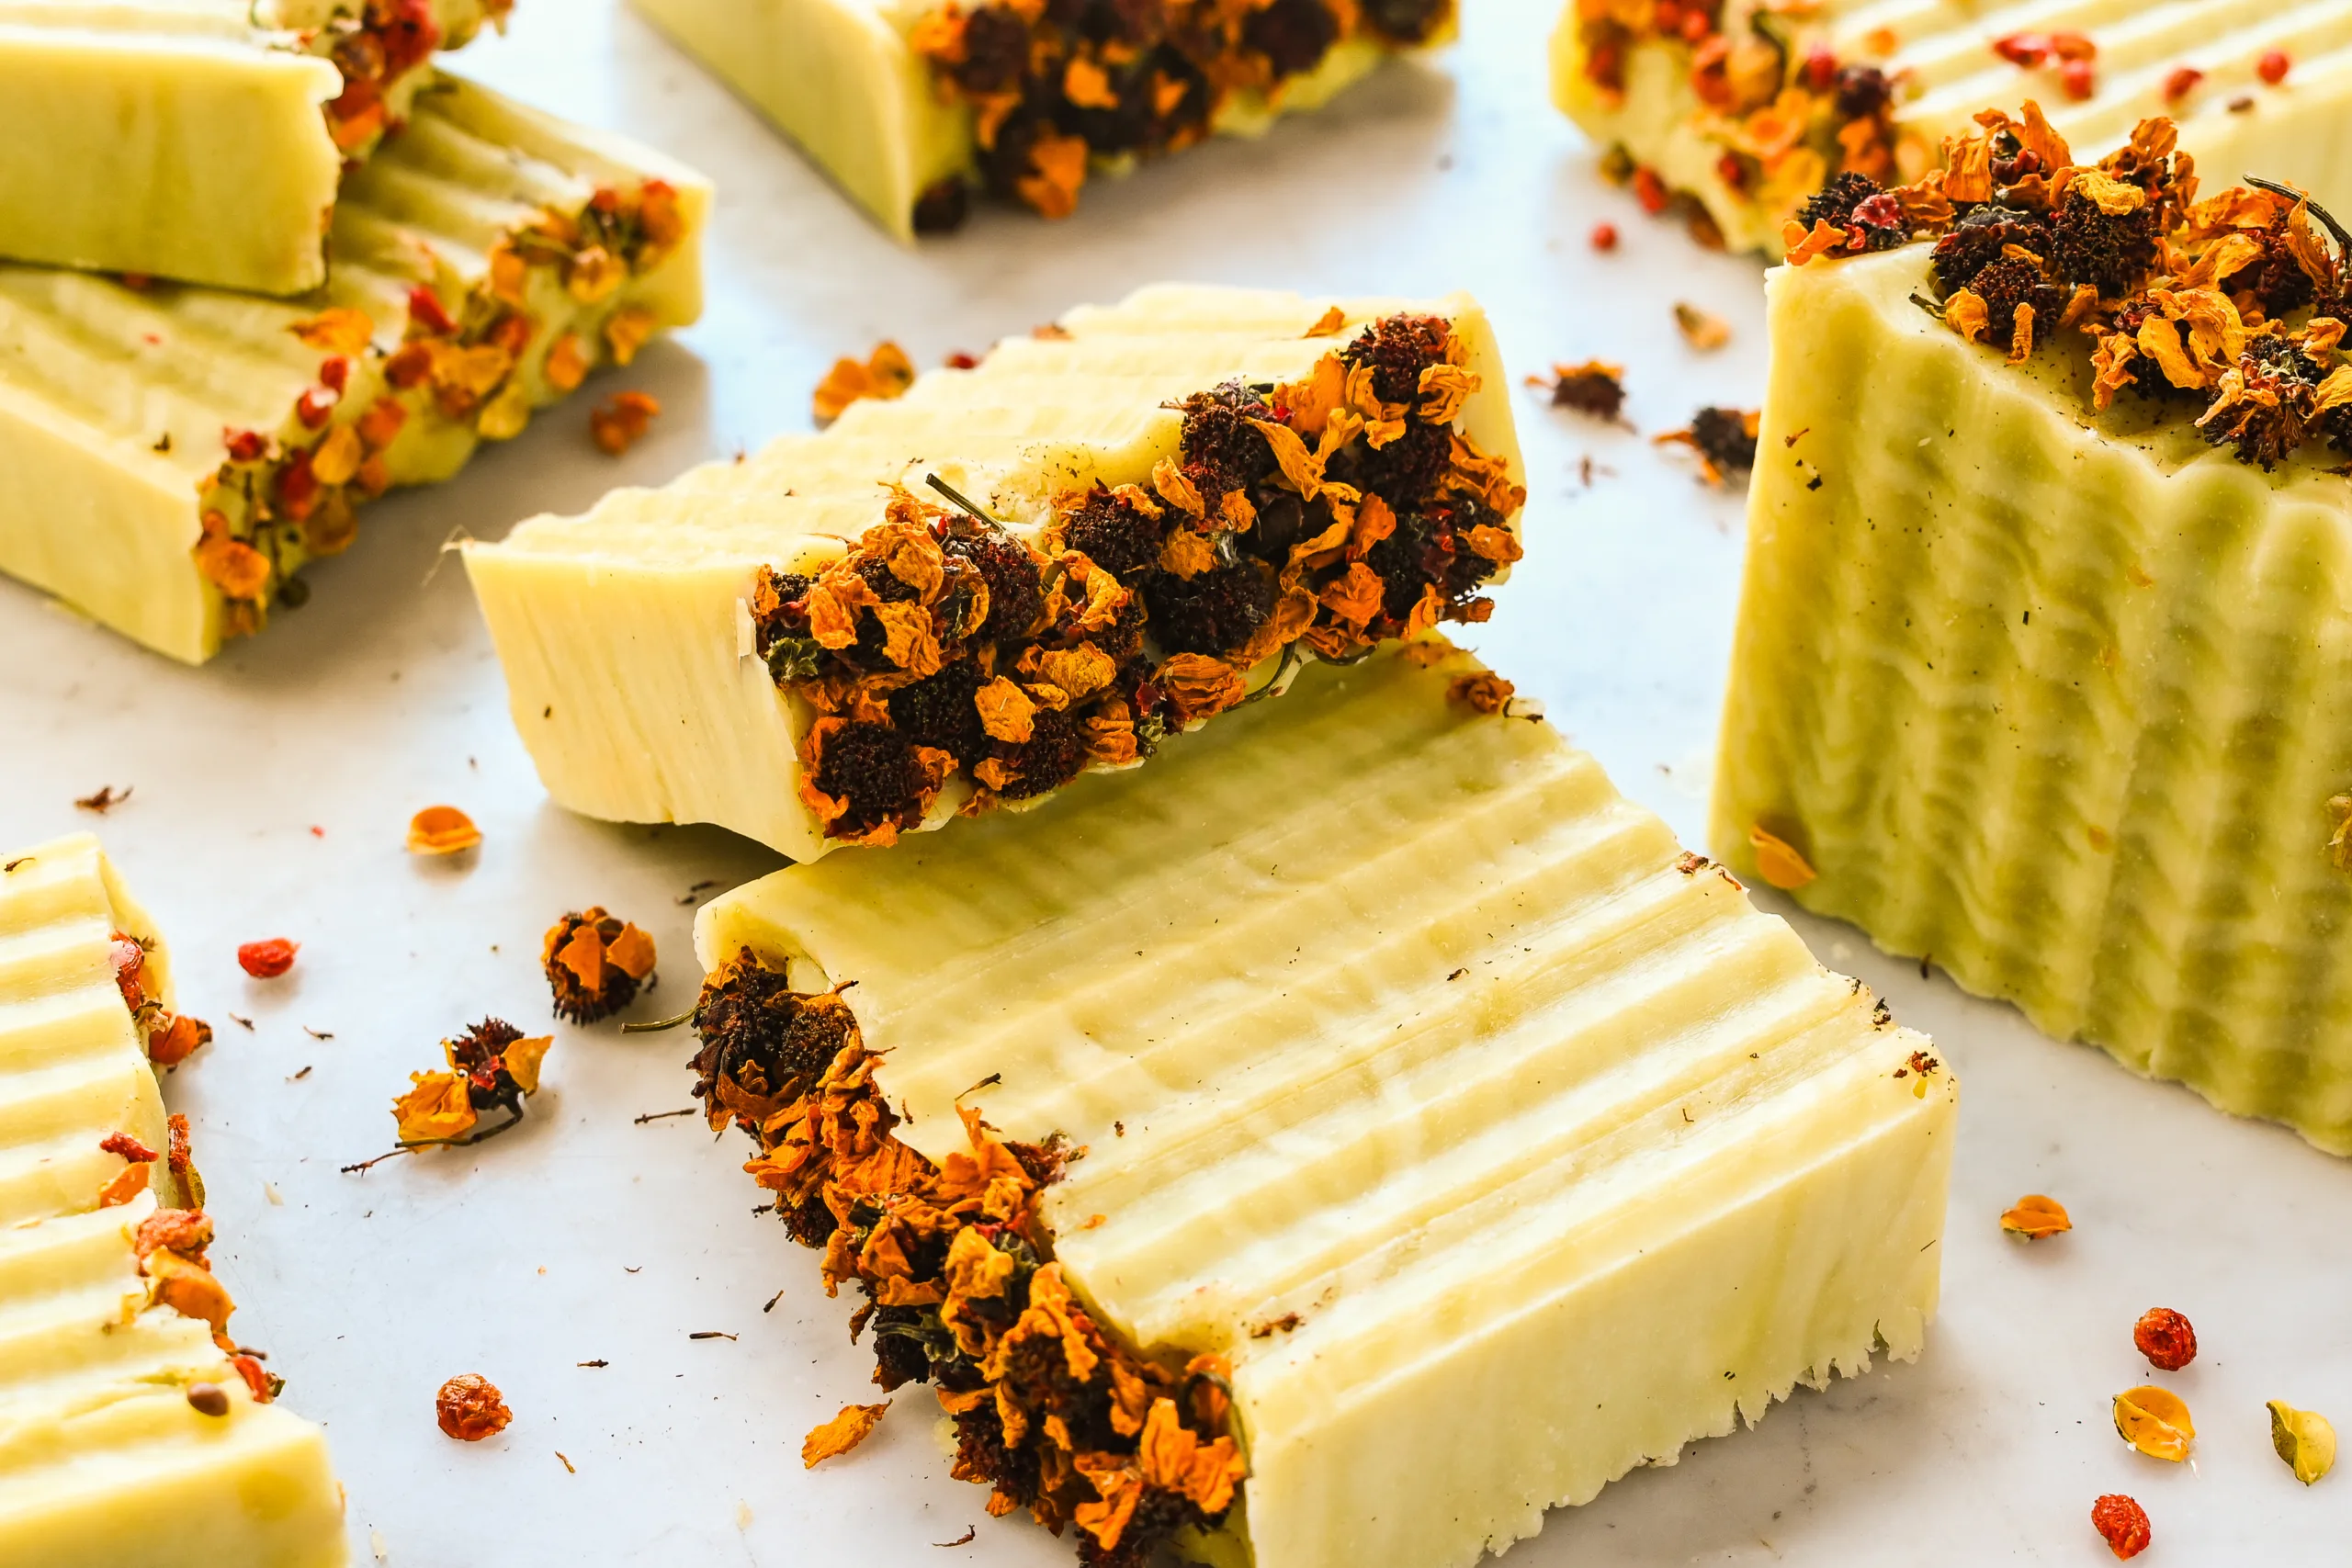
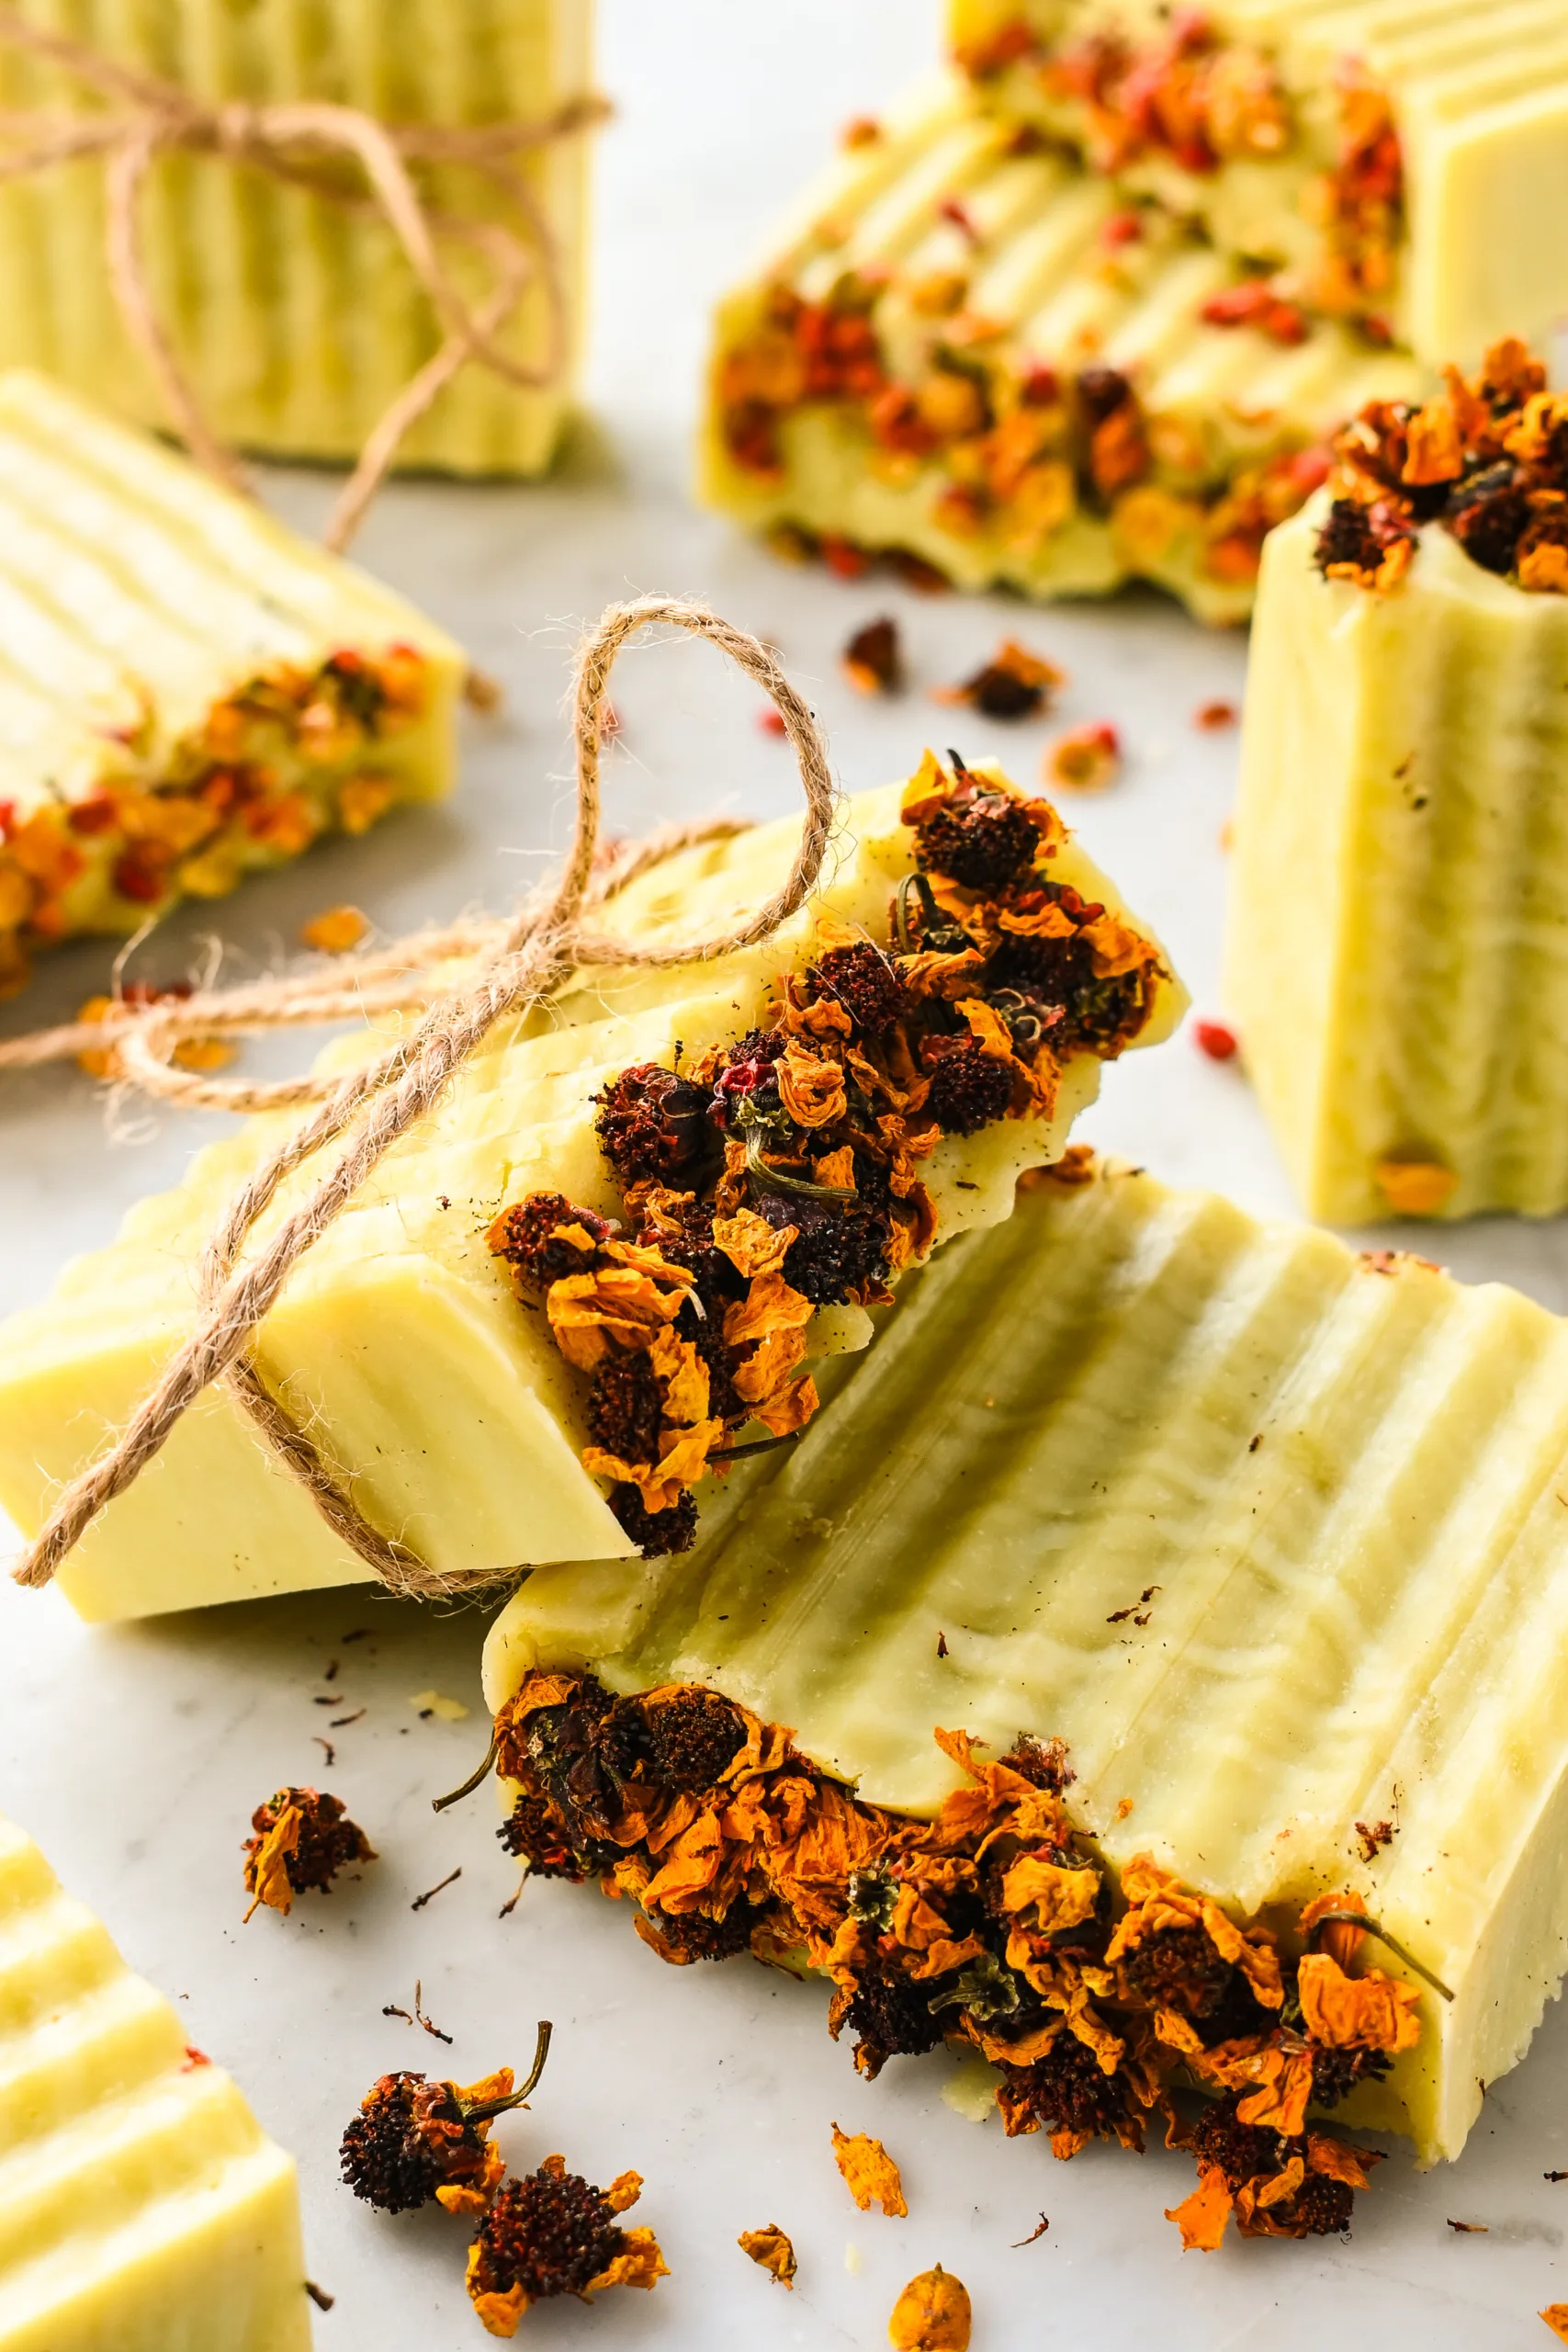
(Optional: dried flower petals for decoration.)
Step-by-Step Instructions
Prepare Your Work Area
Choose a safe place with good ventilation—an open window or a space near your kitchen sink is ideal. Put on rubber gloves, long sleeves, and safety goggles. Keep pets and children out of reach.

Slowly add sodium hydroxide (lye) to cold water (never add water to lye). Stir with a heat-resistant spoon until dissolved. The lye water will heat up—set it aside to cool to100–110°F. Check with an infrared thermometer.

Using a double boiler, saucepan, or a crock pot over low heat, melt coconut oil until clear. Add olive oil and mix gently. Let cool slightly.

Pour your cooled lye solution into the melted oils. Use an immersion blender to combine, alternating between short bursts and gentle hand stirring until you reach light trace (the soap batter thickens like thin pudding).

Add the essential oil and stir by hand to incorporate evenly.

Pour your soap into prepared soap molds, tap to remove bubbles, and cover lightly with an old towel. If you are adding dried flowers, this is the time to press them into the soap. Allow to rest for 24–36 hours to complete the early gel phase.

Once firm, unmold the soap, slice into bars with a soap cutter, and place in a dry, ventilated space for 4–6 weeks. This soap cure time allows the chemical reaction to finish and excess moisture to evaporate, resulting in a hard, gentle handmade soap.
The Science Behind It
Each oil brings unique oil properties and fatty acid profiles to your recipe:
- Olive oil gives a mild, creamy lather with long-lasting conditioning.
- Coconut oil adds cleansing power and a firmer bar.
These natural liquid oils work together to create a balanced bar soap that rivals any store-bought soap—without synthetic fragrance oils or harsh detergents.
If you’d like to explore different fatty acids and their effects, try experimenting later with castor oil, babassu oil, avocado oil, or shea butter for richer textures. You can check exact oil properties using a soap calculator before changing your recipe.
The Finished Product
After curing, your finished product will be a bright, creamy, gently scented orange bar soap that feels silky on the skin. It’s an ideal recipe for small batches, perfect for gifts, and a wonderful way to learn the craft before moving on to larger batches or different kinds of soaps like tallow soap.
This simple recipe also pairs beautifully with other handmade creations—try making a batch alongside your Homemade Whipped Tallow Balm or your Homemade Tallow Lip Balm to create a complete natural skincare set.

Tips for Beginners
- Use caution with lye—it’s a caustic substance until it reacts with the oils.
- Always add lye to water, never water to lye.
- Work at room temperature for slower trace.
- If you want a harder bar, cure longer or add 1 teaspoon sodium lactate per pound of oil.
- Clean equipment in the kitchen sink only after residue has turned to soap (about 24 hours).
- Keep all supplies in a safe place, away from the reach of children.
FAQ: Homemade Cold Process Soap
Can I replace the coconut oil with something else?
Yes. Try babassu oil or palm oil (ethically sourced) for similar hardness. Always use a soap calculator to adjust lye amounts accurately.
What if I don’t have an immersion blender?
You can hand stir, but it will take much longer to reach trace. Short bursts with a stick blender make the process faster and more consistent.
How long should I cure my soap?
At least 4 weeks for smaller bars, 6–8 weeks for best hardness and longevity. Cure time allows excess water to evaporate and ensures a gentle bar.
How should I store my finished bars?
Keep them in a dry, ventilated space on parchment or a drying rack. Avoid plastic containers; airflow prevents sweating and preserves scent.
What’s the difference between cold process and hot process soap?
Cold process soap cures over several weeks, while hot process soap is heated to speed up the saponification process. Both create excellent results—it’s just a matter of personal preference.
Keep Exploring
If you loved this beginner soap, you might also enjoy:
- How to Render Fat to Make Homemade Beef Tallow
- Homemade Whipped Tallow Balm (DIY Recipe)
- Homemade Tallow Lip Balm Recipe (Nourishing & Long-Lasting)
Each of these projects uses simple, natural ingredients and fits perfectly into a handmade, homestead lifestyle.

Tried this recipe?
I would love to see it! Tag me on Instagram @idiesfarm and #idiesfarm so I can share your beautiful creation!
Homemade Cold Process Bastille Soap Recipe for Beginners
Equipment
- Digital kitchen scale
- Chemical Resistant Container
- Infrared Thermometer Gun
- Stainless steel pot
- Immersion blender (stick blender)
- Rubber gloves, long sleeves, safety goggles
- Old towel
- Soap molds
- Parchment paper or silicone liner
- Soap cutter
- Open window or vented work area
Ingredients
- 22 oz Olive oil (624 g)
- 6 oz Coconut oil (170 g)
- 8 oz Distilled water (227 g)
- 3.9 oz Sodium hydroxide (Lye) (110 g)
- 1 oz Orange essential oil (28 g)
Instructions
- Prepare Your Work Area
- Choose a safe place with good ventilation—an open window or a space near your kitchen sink is ideal. Put on rubber gloves, long sleeves, and safety goggles. Keep pets and children out of reach.
- Slowly add sodium hydroxide (lye) to cold water (never add water to lye). Stir with a heat-resistant spoon until dissolved. The lye water will heat up—set it aside to cool to 100–110°F. Check with an infrared thermometer.
- Using a double boiler, saucepan, or a crock pot over low heat, melt coconut oil until clear. Add olive oil and mix gently. Let cool slightly.
- Pour your cooled lye solution into the melted oils. Use an immersion blender to combine, alternating between short bursts and gentle hand stirring until you reach light trace (the soap batter thickens like thin pudding).
- Add the essential oil and stir by hand to incorporate evenly.
- Pour your soap into prepared soap molds, tap to remove bubbles, and cover lightly with an old towel. If you are adding dried flowers, this is the time to press them into the soap. Allow to rest for 24–36 hours to complete the early gel phase.
- Once firm, unmold the soap, slice into bars with a soap cutter, and place in a dry, ventilated space for 4–6 weeks. This soap cure time allows the chemical reaction to finish and excess moisture to evaporate, resulting in a hard, gentle handmade soap.
Notes
- Use caution with lye—it’s a caustic substance until it reacts.
- Always add lye to water, never water to lye.
- Work at room temperature for slower trace.
- If you want a harder bar, cure longer or add 1 teaspoon sodium lactate per pound of oils.
- Clean equipment in the kitchen sink only after residue has turned to soap (about 24 hours).
- Keep all supplies in a safe place, away from the reach of children.

Welcome!
Hi! I’m Stephanie, also known as Idie. Follow me as I tap into the methods of the past and learn how to make my world a little smaller.