Making a sourdough starter from scratch is so incredibly simple and so is the maintenance behind keeping it alive! It is the process of mixing equal parts water and flour for several days until the wild natural yeast are captured and your mixture becomes a living thing. It's amazing to think that there are only two simple ingredients that are involved in making such a impressive food: flour and water. And to think, this simple ferment has unlimited possibilities!

Once you get your very own sourdough starter mature and active, you'll find yourself making all sorts of things from amazing artisan boule breads to french baguettes, to cakes, cookies and even pancakes! Once you have your active starter ready to use, you'll have to try it out on my Easy No Knead Sourdough Bread Recipe. One of the benefits of making your own bread, aside from it tasting so much better, is that you know exactly what's in it! This is the biggest benefit for us. The type of flour I prefer to use is an organic unbleached all purpose flour or organic whole wheat flour because they are free from harmful herbicides that are sprayed on the wheat, and it is also free from any synthetic additives such as: folic acid and synthetic vitamins.

A recap on the difference between sourdough and conventional yeast.
Let’s take a look at sourdough or wild yeast:
- It is Lactobacillus, a lactic acid bacteria, which is found on all living things.
- Lactobacilli convert starches and sugars into lactic acid.
- Lactic acid is a natural preservative which produces helpful enzymes and substances that are antibiotic and anti carcinogenic.
- A slower fermentation process allows yeast to break down hard to digest gluten and allows for easy absorption of nutrients.
- According to Sally Fallen Morell, in her book Nourishing Traditions, “Soaking allows enzymes, lacto-bacilli and other helpful organisms to break down and neutralize phytic acid.”
- It's easier to digest if you have a gluten intolerance, with the exception of celiac disease.
- The bread does not stale as easily.

Now a word on baker’s yeast aka Active Dry Yeast.
- It produces a quick rise in the bread in a short amount of time, which does not allow enough time for the phytic acid in the grains to be neutralized.
- Unneutralized (unfermented or unsoaked) phytic acid according to Mrs. Morrell “Phytic acid can combine with calcium, magnesium, copper, iron, and especially zinc in the intestinal tract and block their absorption.” In other words, unfermented grains are robbing us of the minerals and nutrients that we need!
- Bread will stale easily.
Does the type of water matter?
Yes, the type of water does matter! Chlorine found in tap water will kill your starter! The water must be purified (bottled water), or non chlorinated water. Filtered tap water works well (this is what I use) but if you don't have a filtration system, you can place a jar of tap water on the counter uncovered, and let it sit at room temperature for 24 hours to allow the chlorine to evaporate out of it.

How to test your homemade sourdough starter.
I have found that the best way to test your sourdough starter is by doing a float test. You simply fill a glass up with water, then drop a little bit of your sourdough starter into it and if it rises to the top and floats, then it's ready. If it hits the bottom and stays put, then it needs a few more days to develop. This is a great trick if you are starting with an immature starter, meaning you have recently started it and are trying to see how active it is.
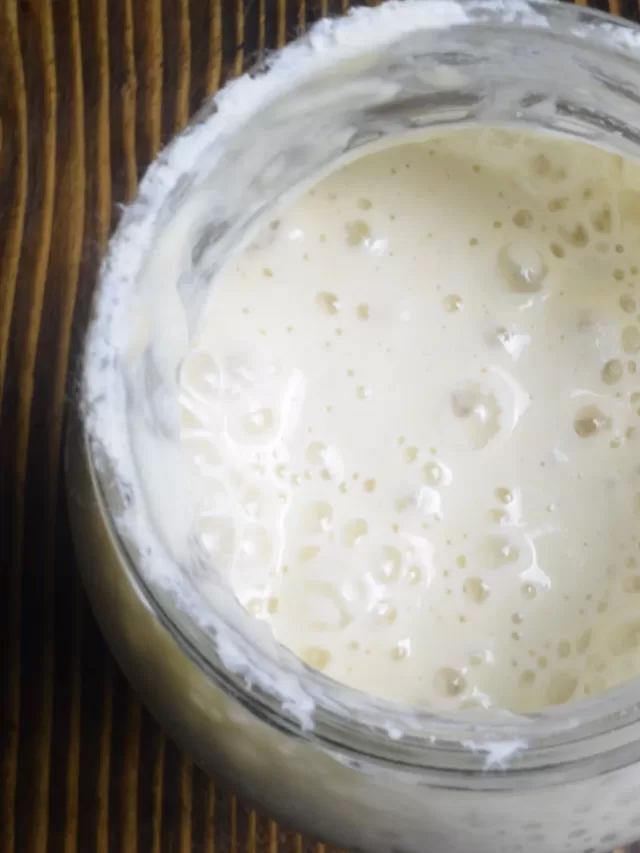
Once your started has become active and floats in the water, you will no longer need to do this test. Once your starter has matured, then just by feeding it, you'll see it double in size and know when it's ready to use. You'll also see large bubbles on the side of the mason jar, and that is a good indication that it is ready to use.
How long before the sourdough starter becomes active?
It should take only about 5 to 7 days to see the little bubbles develop. After this point it should be good to use it in your baked goods. However, in my experience, it takes about 5 to 6 weeks at room temperature and daily feedings to truly develop a mature sourdough starter to be strong enough to give you that good bread rise. But do not let that discourage you! You can use the starter in breads that use a leavening agent like baking powder found in cakes and cookies! You can also use an immature sourdough starter in a bread recipe and use about a ¼ teaspoon of active dry yeast to help give it that beautiful rise. You will still be getting the added benefit of the sourdough starter versus buying the loaf from the store.

Caring for your sourdough starter.
In order to develop your starter properly, you will have to "feed" the starter daily. Feeding means mixing in equal parts flour and water to starter. A 1:1:1 ratio. Which also means, you will be discarding some of the sourdough starter daily, otherwise your dough will build up and spew over your jar. This can be a nightmare! Trust me, I have woken up with it all over my countertop! But, no worries, the discard can be used in any discard recipe. And there are several! We like heating a cast iron pan with butter and spreading the sourdough discard in a circular motion across the pan to make tortillas. So easy and delicious! Just make sure to sprinkle a little salt on it to enhance that flavor.

Once your started is developed well, you will not have feed it as often if it is placed in a cool place. I usually place mine in the fridge, to slow down the fermentation process. I will bring it out and feed it the night before when want to start my sourdough recipe. It is probably good practice to feed your sourdough starter once or every other week, even if you aren't using it. However, I will say that I have gone months without feeding it, and managed to revive it. I just pulled it out of the fridge, skimmed off the top and fed it. So take heart! If this feels daunting, then find comfort in knowing it is pretty resilient once established. And honestly, it hardly takes any time to tend to it once a day.

I also will keep a piece of cloth like a tea towel with a rubber band on it to cover it so nothing can get into it and so that the starter can still breathe. You may not want to cover it in plastic wrap, because remember, the sourdough starter needs to be able to capture the wild yeast from the air. Placing a lid to rest on top, is another good idea, just make sure to not screw it on, because all living things need to breathe!
The spoon and bowl matter!
Yes, hard to believe but it is true! It does matter what type of spoon and bowl or jar you use. The acid and bacteria in sourdough can be corrosive. Using metal bowls and utensils can cause corrosion and pitting in the metal. There is some controversy over this, so I choose to use glass bowls and jars along with a wooden spoon to stay safe. I love my sourdough starter! You will find that your jar will get crusty around the rim while keeping your sourdough starter, just move it to a clean jar periodically or as needed.

Where to place your starter dough starter.
For the most part, my starter lives in a clean jar on top of my countertop by my stove. At the moment, we use it quite often, and because it is winter while I'm writing this blog post, our house tends to be on the cooler side. I need to make sure that it is warm enough to stay active for me. One more thing that I need to mention is that if you have a sourdough starter, it very much matters where you store it most of the time, especially if you have any other different types of ferments fermenting. For example, if you keep your sourdough starter next to your sauerkraut ferment, then this can cause an airborne contamination. All your different types of ferments should be around 4 feet away from each other, to avoid any cross contamination issues.

When our cow, Sassy, first calved (had a calf), we were in an abundance of milk. She was giving us about 4 gallons of milk a day. Since that was an insane amount for one family to drink, I had to learn how to make cheese to help keep our fridge clear, gallon jars take up a lot of space! Not thinking about the cross contamination issues, I placed the cheese that was in my cheese press next to my sourdough starter. Well, you might be able to guess what happened next...my cheese started to rise!!! Looking back, it is pretty funny to think about, but at the time it was devastating. If you have ever have made cheese or just understand the time that goes into it, them I'm sure you can sympathize with me. The good that came out of it was that it fed my chickens, and taught me a valuable lesson that hopefully keeps you from making the same mistake! Keep your ferments separated!
Tips to help your starter:
1. Lifting the wooden spoon in and out as you stir. This can help capture wild yeast!
2. Use warm unchlorinated water (not hot!). I use filtered water heated to about 85 degrees fahrenheit.
3. Use a thin towel such as a tea towel or a cheese cloth, so the starter can breathe.
4. Keep the starter at room temperature or in a warm spot.
5. For best results, discard and feed the sourdough starter every 24 hours until the starter is fully established.
6. You want the sourdough starter to be a pancake consistency, not like biscuit batter. If if seems to be too runny, you can add a little bit more flour.

What you will need to make your starter:
A quart wide mouth mason jar
kitchen scale (optional)
Measuring cups (if not using a scale)
A tea towel, or cheesecloth
Rubber band
Ingredients:
Bag of flour
filtered water

Sourdough Starter Recipe
Day 1
Measure out 1 cup flour and 1 cup water into a quart size clean jar or a large bowl. Stir the flour and water with a wooden spoon until completely combined. Scrape down the sides to keep the dough together. Place a tea towel on top of the jar and a rubber band to keep it in place. Place on your counter at room temperature.
Day 2
After 24 hours, remove a cup of starter and discard it. With the remaining starter in the mason jar add 1 cup of warm water and one cup of flour. Thoroughly combine the mixture. Place the cover back on and allow it to sit at room temperature or a in warm place for 24 more hours.
Day 3 through 7
Repeat day 2 process until you see lots of bubbles! This usually take about a full week.
Use your new sourdough starter on these recipes:
Easy Same Day Sourdough Bread (Beginner’s Recipe)
Easy Sourdough Bread Recipe Without A Dutch Oven
Easy No-Knead Sourdough Bread Recipe for Beginner’s

It is that simple! You now have your first starter and are on your way to making your very own homemade bread! From here on out you can bulk up your starter if you find some discard recipes that require more. Just be sure that you always use equal amounts of flour to water and starter, for a healthy active starter. Or you can keep a minimal amount on hand. Once you get you first loaf out of the oven you can top it with my How To Make Easy Homemade Butter From Raw Milk.
Depending on the season, I will keep my starter on my counter, feeding it every other day, especially when I'm using it more, like during the holidays. During the summer months, I reduce it to a smaller amount and it pretty much just hangs out in the fridge, because we don't tend to bake or eat bread as much during that time. Usually I will pull it out on friday night and feed it so it's ready to go for our delicious pancakes!

How to Make A Sourdough Starter From Scratch
Ingredients
- Bag of flour
- Filtered water
Instructions
- Day 1
- Measure out 1 cup flour and 1 cup water into a quart size clean jar or a large bowl. Stir the flour and water with a wooden spoon until completely combined. Scrape down the sides to keep the dough together. Place a tea towel on top of the jar and a rubber band to keep it in place. Place on your counter at room temperature.
- Day 2
- After 24 hours, remove a cup of starter and discard it. With the remaining starter in the mason jar add 1 cup of warm water and one cup of flour. Thoroughly combine the mixture. Place the cover back on and allow it to sit at room temperature or a in warm place for 24 more hours.
- Day 3 through 7
- Repeat day 2 process until you see lots of bubbles! This usually take about a full week.
- It is that simple! You now have your first starter and are on your way to making your very own homemade bread! From here on you can bulk up your starter if you find some discard recipes that require more. Just be sure that you always use equal amounts of flour to water and starter, for a healthy active starter. Or you can keep a minimal amount on hand. Once you get you first loaf out of the oven you can top it with my How To Make Easy Homemade Butter From Raw Milk.



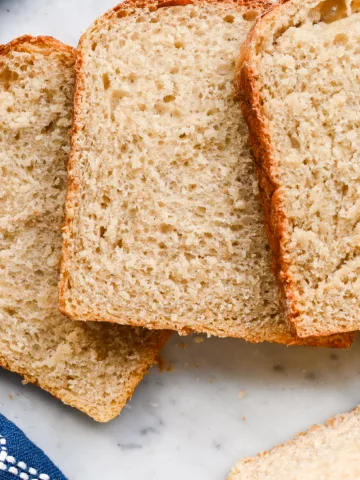
[…] This easy no-knead sourdough bread recipe is so simple to make you’ll honestly wonder why the bread machine was invented in the first place! The crust has an amazing crunch, aah, yes it’s all about the sound! and the center is so soft with a subtle tangy taste. This loaf will have you coming back for seconds, or if you’re like me, thirds! Looking for how to start a sourdough starter? Check out my How to Make A Sourdough Starter From Scratch. […]