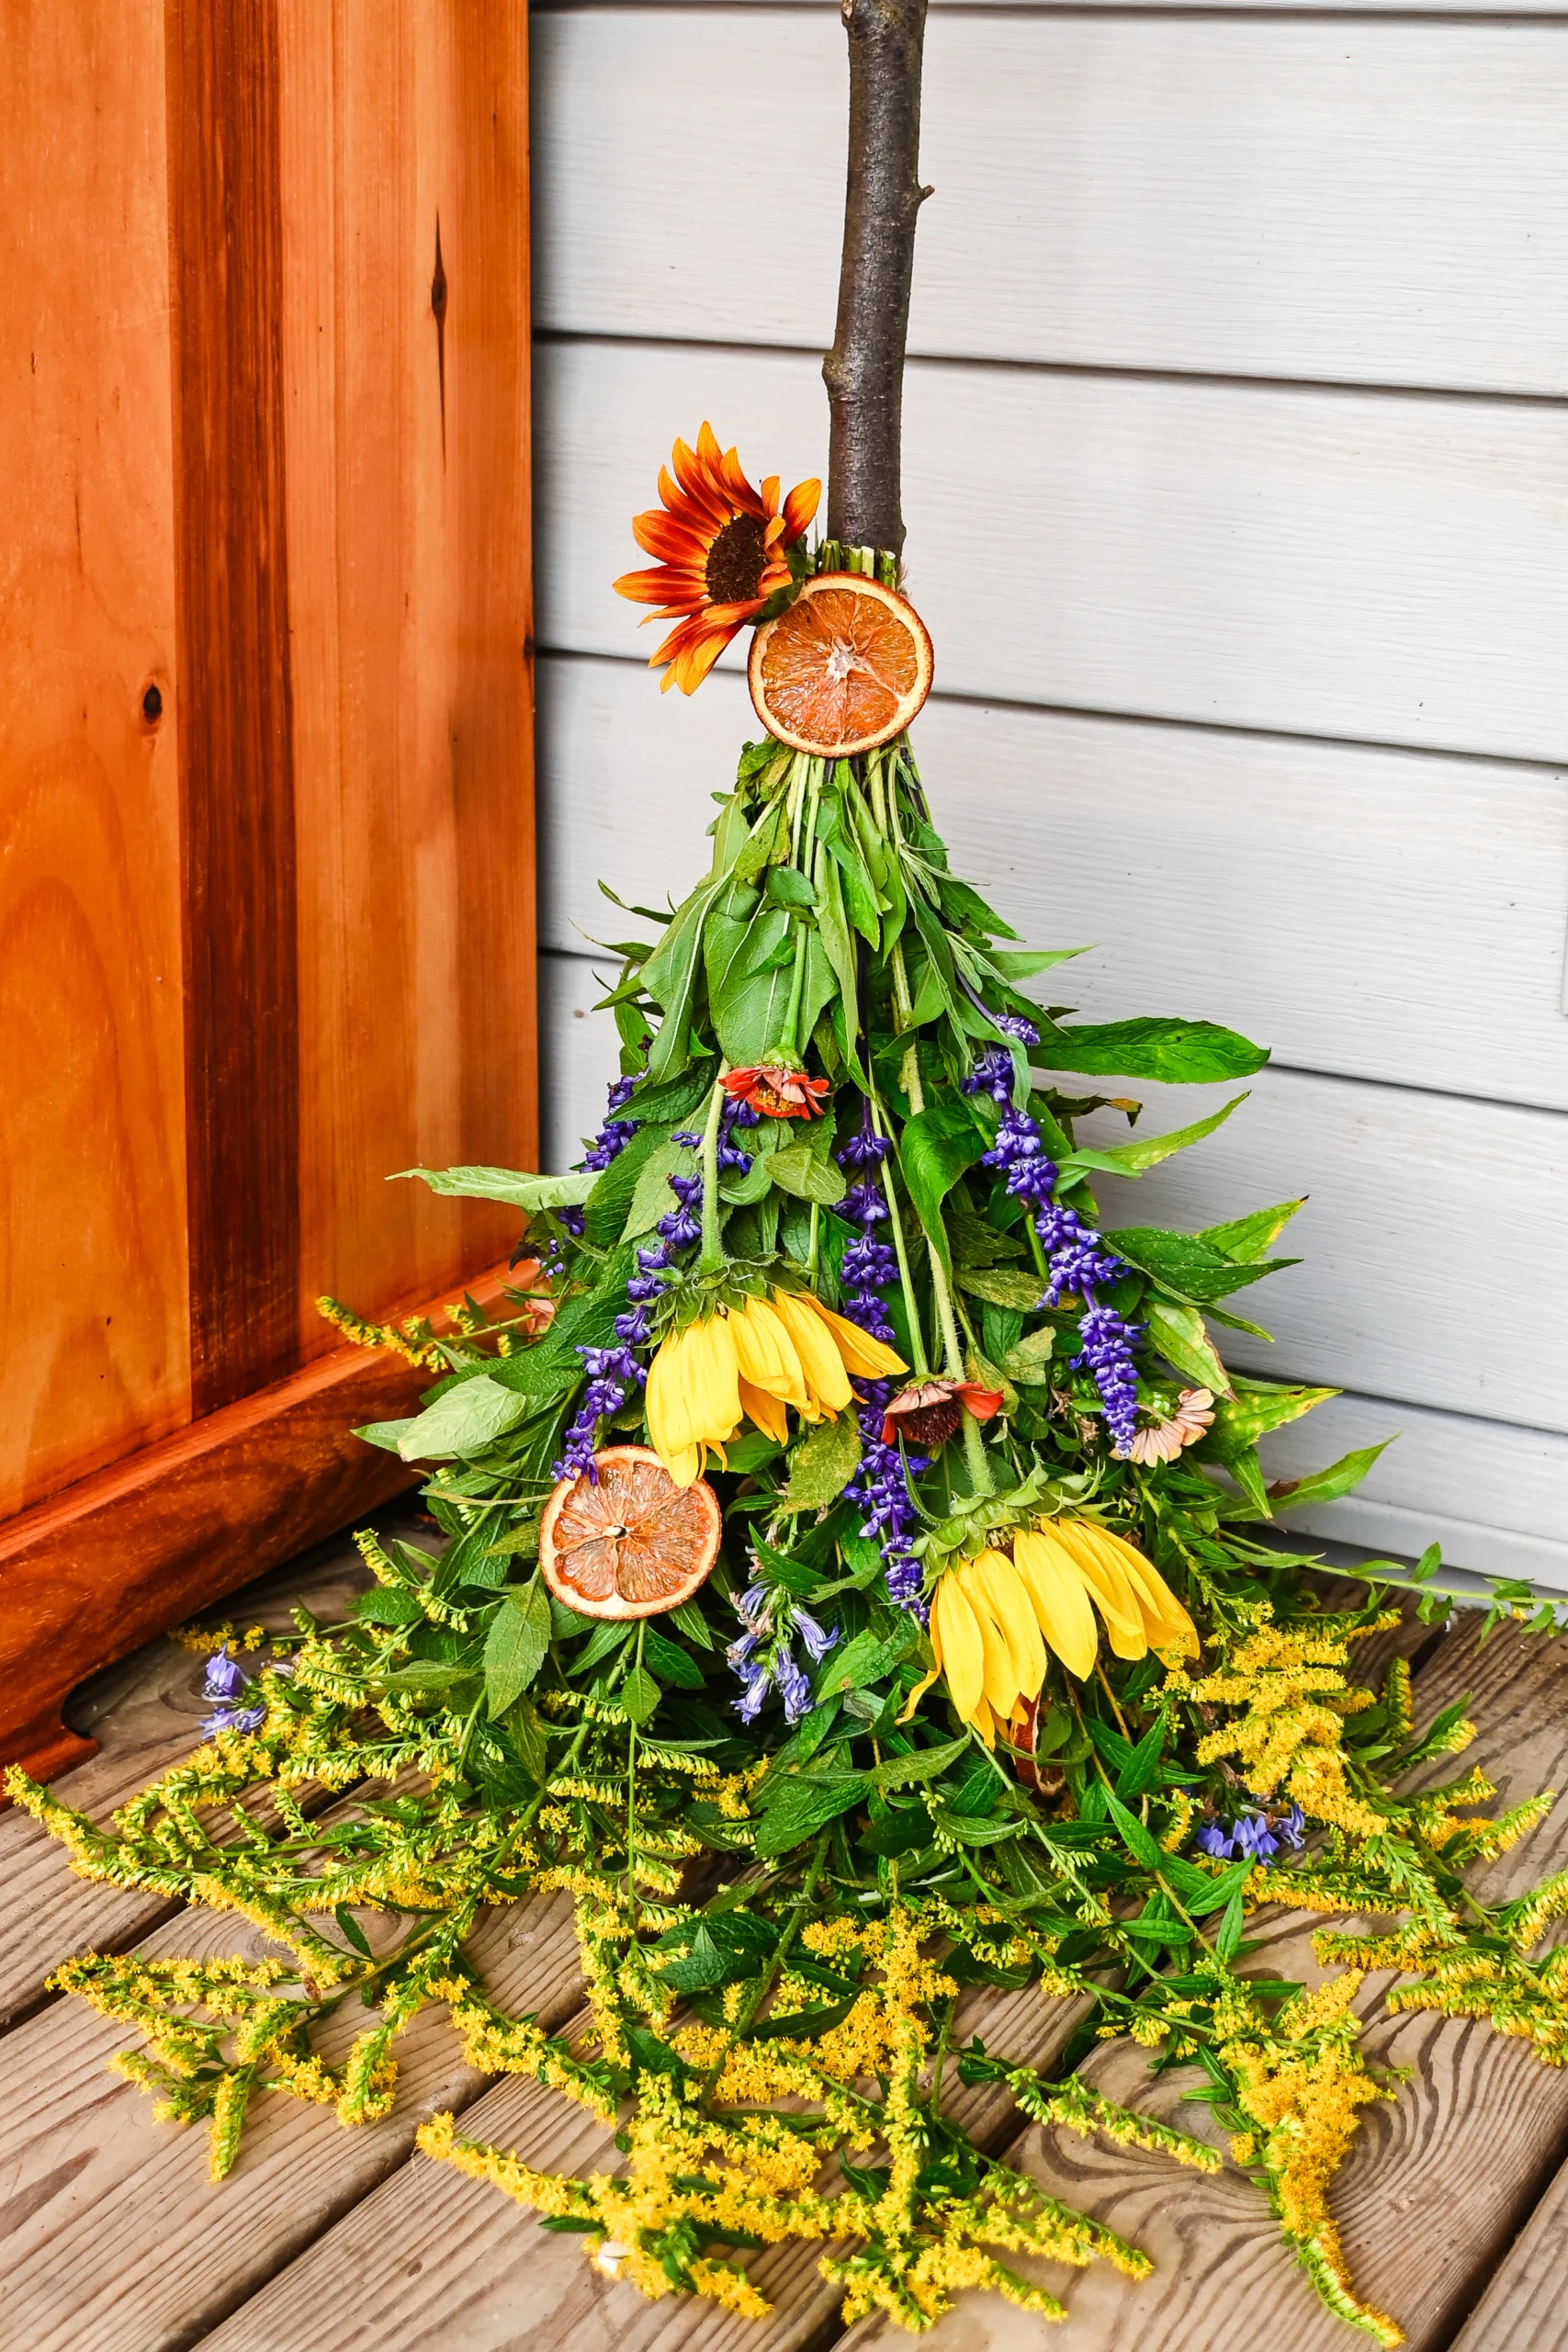
There’s something magical about autumn—the crisp air, the shifting colors, and the way nature seems to scatter treasures everywhere you look. Around Idie’s Farm, I love gathering branches, herbs, and fresh flowers for seasonal projects. One of my favorites this time of year is a rustic fall broom, also called a DIY besom broom.
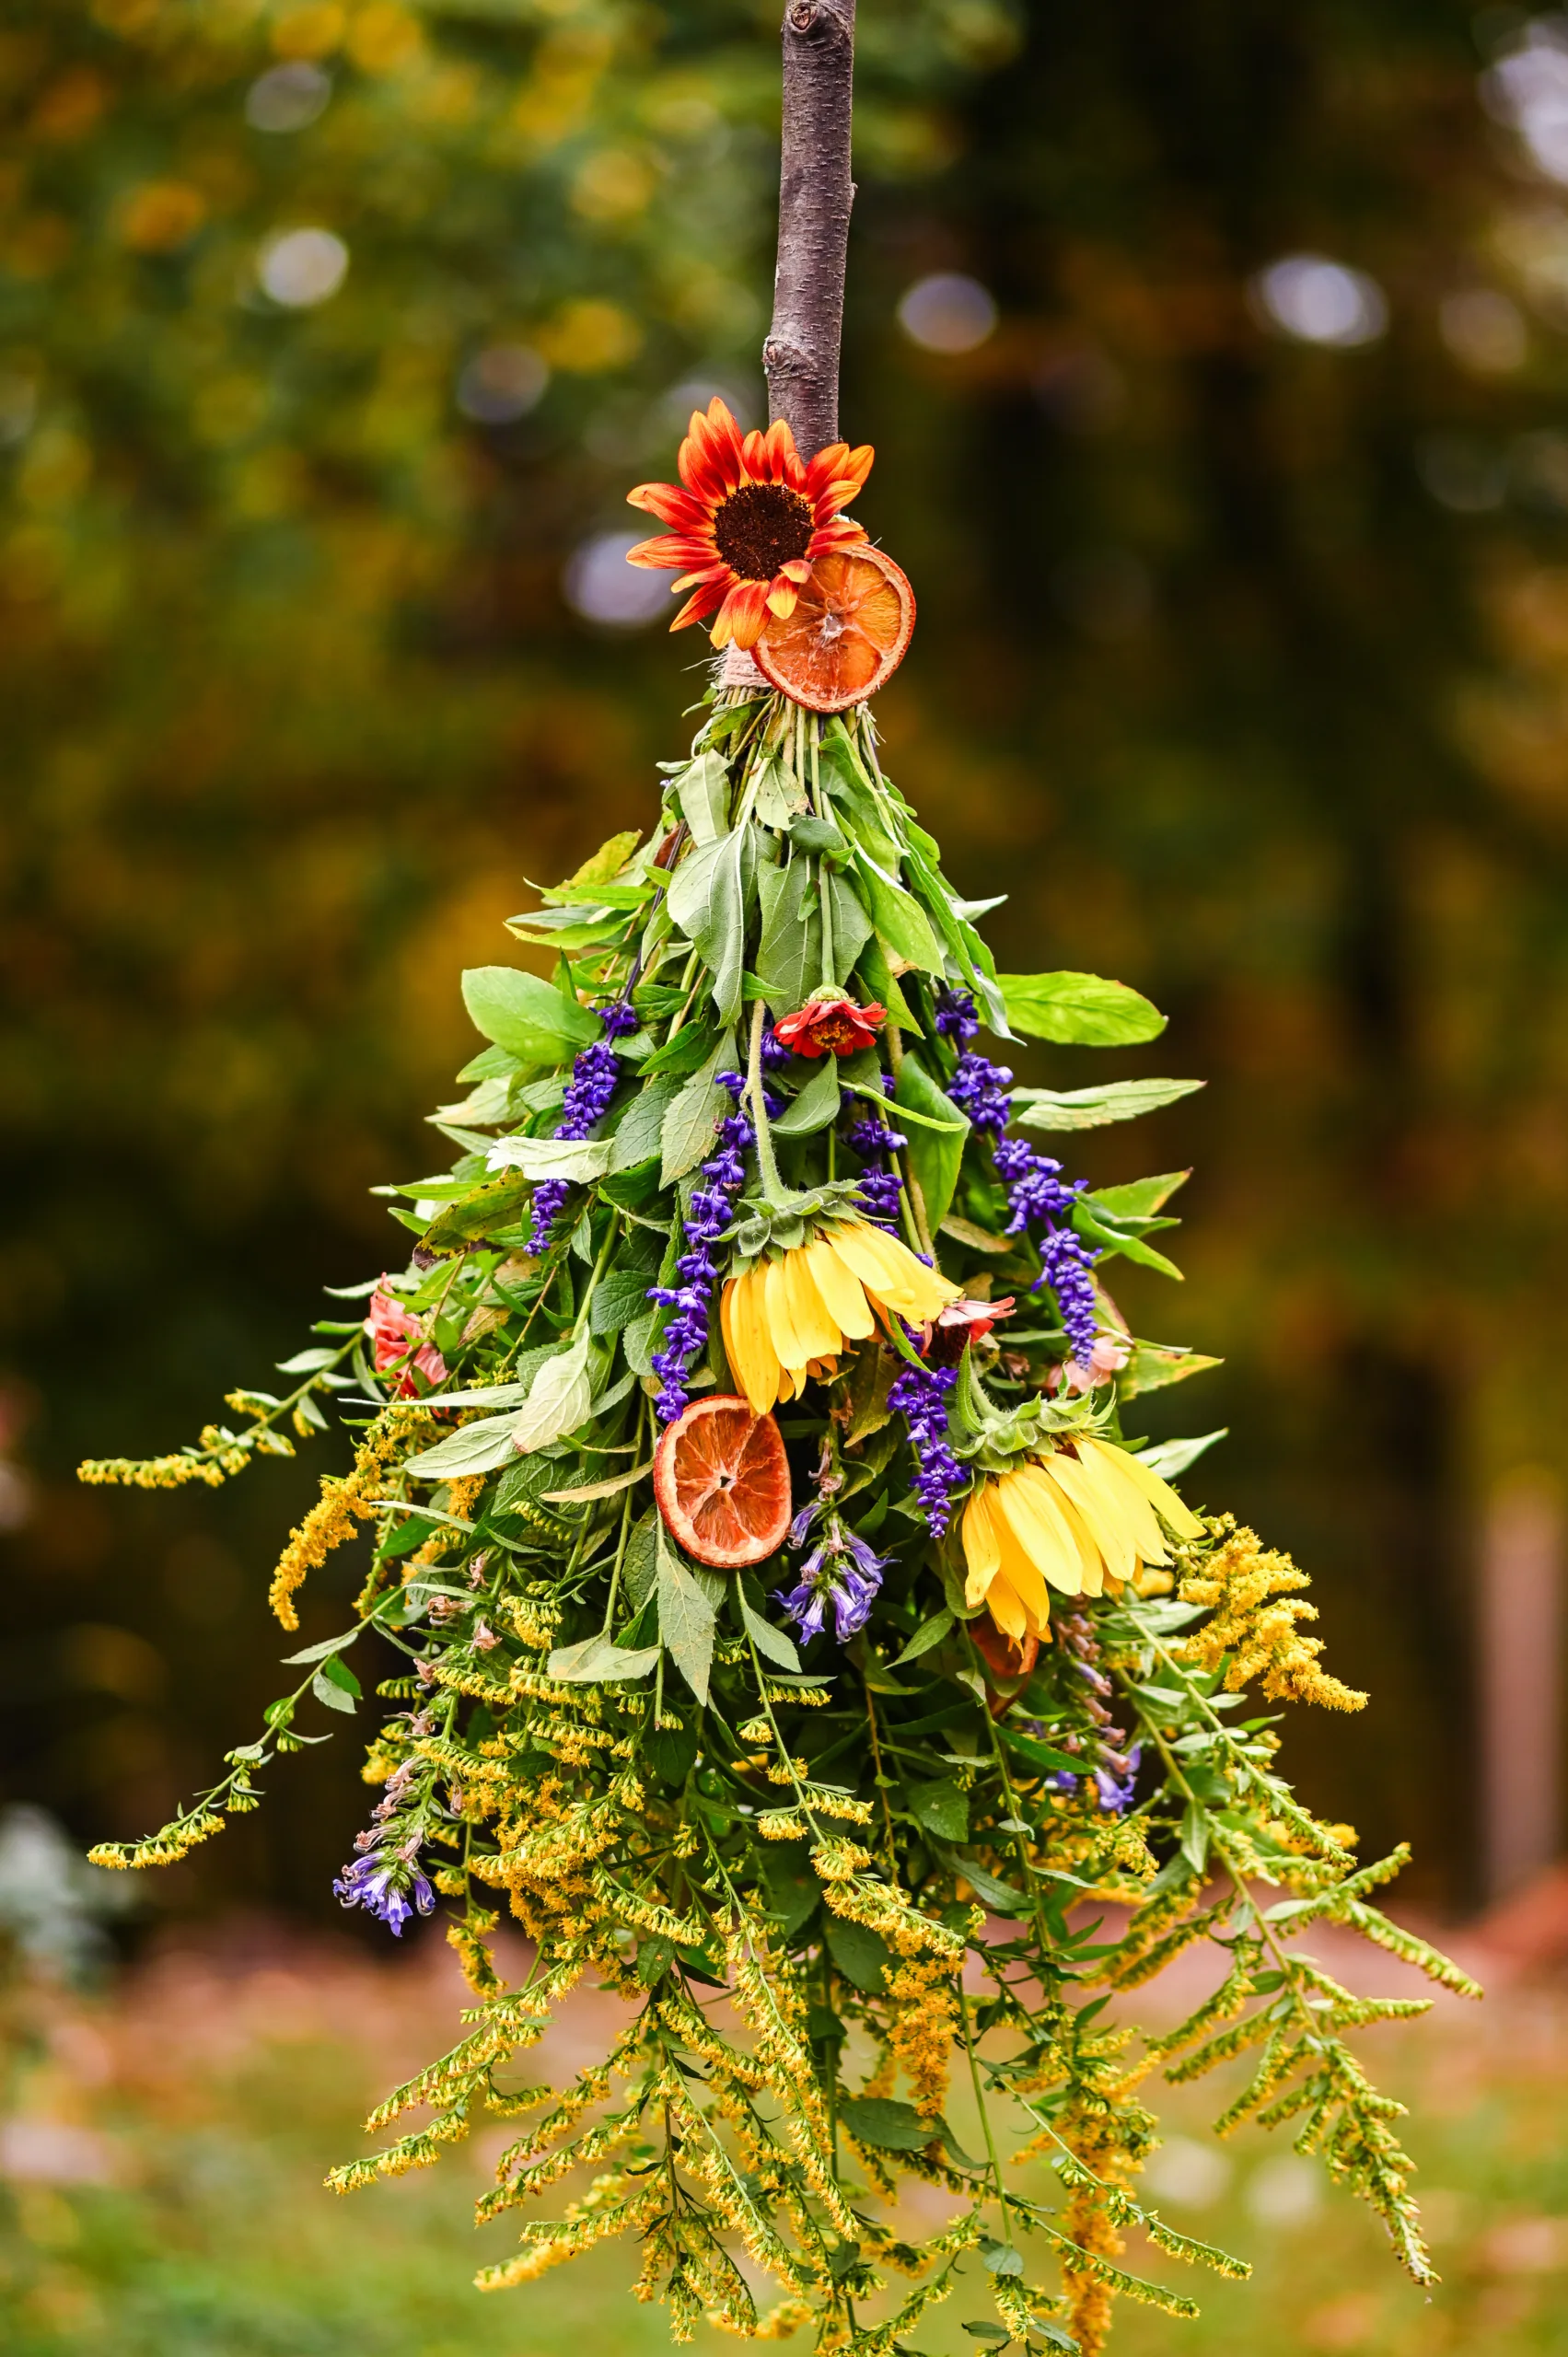
Traditionally, besoms were made from bundled twigs for sweeping. Over time they became linked to folklore, harvest rituals, and even Halloween traditions. Today, they’re just as perfect for fall décor—whether leaning on a porch, tucked next to pumpkins and homemade mason jar candles, paired with cozy throw pillows, or used as a centerpiece for autumn gatherings. With just a few foraged materials, twine, and maybe some homemade dried orange slices, you can make a beautiful, rustic broom that dries naturally and lasts the whole season.
Table of Contents
This post contains affiliate links, which means I make a small commission at no extra cost to you. See my full disclosure here.

Quick Look at This DIY Fall Project
- Project Type: Rustic fall craft / DIY Fall Decor
- Skill Level: Beginner – no special tools needed
- Time Required: 30–45 minutes
- Best For: Fall porch décor, harvest gatherings, rustic indoor accents
- Main Materials: Branch handle, twiggy branches or broomcorn, dried flowers, herbs, natural twine
Materials You’ll Need
- 1 sturdy branch (3–4 feet long) for the handle
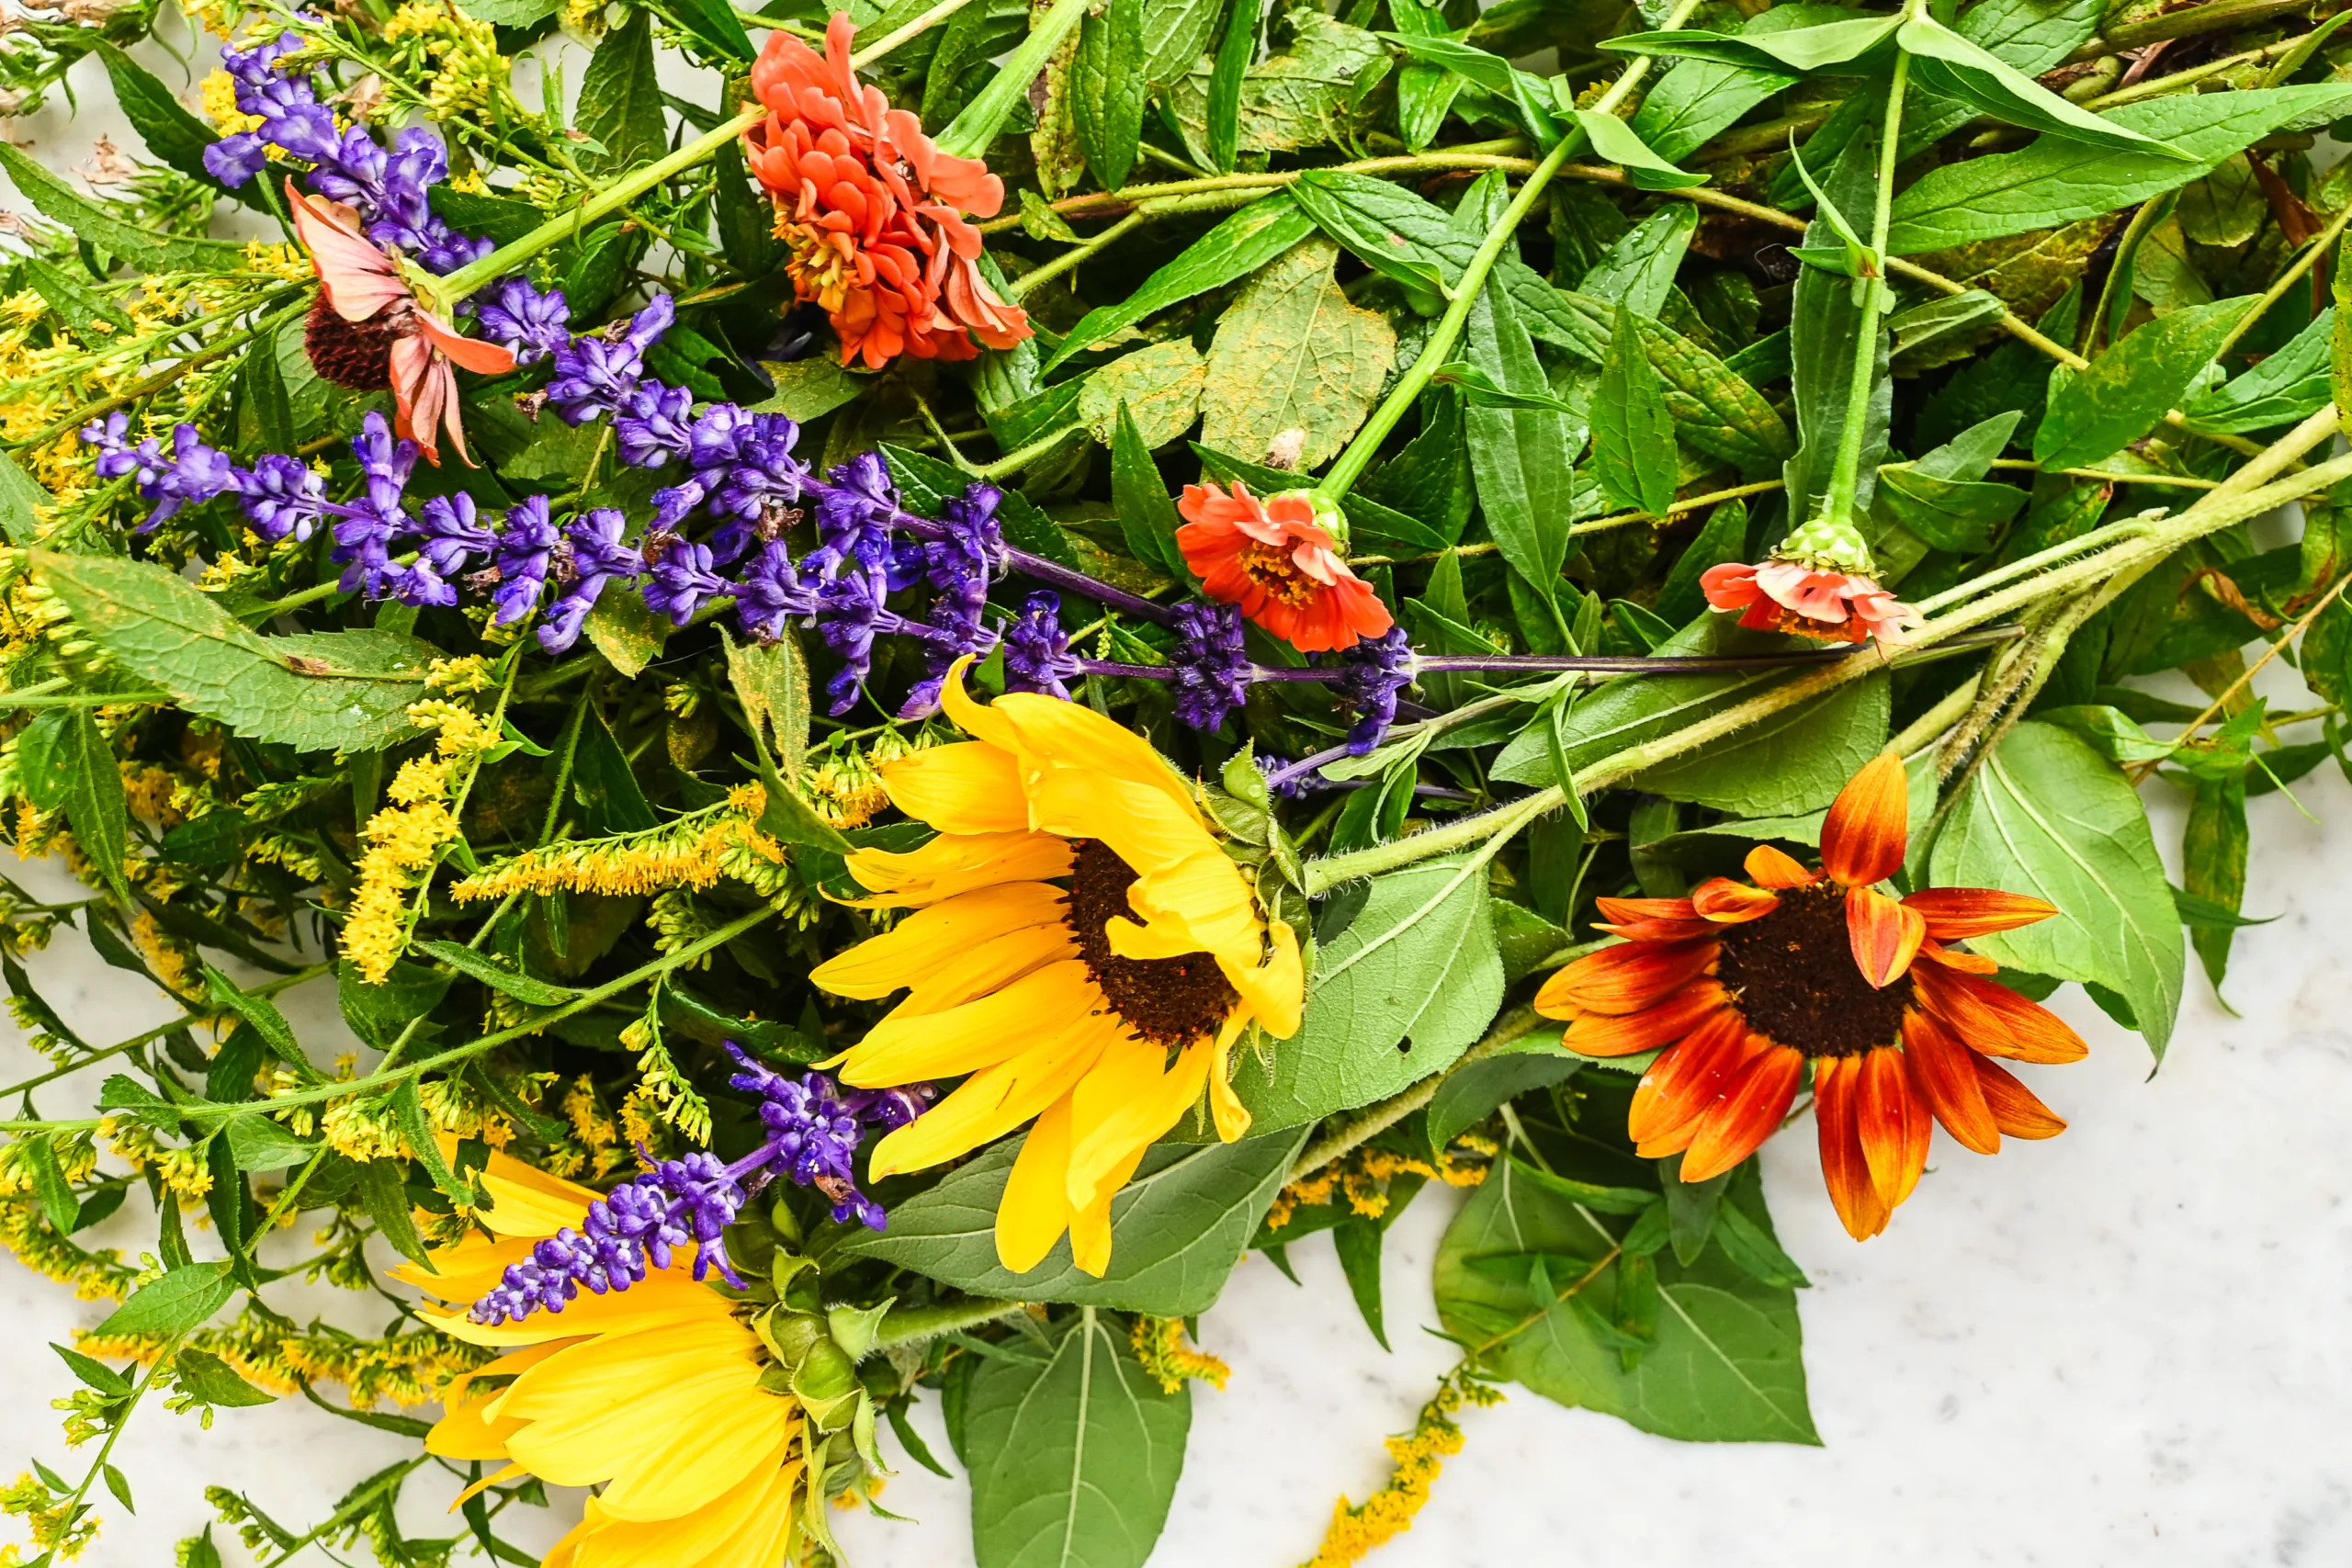
- A bundle of twiggy branches, broomcorn, grapevine, or corn husks for the broom base. (This is optional. I had an abundance of goldenrod, so I chose to use this instead for a more floral look.)
- Foraged flowers & grasses – sunflowers, goldenrod, hay, ornamental grasses, black-eyed Susans. I used zinnas, sunflowers, and salvia from my garden.
- Herbs and aromatics – sage, rosemary, lavender, thyme, or eucalyptus
- Natural twine, raffia, or jute rope
- Optional: cinnamon sticks, dried orange slices, pinecones, acorns, ribbon, (Glue Gun: if adding any of these)
- Optional: garden wire to hang broom on the wall

Foraging & Making It Fresh
One of the joys of this rustic broom craft is that you don’t need to buy anything. Foraging in your yard, garden, or along country paths gives you everything you need. Here’s how to gather and work with fresh stems so your broom looks great and dries beautifully:
- Choose strong stems: Thick sunflower stalks, goldenrod, and tall grasses hold up best.
- Harvest on dry days: Pick when flowers are free of dew to prevent mold.
- Layer thoughtfully: Place large blooms and grasses toward the back, herbs and finer textures toward the front.
- Bind while fresh: Green stems bend more easily and secure tightly.
- Dry in place: Hang the broom upside down in a dry, airy space to let it cure naturally.
- Expect changes: Colors like goldenrod yellow fade to warm tan, while sunflowers darken—adding to the rustic fall charm.
Step-by-Step: How to Make a Rustic Fall Broom
STEP 1: Head outside with clippers and a basket. Collect a sturdy fallen branch for the handle plus twigs, grasses, herbs, and flowers for the sweeping end. Build a full bouquet with your chosen fillers and flowers, arranging them in layers for depth. Keep most of the blooms facing forward and to the sides for the best display. This will also help it to lay flat on the wall, should you choose to hang it. Bundle together twigs, hay, or broomcorn until you have a thick handful.
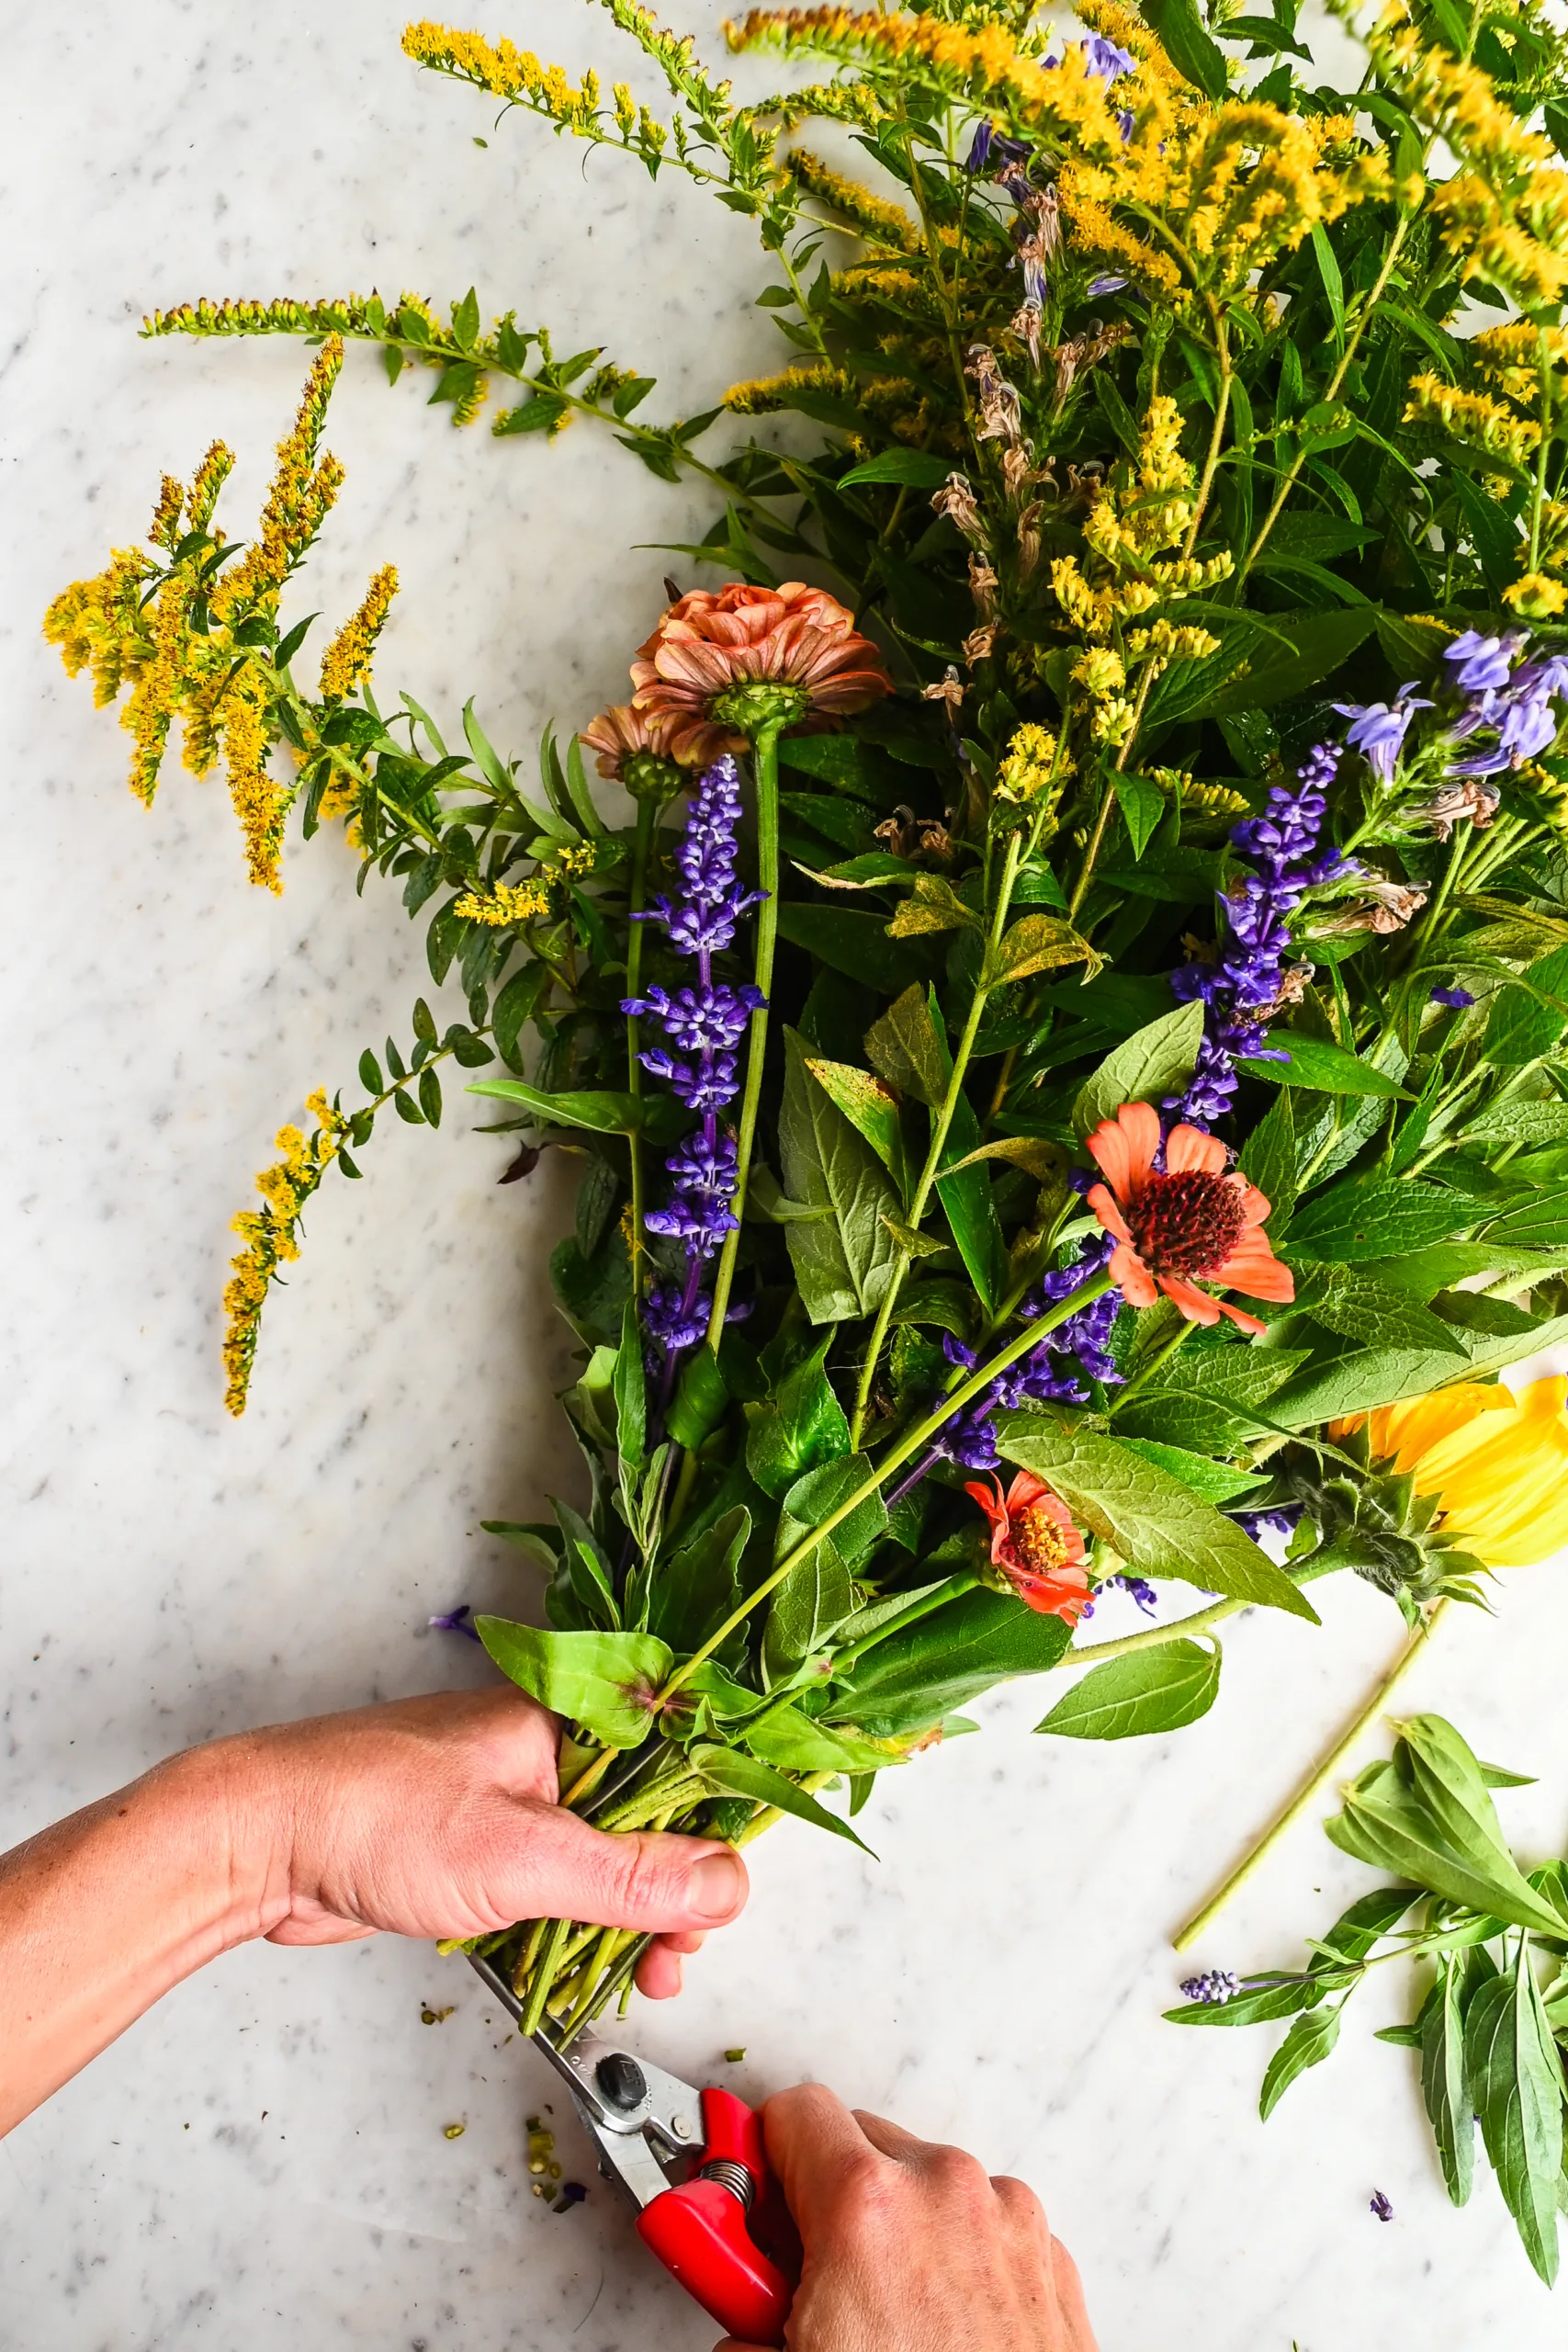
STEP 2: Trim the ends for a neat look.
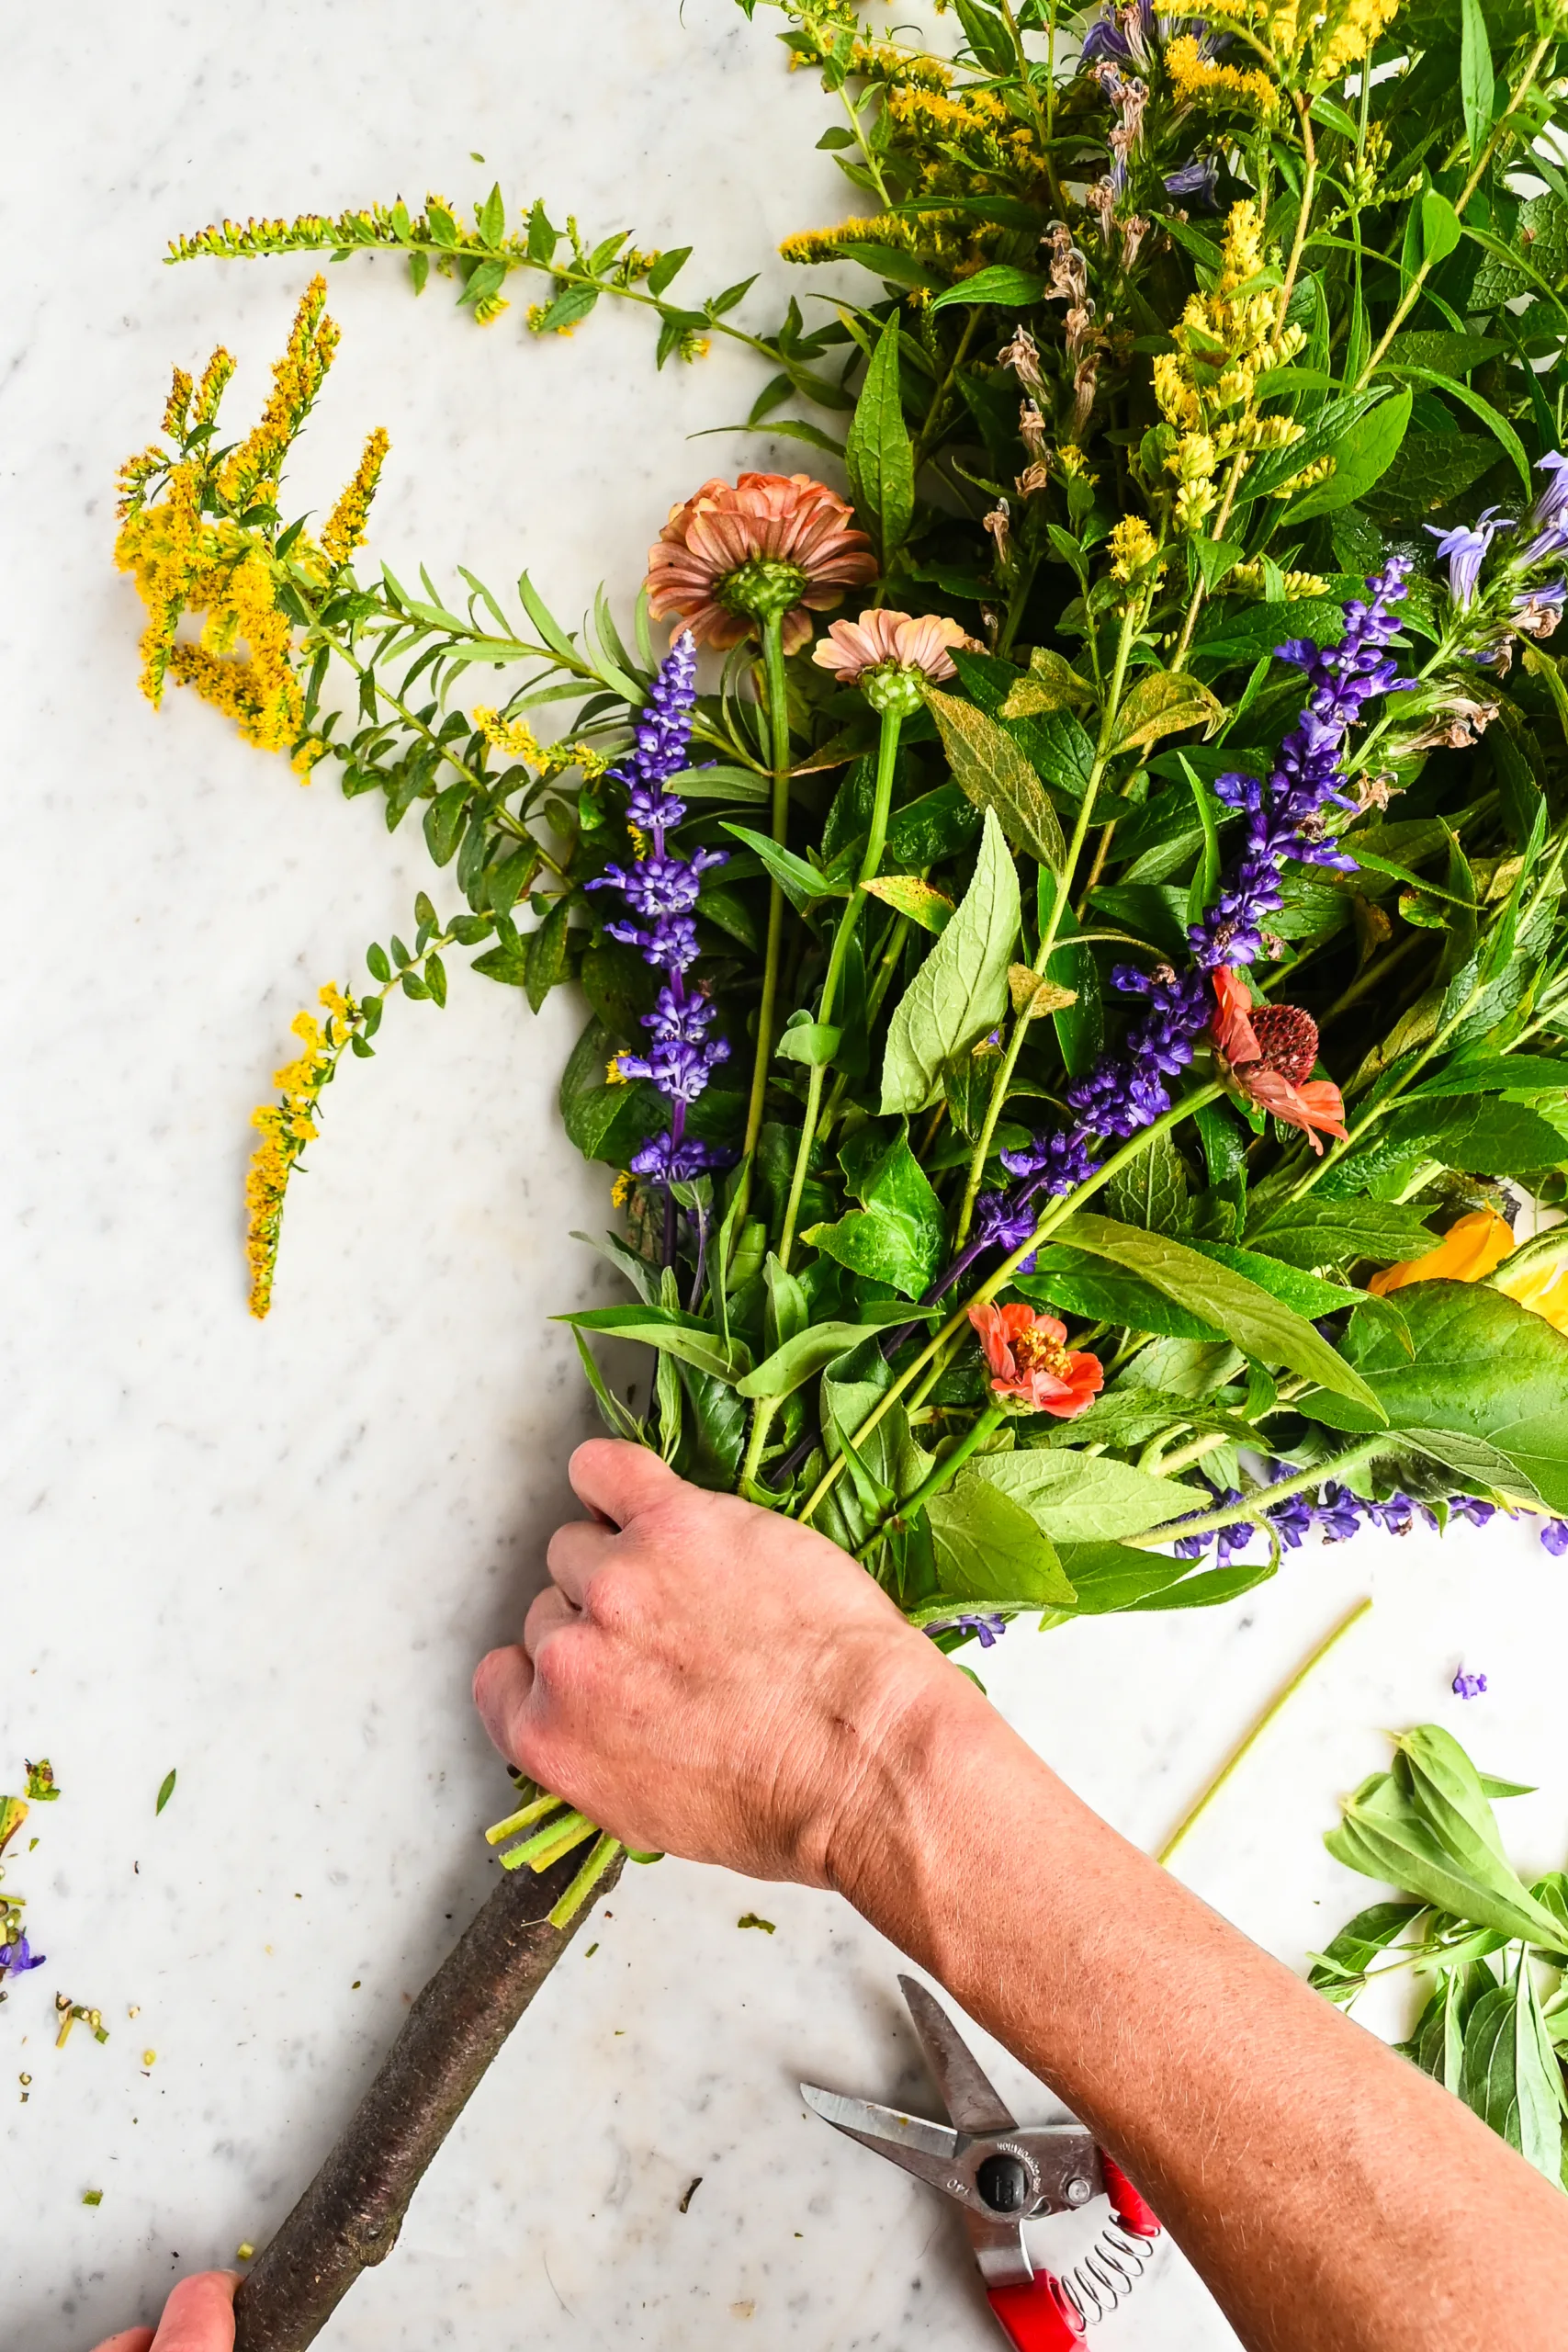
STEP 3: Lay your bouquet on the workspace and gently part the stems to create an opening for the broom handle. Insert about 4 inches (10 cm) of the broom handle into the center of your bundle of stems, tucking it firmly inside the bouquet.
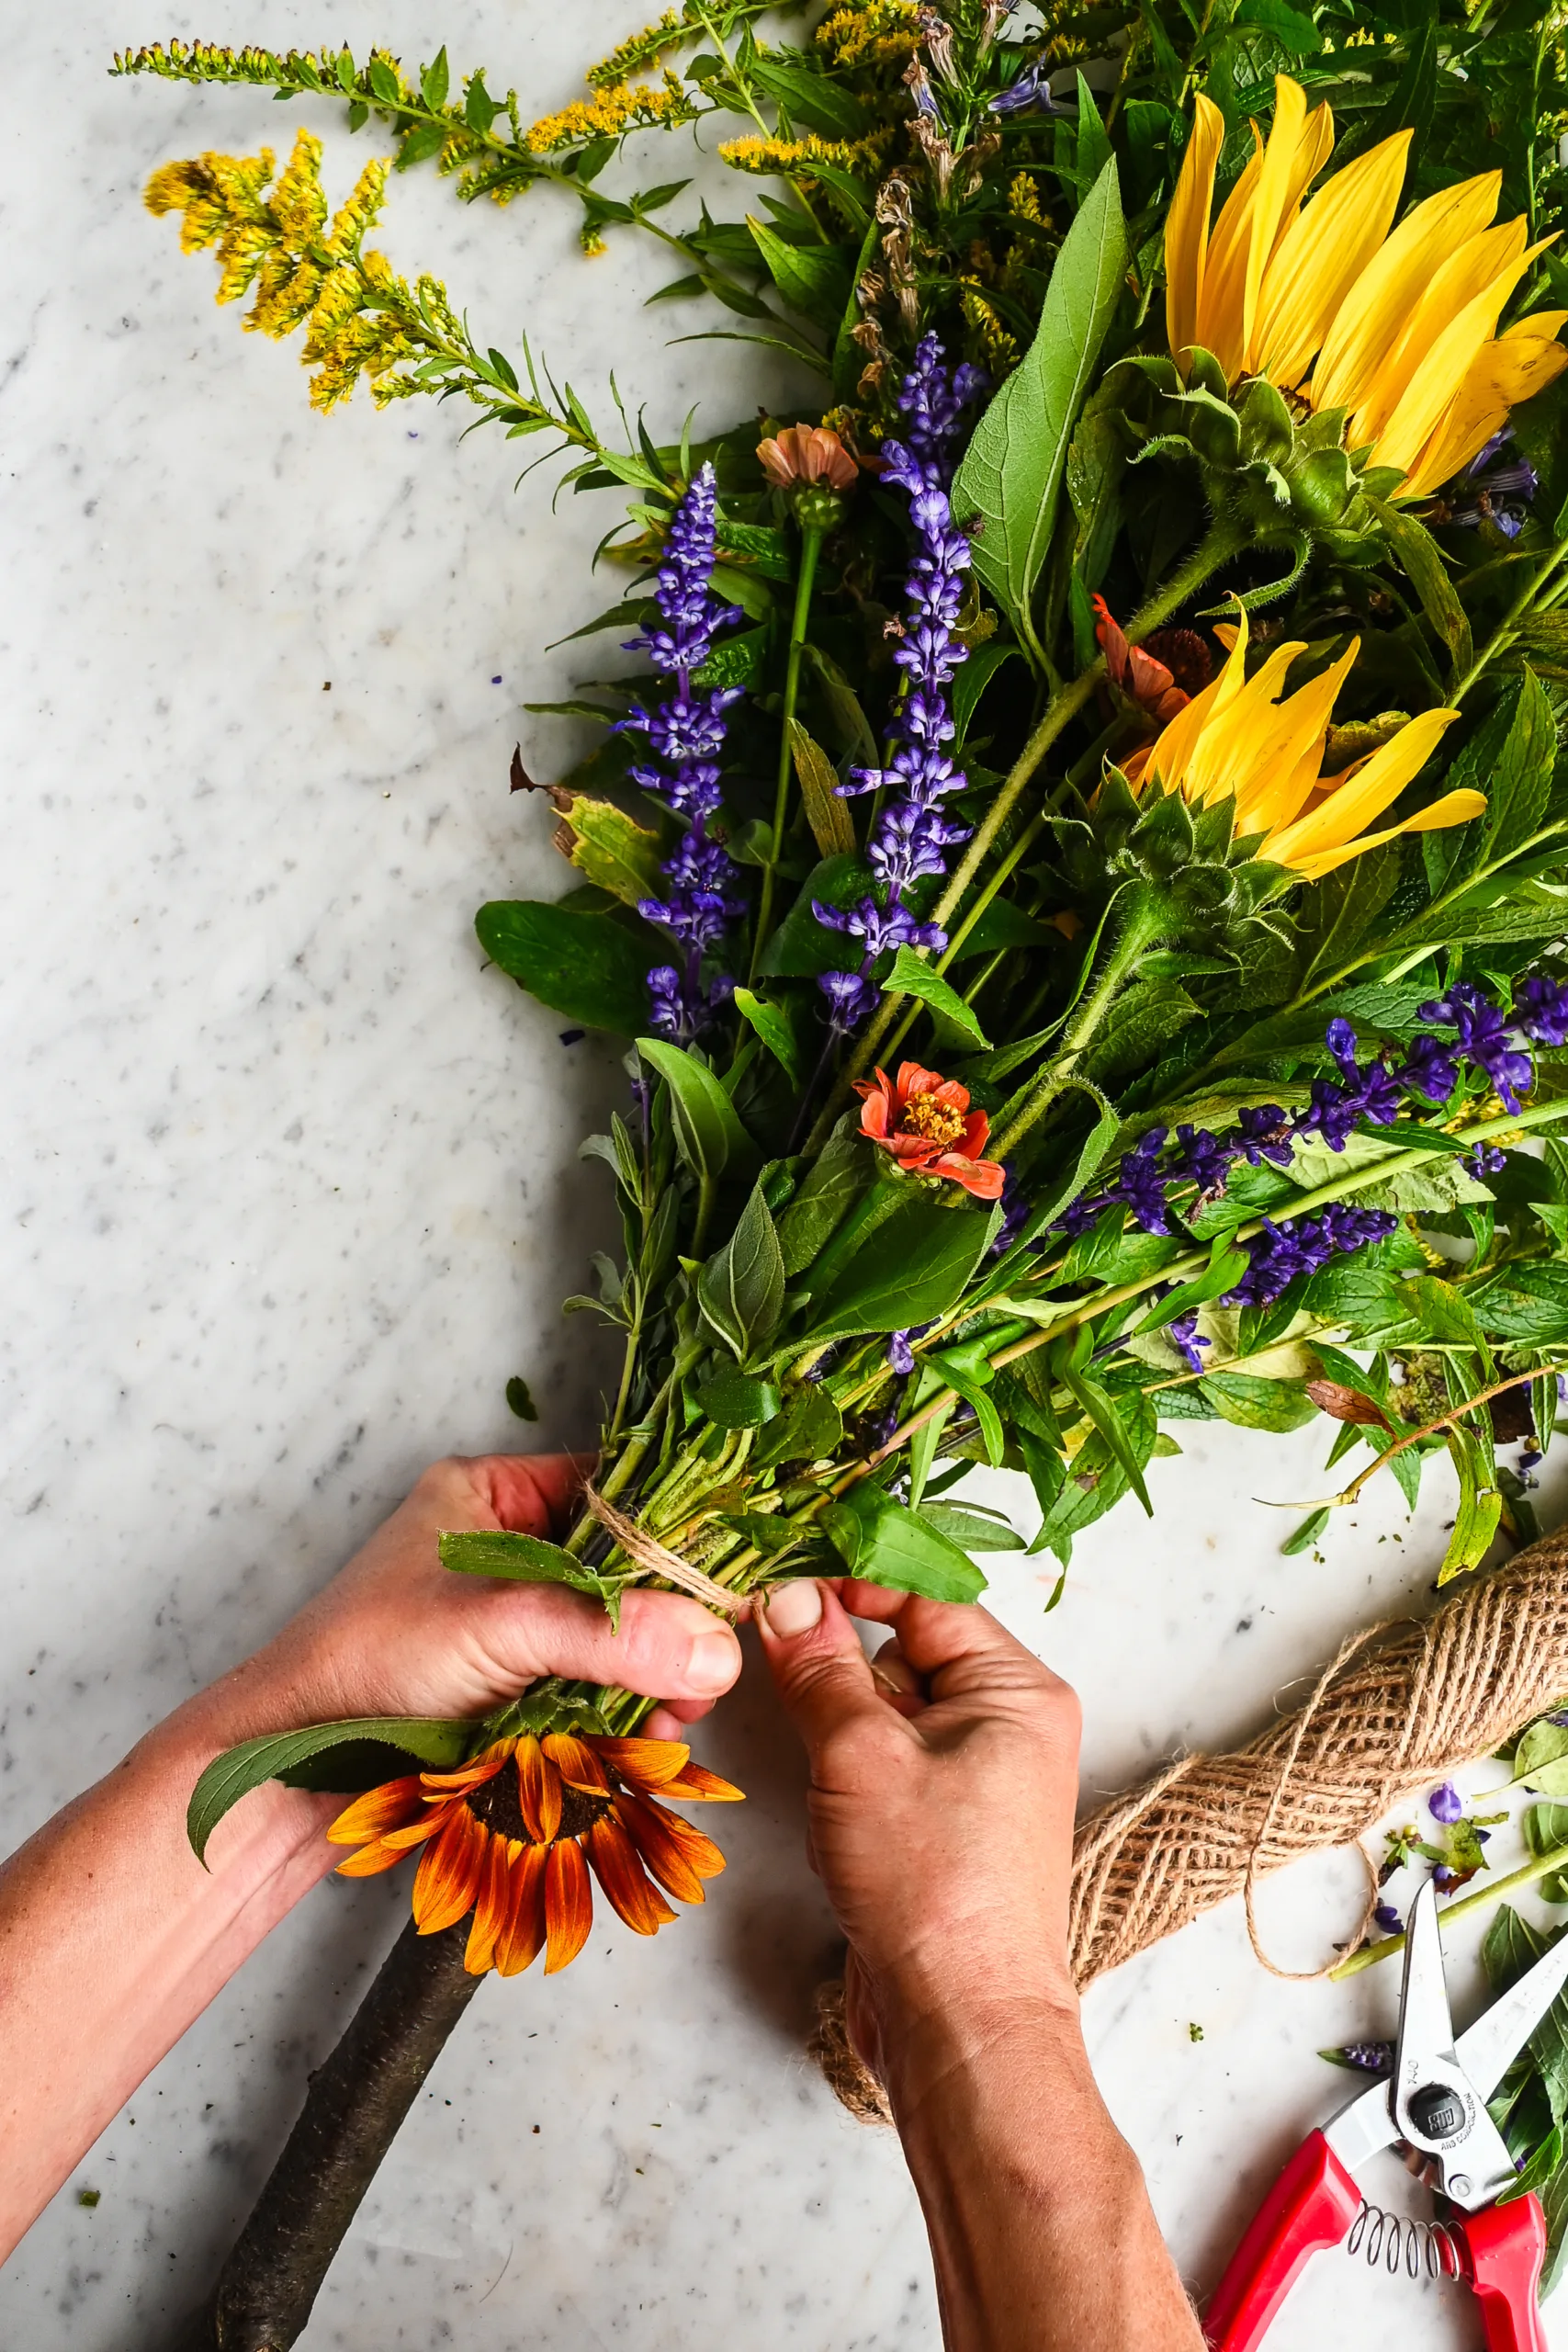
STEP 4: Wrap twine or raffia tightly around the bundle several times. Knot firmly in the back and trim the ends.

STEP 5: Add optional décor like a raffia bow, cinnamon sticks, or dried orange slices.

STEP 6: Secure a piece of gardening wire around the top of your broom handle. Twist the wire tightly so it won’t slip, then form the excess into a loop. This creates a sturdy hanger so your broom can be easily displayed on a wall or door.
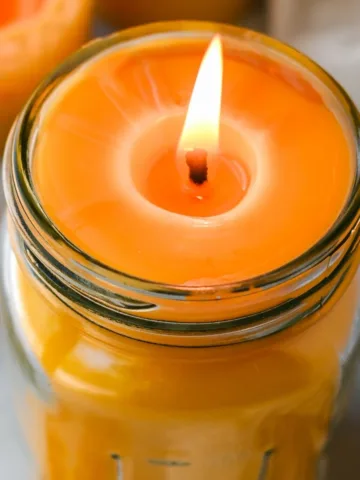
STEP 7: Display next to a basket of faux pumpkins, a stack of cozy throw pillows, or even alongside Homemade Mason Jars Candles for a complete rustic fall vignette.
Tips for the Best DIY Fall Besom
- Use fresh materials: They bend easier and dry right onto the broom.
- Mix sizes: Thick stems give structure, fine grasses add texture.
- Allow airflow: Dry in a ventilated spot to prevent mold.
- Swap with the season: Replace fading flowers with fresh foraged finds.
Why You’ll Love Making a Fall Broom
This project costs almost nothing if you forage materials. It connects you to the rhythm of the season, brings a rustic, old-world charm into your home, and gives you décor that feels deeply tied to harvest traditions.
Much like making a batch of Homemade Soft Caramels or baking Raspberry Thumbprint Cookies, this fall craft is simple, satisfying, and filled with seasonal spirit.
Frequently Asked Questions
Do I need dried flowers?
No—you can start with fresh sunflowers, goldenrod, hay, or herbs and let them dry naturally on the broom. Colors will mellow as they dry.
What kind of twigs work best?
Flexible branches like willow, maple, or birch are ideal, but any small sturdy twigs will do.
How long will it last?
Outdoors, your broom should last the whole fall if protected from heavy rain. Indoors, it can last much longer.
Can I actually sweep with it?
Yes! If you build it strong with sturdy twigs or broomcorn, it works as a light-use broom for porches and walkways.
Can I make a Halloween version?
Absolutely—add black ribbon, dried dark grasses, or keep it rustic for a harvest look. It can double as a “witch’s broom” for October.


Tried this recipe?
I would love to see it! Tag me on Instagram @idiesfarm and #idiesfarm so I can share your beautiful creation!
DIY Rustic Fall Broom Decor (Made with Fresh or Dried Flowers)
Equipment
- 1 sturdy branch (3–4 feet long) for the handle
- A bundle of twiggy branches, broomcorn, grapevine, or corn husks for the broom base
- Foraged flowers & grasses – sunflowers, goldenrod, hay, ornamental grasses, black-eyed Susans
- Herbs and aromatics – sage, rosemary, lavender, thyme, or eucalyptus
- Natural twine, raffia, or jute rope
- Optional: cinnamon sticks, dried orange slices, pinecones, acorns, ribbon (Glue Gun: if adding any of these)
- Optional: garden wire to hang broom on the wall
Instructions
- Head outside with clippers and a basket. Collect a sturdy fallen branch for the handle plus twigs, grasses, herbs, and flowers for the sweeping end. Build a full bouquet with your chosen fillers and flowers, arranging them in layers for depth. Keep most of the blooms facing forward and to the sides for the best display. This will also help it to lay flat on the wall, should you choose to hang it. Bundle together twigs, hay, or broomcorn until you have a thick handful.
- Trim the ends for a neat look.
- Lay your bouquet on the workspace and gently part the stems to create an opening for the broom handle. Insert about 4 inches (10 cm) of the broom handle into the center of your bundle of stems, tucking it firmly inside the bouquet.
- Wrap twine or raffia tightly around the bundle several times. Knot firmly in the back and trim the ends.
- Add optional décor like a raffia bow, cinnamon sticks, or dried orange slices.
- Secure a piece of gardening wire around the top of your broom handle. Twist the wire tightly so it won’t slip, then form the excess into a loop. This creates a sturdy hanger so your broom can be easily displayed on a wall or door.
- Display next to a basket of faux pumpkins, a stack of cozy throw pillows, or even alongside Homemade Mason Jars Candles for a complete rustic fall vignette.
Notes
- Use fresh materials: They bend easier and dry right onto the broom.
- Mix sizes: Thick stems give structure, fine grasses add texture.
- Allow airflow: Dry in a ventilated spot to prevent mold.
- Swap with the season: Replace fading flowers with fresh foraged finds.